Showing posts with label myog. Show all posts

Friday, April 26, 2024

Tensioning Guy Lines

One thing that I read about in the late 1950s has stuck with me. I don't see it used or even talked about, which is surprising. It's immensely useful for backpacking.

What I read about was how to moor a boat using a real rope and a piece of rubber rope.

Rubber rope is a thing I've never seen, but it's the idea that counts. The same idea in the world of backpacking shelters works out to be what's called "shock cord", which is just an elastic core wrapped in fabric.

You tie some of this into the middle of a guyline for a tent, or a tarp, or a hammock tarp, and leave a little slack in the real guy line, and this lets the tent or tarp move a little, give a little in the wind, like a flexible tree bending a little, but not snapping off.

The thing is, it's hard to fasten a length of plain shock cord so it stays tied. All knots in the stuff eventually work loose.

Well, you can run this stuff through a little soft metal tube and then crimp the tube, but where do you get super lightweight metal tubing about 1/8" in diameter, in like 1" segments? (3mm by 25mm) There are things like this made for exactly this purpose, but you don't see them just sitting around in every store, and it's baffling what a guy could use as a substitute, so I've been stumped.

Yeah, so today while buying groceries and letting myself be open for ideas about whatever, and also to kill time, I blithely wandered through the women's doodad section at the supermarket and had a nice bingo moment.

Goody. Goody Ouchless Hair Elastics and Goody Ponytail Holders. Yep. Them's things, and they were there. Just about what I wanted, and all ready-made. Cheap too.

Goody.com doesn't have details. You have to follow the links from there to Walmart or Target and check them, and that's where I stole the images you see here. Too good not to steal.

I made a dumb graphic (right below) showing how to use elastic with guylines and it shows way too much slack, but I'm not going to do it over, so use your imagination. And what looks like a knot on each side should be in red. Or something. The graphic should be clearer, but I'm not a pro, hey. (Another D'Oh! moment, brought to you by me.) But it's the idea that counts, and this is one idea that is really fine. Think about it. I believe you've even caught on already. The elastic stretches just so far under heavy stress, and then the actual guyline takes over. Brilliant, as they say.

Guy line tensioner.

Guy line with elastic tensioner, showing way too much slack.

Goody elastic hair products.

Ouchless hair elastics.

Goody elastic hair products.

Ouchless hair elastics showing thickness.

Goody elastic hair products.

Ponytail holders.

Goody elastic hair products.

One ponytail holder, showing "welded" ends — no knots, no crimping, etc. Woot!

Updated tensioner graphic

Updated tensioner graphic. More schematic but possibly no clearer. At least I tried, eh?


Have anything worth adding? Then try sosayseff@nullabigmail.com
Me? Still trying after all these years.


Etc...

so says eff: sporadic spurts of grade eff distraction
definitions: outdoor terms
fiyh: dave's little guide to ultralight backpacking stoves
boyb: dave's little guide to backpacks
snorpy bits: nibbling away at your sanity
last seen receding: missives from a certain mobile homer
noseyjoe: purposefully poking my proboscis into technicals

Wednesday, December 12, 2018

What Karen Started

What does a Frenchman find when he goes snooping the internet?


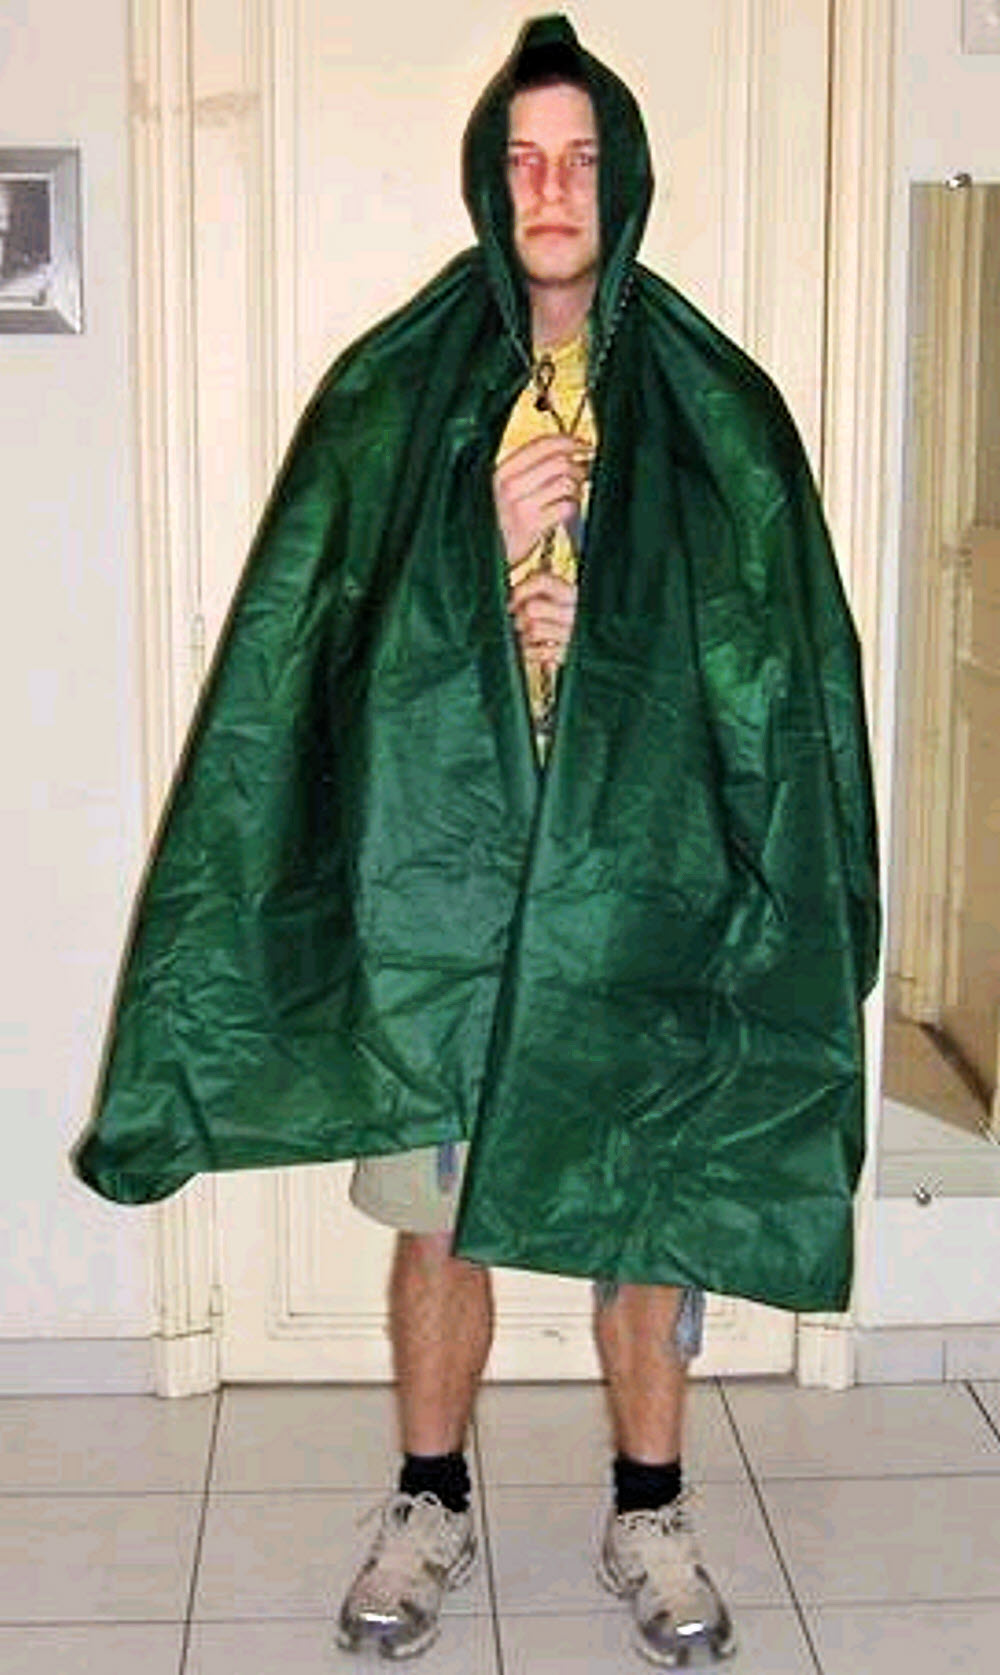
The following is an edited discussion around the work of Pierre Dumay, from www.randonner-leger.org. The original, in French, is at L'Atelier des Bricoleurs [Vêtements] le P.A.P (Peyo Abri Poncho).

If you want an English translation of the full thread, try The Handyman Workshop [Clothes] P.A.P (Peyo Abri Poncho).

I'm posting this because

  • I like it.
  • It's old, in internet years, and could vanish completely at any moment.
  • It's clever — shows good thinking.
  • I can't get it out of my head.
  • I want to make a cloak like this and extend it to a full shelter system.
  • And, let's not forget Scary Karen. (I definitely like her spirit.)

Most of the content here belongs to others, but let's consider this an act of preservation. The quality of the images is bad enough now — guess how hard they'll be to deal with when they're gone entirely.

So let's go then, let's learn about the P.A.P., the Peyo Abri Poncho (or, in English, the Peyo Shelter Poncho / Peyo Poncho Shelter), starting with Pierre "Peyo" Dumay's first comment.

Peyo 11-01-2006 23:42:46

As you may know, I just finished sewing a tarp. Its dimensions are 160X260 and weighs 200 grs (silnylon) [Measurements: 160x260 cm = 63x102" = 5'3"x8'6". Weight: 200g = 7.1 oz. ]

A tarp is good but to gain weight should think of multiple use for the same article.

In this respect the poncho is a beautiful invention because it serves as rain gear, sursac (back) and tarp for the bivouac. [Sursac is literally an "outer bag", or maybe a "bag cover" or "splash bivy", or just "bivy sack", in this case a waterproof one.]

I have long had poncho-tarp views at Backpackinglight.com. In silnylon they offer everything I just mentioned.

But besides the price that hurts, these poncho-tarp have the huge disadvantage in my eyes to have a hole (well yes the hood) in their middle when they pose tarp.

It's obvious...

Certainly a hood can close effectively by twisting its cord around. The hole is no longer a problem therefore (or when setting the tension tarp anyway).

I was ready to take the plunge, grab my scissors and make a nice circular hole in my new tarp.

Yes but here ... I had to solve a preliminary technical problem: how to sew cleanly and efficiently a hood while at its base it was circular?

I started to sew (with machine) for a little less than a year and that I still do not know how to do it.

Then there was the problem of the size and the resistance of the hood.

Finally, the sewing and of course the application of a silicone coating on the seam had to be superbly done to avoid that I find myself in a big puddle during my bivouacs in the rain.

So many pitfalls that made me look for an alternative solution (and just as much, if not lighter).

I had thought of fixing the tarp on my skull with various methods, but none were effective.

I found a good track with a thread on the Backpackinglight.com Forum.

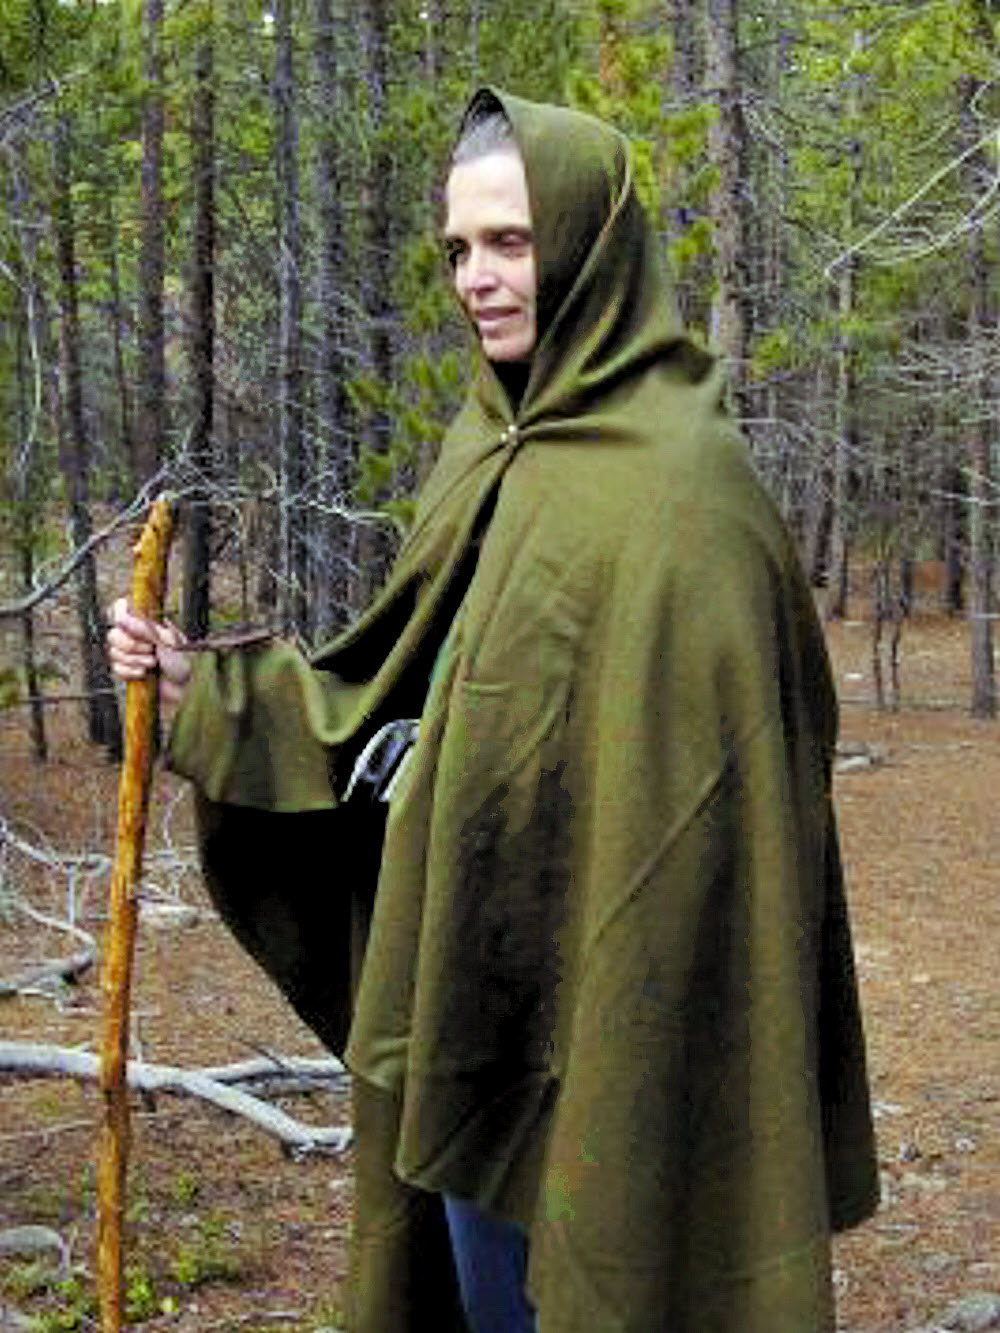
And especially on this page. (Even if the lady scares me. wink)

So here I am tonight doing tests.

The tutorial of the second site did not suit me but it allowed me to follow my own way that I will deliver you in image and that I will make mine for my future hike.

Step 1:

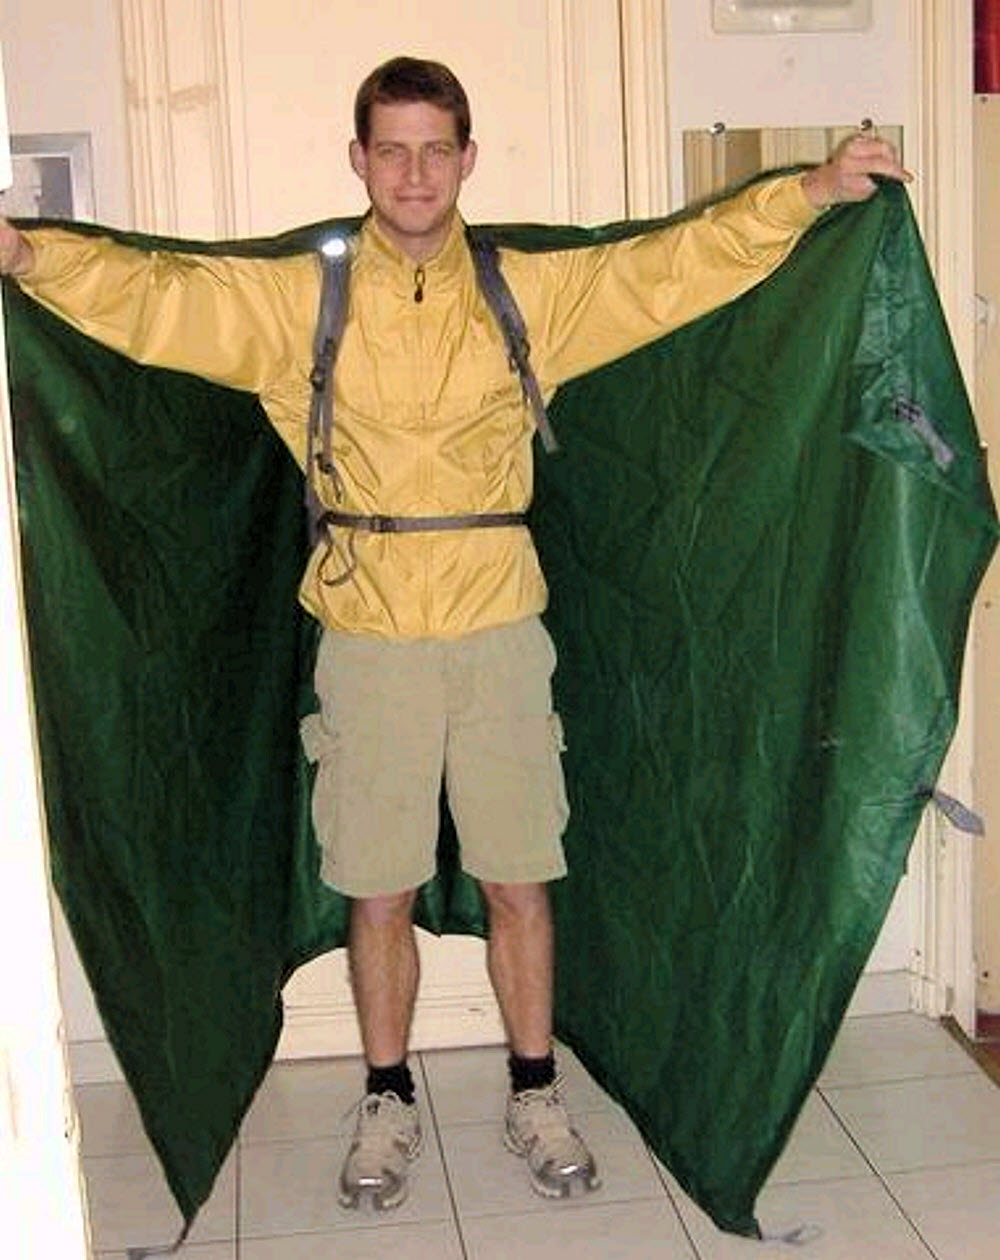
The tarp rests on my head in its middle on its longest side (260/2 = 130 cms of each side) [51"] and as I am 173 cms [68"] the 2 back angles drag.

To avoid this I grab the two back angles at the straps.


Ready, set, um...


And I pass these straps in the chest strap of my backpack (as in hiking I do not walk so sporty with my bag is not a problem). The angles are no longer dragging.


Grab the rear corners...


2nd step:

Now it is necessary to effectively close the system and especially to form a hood that will hold well even with wind or at a good pace.

For this you have to use a simple lace and a tankka (a blocker to push as on jackets or sleeping bags).

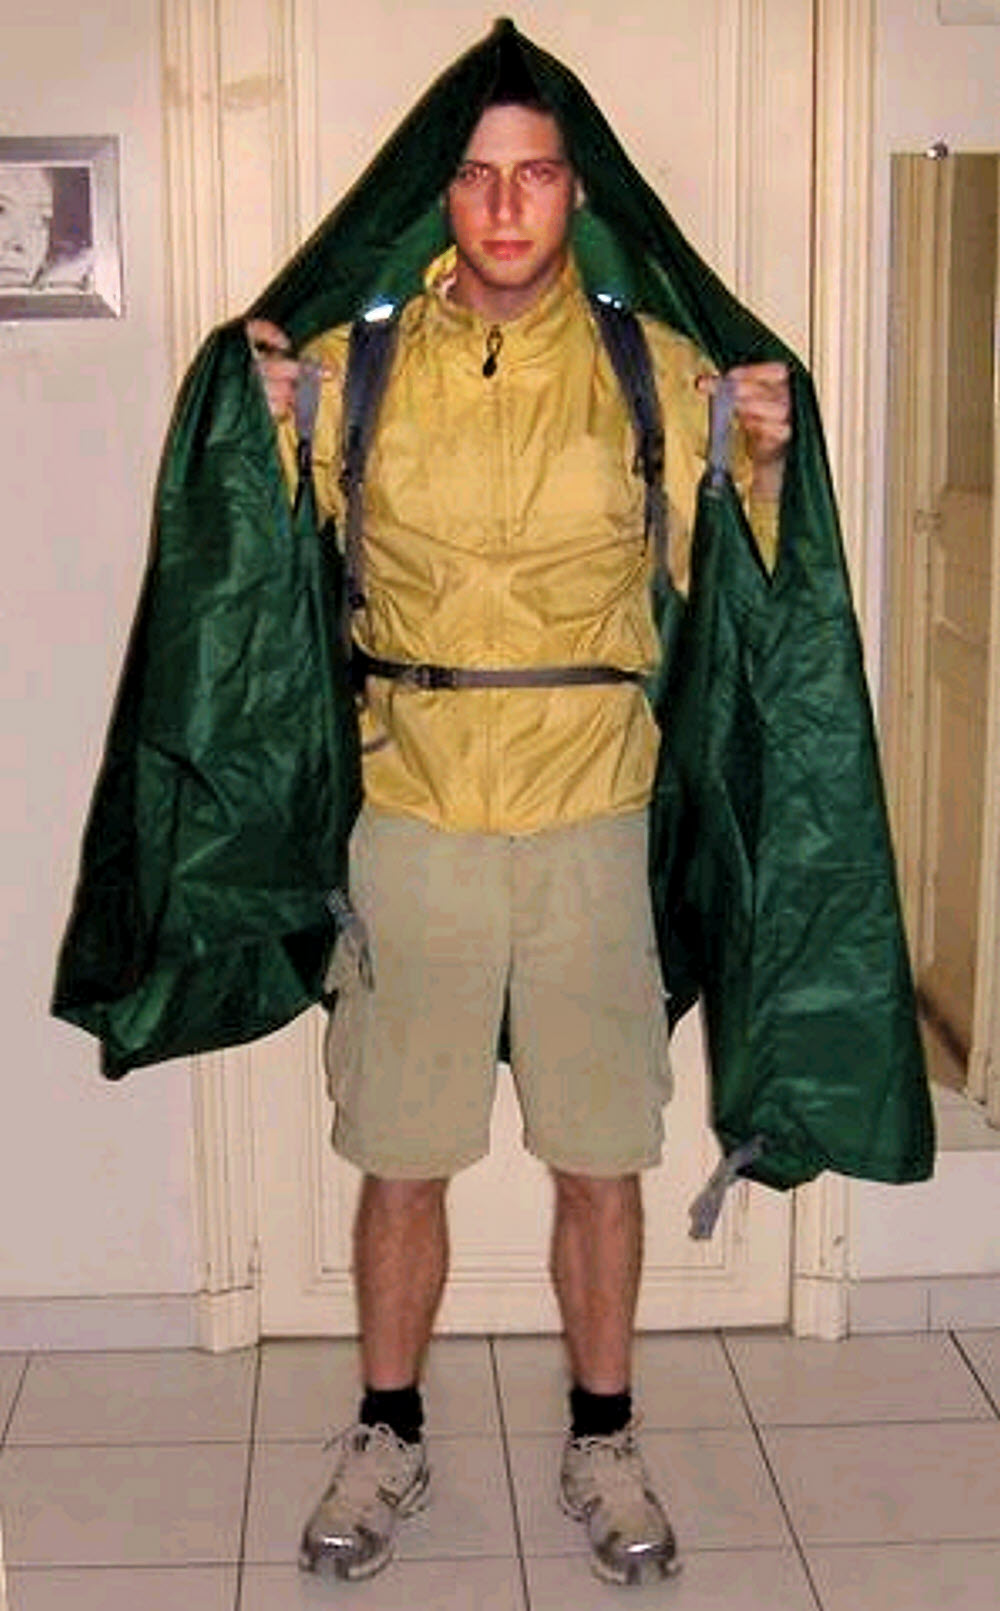
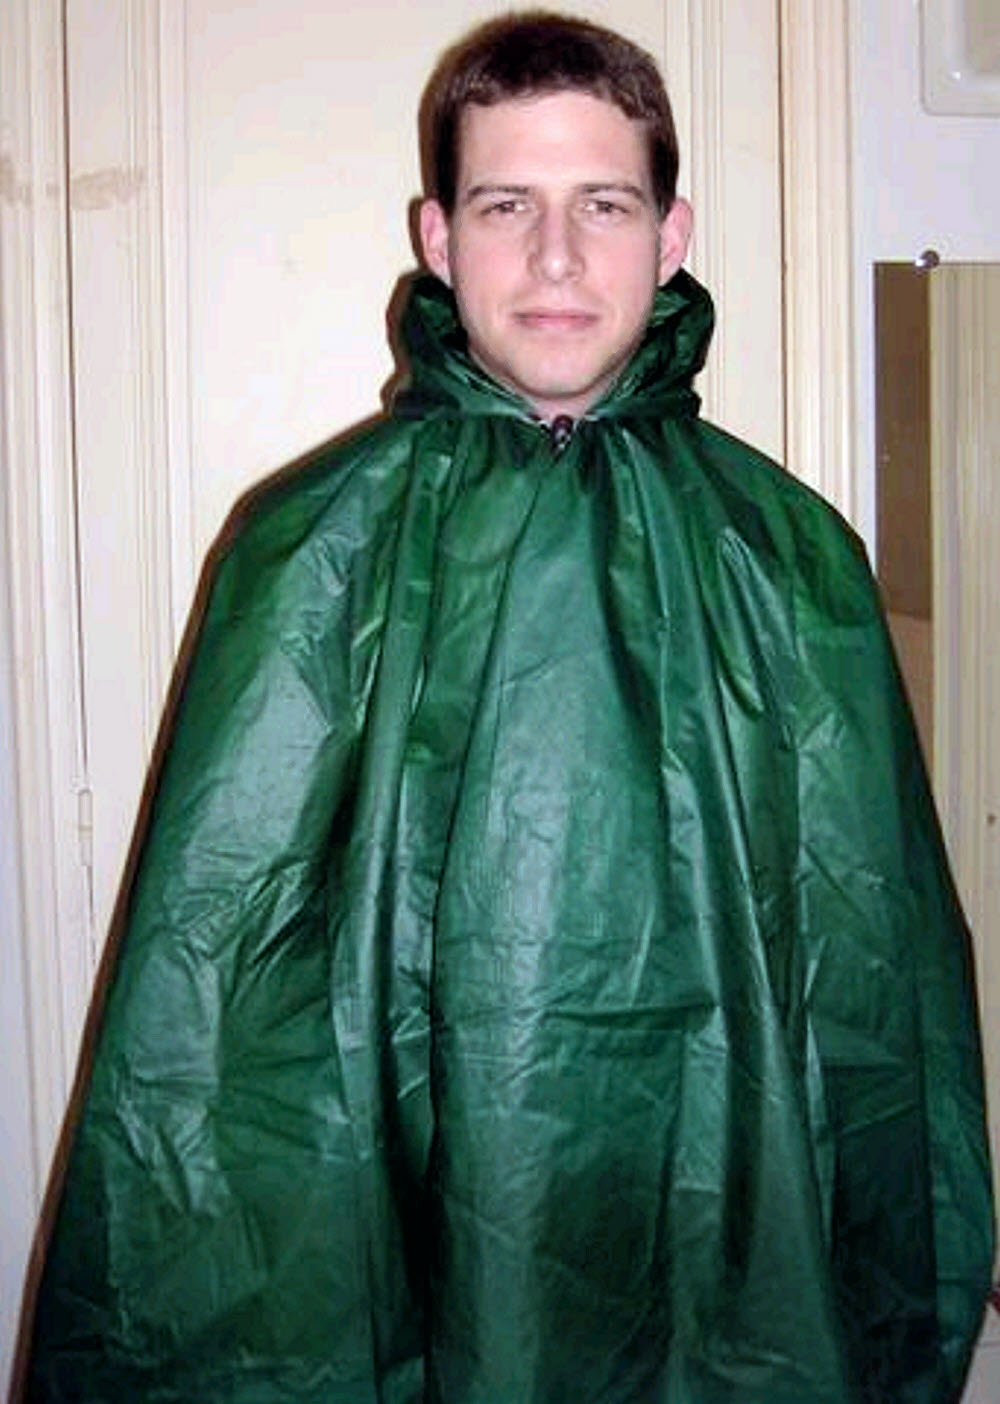
We draw the fabric well on the head (practice in hiking because during the establishment the walker is protected!) And we put the lace with the tankka around the neck.


And attach them to the sternum strap...


We get up to adjust the cord and hood (playing on the cord and the fabric we can make a hood at his will, a small back and here is a visor) (God, I look stupid ... That's good because it's you! wink )

For those who fear a potential throttle, know that we do not need to tighten too much and that the lace fits perfectly inside the poncho (thus avoiding inadvertent snapping)


Then adjust the hood...


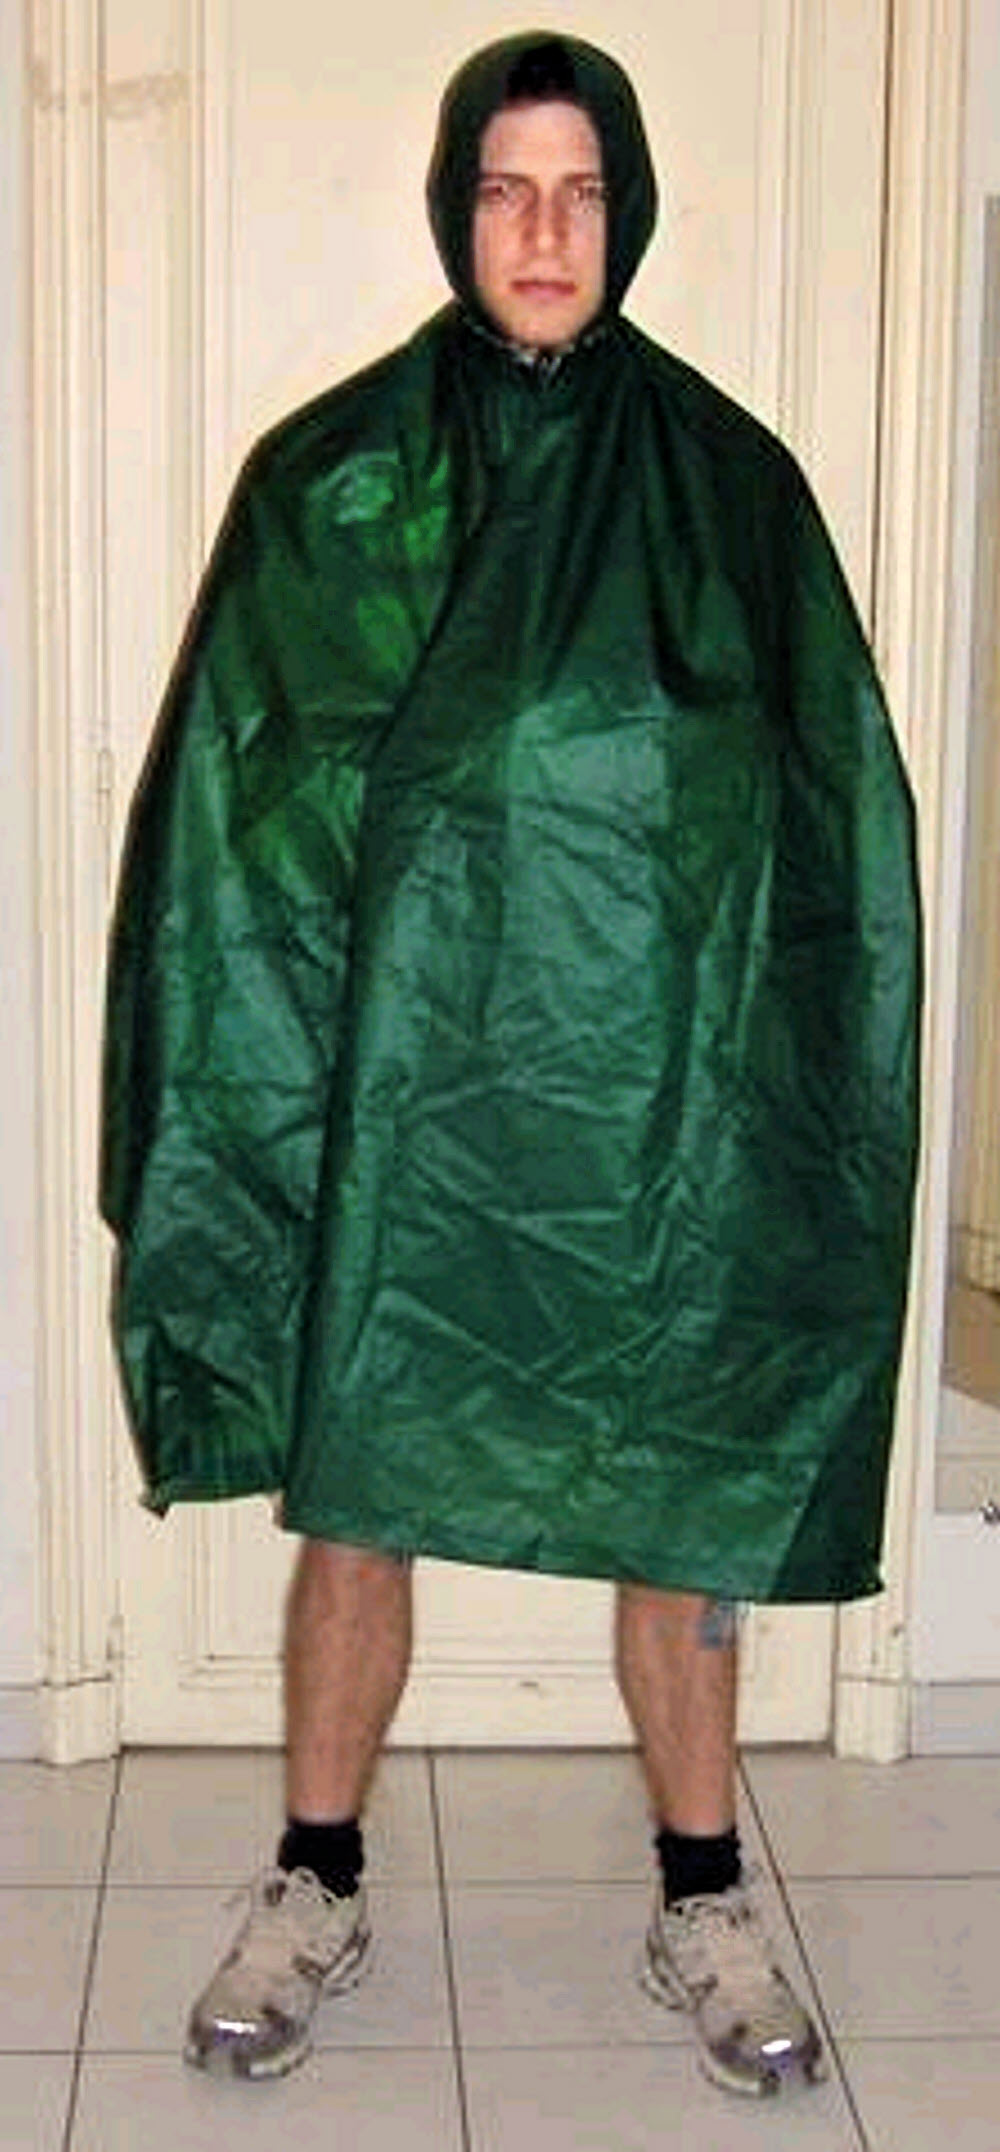
Here is the hood and the poncho are finished! (dressing time less than a minute)

Not a single seam so no escape.

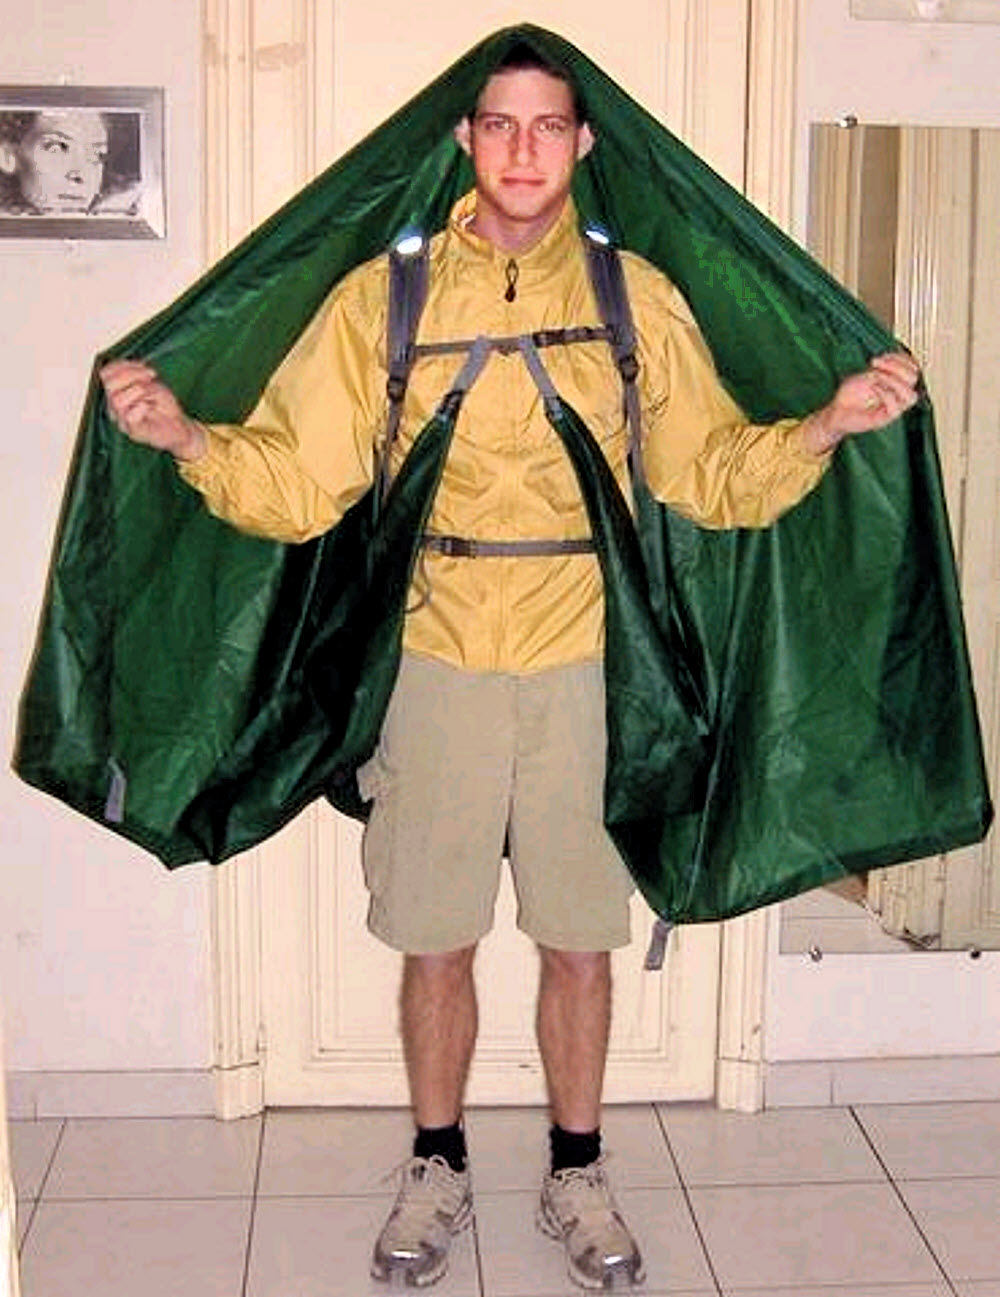
Of course the front is not completely closed but there are two advantages: we can take out the arms if we fall and the fabric folds away against the sides ensuring good resistance to water inlets (it can even be wedged under the shoulder straps of the bag)

In any case, this PAP is made to be used with a jacket windproof and water repellent when there is heavy weather.

But we will gain significantly weight (and money) by taking a jacket that does not need a membrane / coating machine-bidule.

In this case a jacket Pertex Quantum (just water repellent) is perfect for a hike 2/3 seasons (100 grs). [3.5 oz.]


Then wrap yourself in it...


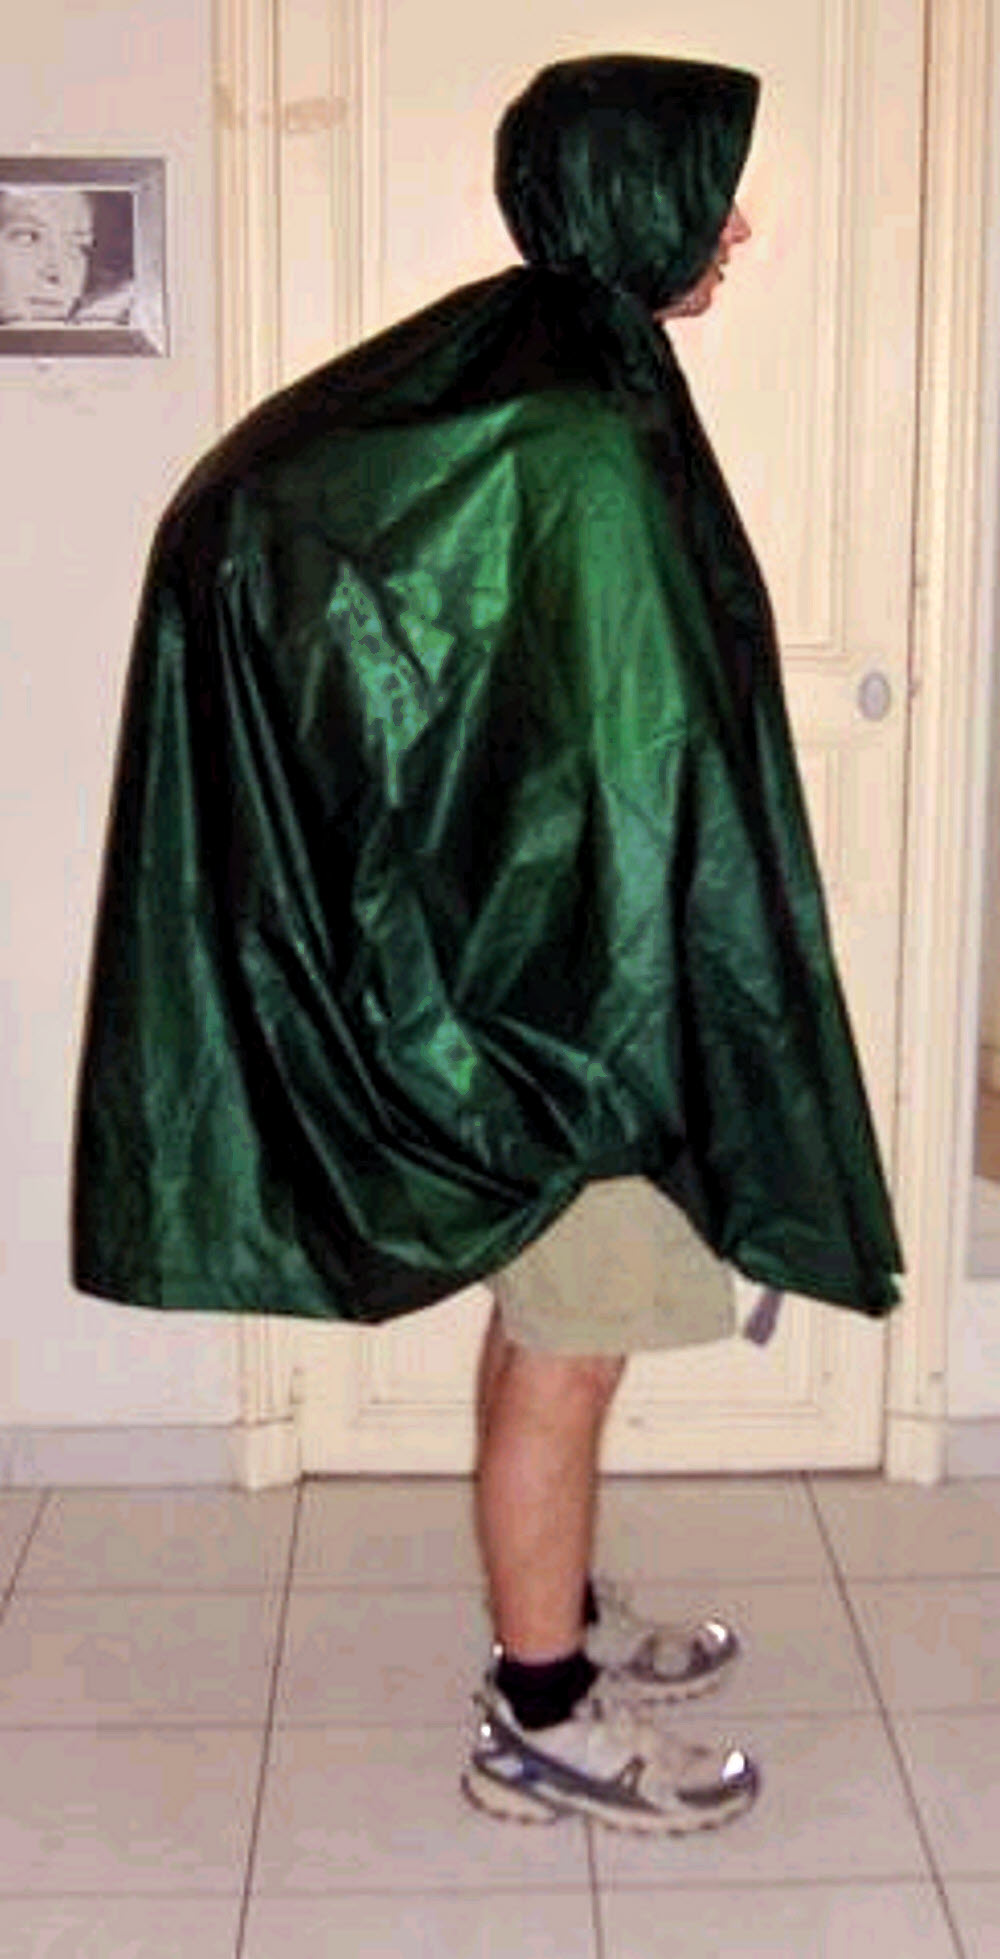
Here a profile view. What more can you ask than to have a shelter, a rain suit (covering head, bust and mid-legs) and a [protected] backpack for all in all for 200 grs!


Take a look from the side, with a pack on...


Here the Peyo quite happy with him (I know it's not good ... big_smile) but especially a nice view on the top closure with the tankka and the departure of the hood.

Besides with or without the hood this poncho is very good in the effort (test intensive gul [no idea what this word should be] with the bag on the back: nothing moves)


Looks tidy, dunnit?


That's it, I think it's squaring my circle in this matter ...

But I'm still looking (perhaps a small scratch at the front closure? Or a strap at the waist for better wind resistance).

Small detail, with a tarp as small I use a bivybag (sursac bivouac) but the Pertex 5 is in command for a sursac even lighter. To follow then.

Ciao

...

Peyo 12-01-2006 12:19:24

I consider 4 parameters that make me prefer this method.

1 / The total cost:

the end of silnylon cost me nothing (it was a gift). a jacket loss quantum about 55 euros (at CAMP) and my sursac had cost me 30 euros (they still do at Expe).

So rain suit and bivy protection for cheap.

2 / The big time

In bad weather, I totally trust my sursac and a poncho is a real insurance when you walk (the only technique not to be wet in my opinion).

When there is a lot of wind (and if rain) I do not climb the tarp but I literally put it on me by tying it with its stakes (or stuck with stones or wooden stakes carved on the spot)

3 / The weight:

  • My PAP is 200 grams (go 210 with my kite rope guideline)
  • the jacket in lossx quantum 80 grs in M at Camp (with hood and 1/2 closure)
  • Support in silnylon 1.1 and quantum lossx (or grade 5) 6.5 oz (180 grs)

All this for 470 grs.

4 / Montage

It is clear that it is much more adaptable than a normal shelter, both at the field level (I have often been late looking for a place for my tent when there was room in some places for a sleeper), at the level of the will of the walker.

...

Peyo 06-05-2006 10:33:11

But honestly he could know some improvements that it would not bother (especially at the level of closure).

Now that I have Gatewood at Sixmoondesigns, it's true that I have something more comfortable.

...

Peyo 06-05-2006 11:25:44

Versatility, yes that's the key word.

The PAP is in silnylon so there is more resistant.

For improvement, it would be enough to make a closure with Velcro for windy days. After all is possible ...

...

"Original" photos (or as close as we're ever going to get).


Comments? Send email to sosayseff@nullabigmail.com

See if that helps.

Monday, November 12, 2018

One Forgettable, One Forgotten

No, really — this is me smiling. (Note happy leg scabs.)

I used to be this person. Once, and upon a time.

Fifteen years back, now, in 2003, September. September 27. Fifteen years, and even another two months beyond that. A while.

I was sick. It was the year that I was sick. I don't know. Something. Maybe giardia, starting at the end of May, just after a routine trip around Mt St Helens. Nothing memorable about that except that was the trip that my spoon broke, so I used a stick. Maybe it was the stick.

I used a stick to finish just that one meal, then realized that I could do without it, and without a spoon, so the end of May, 2003 was the last time I took a spoon backpacking. But maybe it was the stick. I'm careful, and I can't see how I could have infected myself in any way, but I developed something, and it kept getting worse, and then eventually, in October sometime, it got much worse for a day, and then it was over. Over after I spent a whole day sitting on the floor with my back to the wall, trying to hold on to the carpet while intense intestinal cramps fought each other for the rights to my gut.

That was it, except for two days of diarrhea and a couple following weeks of vile outgassings to finish up.

But it wasn't all fun.

And carrying one of my early packs. The very first weighed 9.8 ounces and still hurt. Duct tape is a pack-maker's tool they never mention. But hey — it works.

That was the year that I was sick, from the end of May to the middle of October, and that was the year that I wrote a sample letter that my gastroenterologist thought was so good that he just signed it on the spot. And then I wasn't working any more. No one said good-bye.

I submitted the letter the next day and within about four hours (or a bit less — maybe it was two hours) I was free. Leave-of-absence for medical reasons. By a trick of the personnel system I was able to submit a thick sheaf of leave slips up front and retain my medical insurance, by gradually using accumulated sick leave over a period of up to a year. But I didn't need a year. I lucked. By the middle of October I had a different job — came out of the blue with a fat jump in salary attached, a two-year data-warehouse project, and I could continue working, for more money, and be asshole-free as well.

Done.

In 2003 I set off just a day or two ahead of the July 4th weekend on a 14-day, 200-mile trip through Olympic National Park. Even with rumbling guts. Several things did not go quite right and I began backtracking just shy of halfway through. Then in early August I took a week off on medical leave (Hah!) and picked up the route about where I'd abandoned it, and finished the second half of the trip.

Then I got my letter signed and quit. "Quit", in quotes, since I was still an employee, but no longer working. I had a year's worth of nothing, with free health insurance, and money in the bank besides, so I did more hiking, not knowing what would come next. Which, after another eight weeks or so, was a better job at the state agency where I had first started doing computer work, and not the zoo I'd just escaped from. Shortly after that project ended (successfully, early, and under budget) and I reverted to my previous agency, I quit. A "hard reset". I decided I'd rather die than keep working there, so I submitted a resignation with my two-weeks' notice, and a leave slip for two weeks, and walked out. My more-or-less temporary boss at the time was himself off on vacation but he handled it well, and I never did get charged for those last two weeks of leave that I took, which amounted to roughly an extra $2000 in the bank when I cashed out my unused leave. Decent guy.

I always felt bad about suddenly bailing out like that but there was nothing for me to do. They had me just sitting there killing time. Even though management was different from when I went on my leave-of-absence, and they weren't actively hostile, they still had their heads up their butts and there was nothing to do, and then my position was going to be eliminated, and I couldn't stand the pure waste of my life, so that's why I quit, on July 7, 2005.

I haven't worked since.

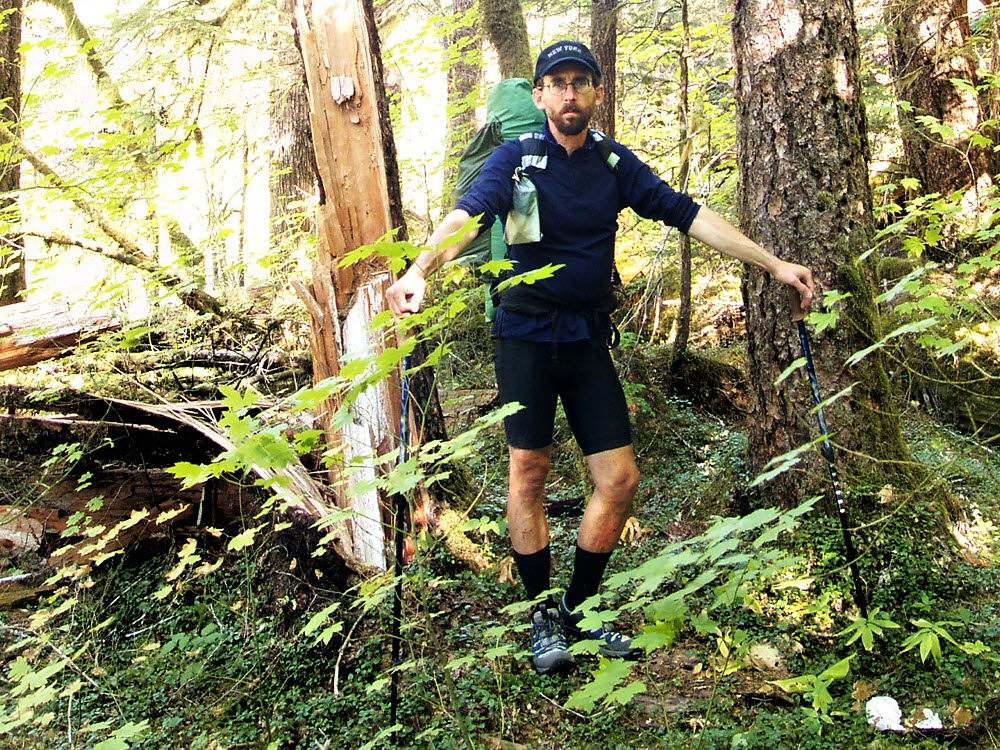
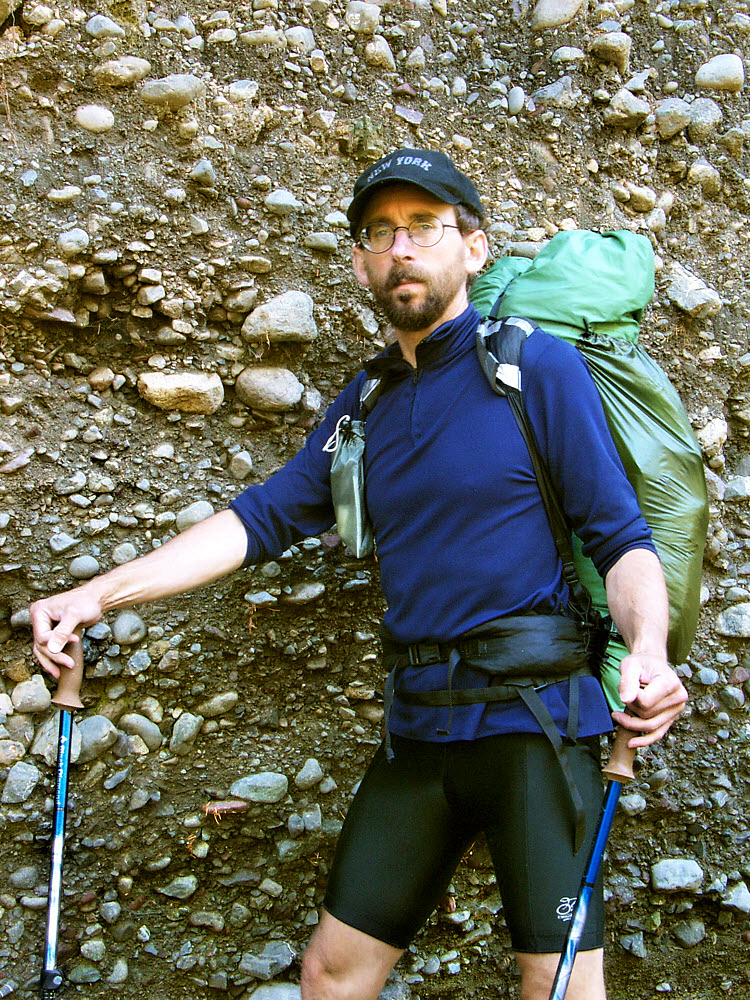
I made the shirt too. Found the cap on the trail one day. Photos shot with my first digital camera, a Kodak DC4800 (3.1 MP).

Got lucky.

I squeaked by. Now that I'm old enough, I have two separate governments sending me money every month to stay away and not bother them again, which I'm good at. Like a quiet little mousy-mouse. I even have health insurance such as it is, which is better than none, etc.

Last year my high school class had its final reunion. I didn't go. I didn't go to any of them, but I did look them up. I sort-of wished I'd been able to make it last year but I know it would have turned out hellish. I read the programs from previous years with insufferable and stale activities planned out to the exact pointless minute.

They were the same people I had known decades ago but older. No other changes. Older — that's all. The same games and blind mediocrities. The same. The same tiny samenesses.

They had posted the photos from the class yearbook online. I looked through them. There was a separate section for the deceased. I was surprised to find too many holes in my life in the shape of people I'd once known. And my photo was there too. I sent them a comment saying that I was surprised to find myself deceased but that it wasn't all that bad being dead and not to worry, but there was never a reply, so that's about my last contact with all of them, I guess. Even all these years on they still ignore me. Well, you can judge by the photos. One forgotten.

One more.

Me again.


Comments? Send email to sosayseff@nullabigmail.com

It may or may not help.

Wednesday, December 27, 2017

Squeeze Me Another Pack, Jack

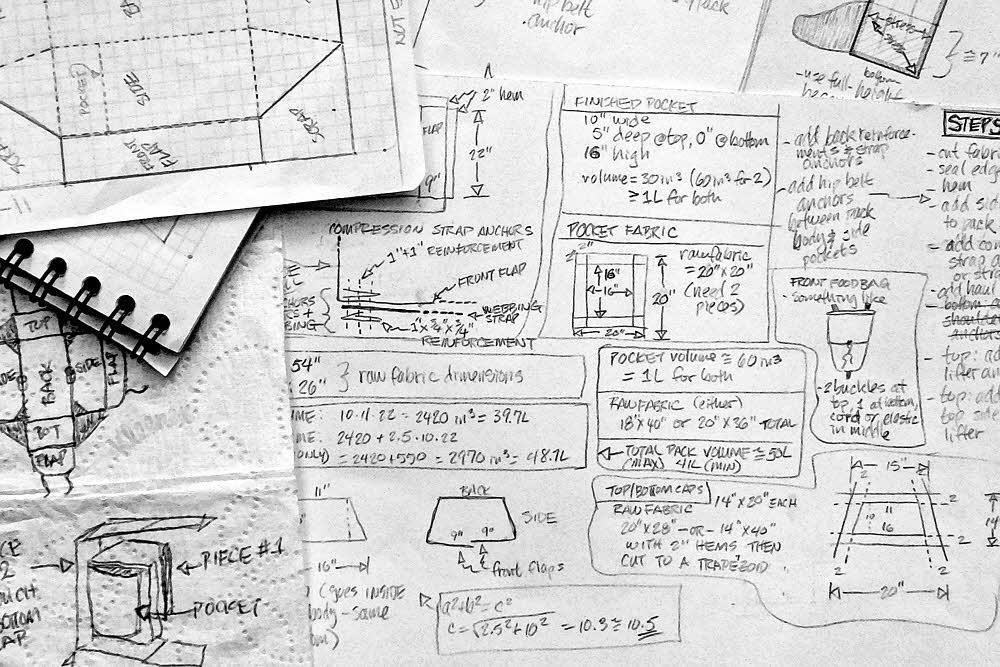
Scheming and scribbling.

ReSqueeze Resurrection.

Two things I decided when I started going light — I'd always wear boots, and if I ever did make any of my own equipment, I'd never muck with packs, ever.

Boots: Last worn backpacking on Labor Day Weekend, 2000.

Packs: I made a Squeezo. Several Squeezos. In fact, I invented the Squeezo. Plus I did a bunch of doofus packs leading up to the Squeezo. (See link to previous post at the bottom.)

The last Squeezo I put together was in 2005 or so, and I intended it to be a last prototype before freezing the design and making a final, perfect pack. But Squeezo 2005 was so good that I just used it until moving out of the country in late 2012. I couldn't take everything so I ditched the pack and, since I was never going backpacking again, threw out my patterns, such as I had. (The shoulder strap and hip belt patterns were critical, as were several key measurements — all long gone. Picture me raging now.)

Continued scheming and scribbling.

Too bad you do that, you, now you know what dumb is. Yep. Me the dumb one. (The voice of reason is always right.)

See, it started with hammocks. The place I worked, there was a contractor crew on board, and one of them found out about Hennessey Hammocks and got me all eager, and I bought one. Fine.

Mark, if I remember. That's all I remember. It was a long time ago.

Some details begin to come into focus.

Then Mark found out about Gearskin packs and got me all eager in those parts, and I bought one of them. Fine, too.

The Gearskin is a brilliant idea, just not finished. It was invented somewhere in the late 1990s, developed to the point that it was workable, and abandoned at the halfway point. It turned out to be especially awkward for someone using a hammock. I like to camp on slopes along the trail. Some of these slopes have been as steep as ye olde 45°, and that's steep. Difficult to even stand on, but near the trail, clean and unused, often with no underbrush, with a clear view all around, and quiet. And the trees on slopes often turn out to be big enough to hang from and also small enough to hang from. None of these six-foot-thick giants of the lowlands.

Yeah, right. But come morning, there's a problem if you're carrying a Gearskin: You can't hardly pack it.

See, the way you load a Gearskin is you lay it flat (go find some photos). This is cool on level ground but not on a slope.

You open the pack, which is one piece of fabric, lay it all flat, and arrange your things on top of that. Then you leave the back on the ground and fold the front up over it like folding a taco. Then you cinch down the side and top straps.

That doesn't work on a slope. All your stuff rolls away, and what can't roll slides away. To load a Gearskin on a slope requires a minimum of three arms, which means getting an implant or bringing along a manservant. Neither worked for me, so after sewing a few dickhead-stupid shelters I thought I was capable of making a pack that would work better.

Eventually I was.

The problem with the Gearskin was that it had no inside. Under the right circumstances it was trivial to arrange all my goods just so before cinching down the pack, but I didn't camp where those circumstances applied. The real beauty of the pack, though, was that it used compression to achieve rigidity, and so it didn't need a frame. I think that my Gearskin weighed 19 ounces (540 g).

I had started ultralightering with a GVPGear G4, another frameless pack, but I moved to the Gearskin because by tightening its compression I could firm it up enough to be actually usable. The G4 was a good introduction to light packs but not practical (which was part of the introduction). By carrying a hammock with an underquilt, I had nothing remotely resembling something rigid, so, unlike those ground-sleepers with closed-cell mattresses, I dint have nothin to use as a fake frame. Anyway, top-loading packs, if I may say so, suck bigtime. They're nearly impossible to load properly, and the more soft stuff you have the worse it gets.

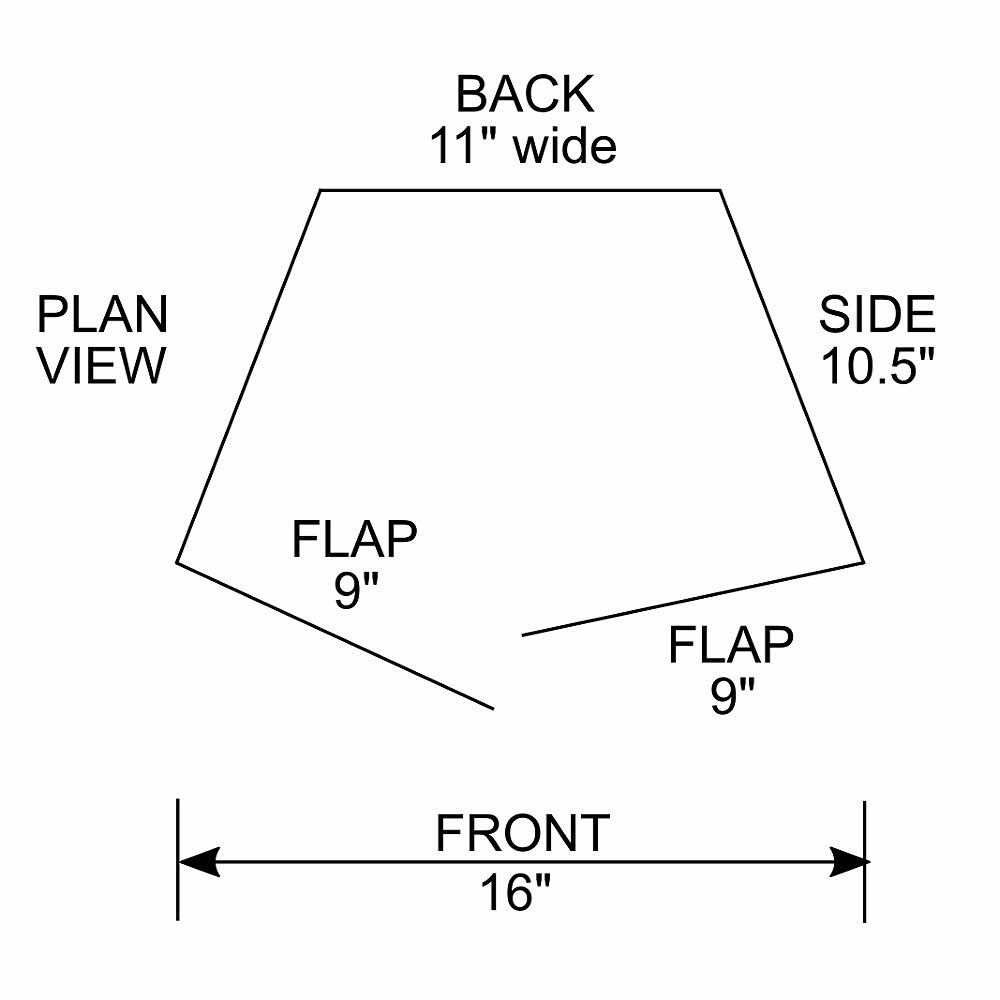
Abstract view from above. Overlapping flappers on front. Expandable from square to trapezoidal.

I eventually developed the idea of making an enclosed pack body that loaded from the front. Among packs we have top-loaders, which everyone is familiar with, panel-loaders, which are seldom available, even the bad ones, the Gearskin, and my design. I call it a slit-loader. It's a font-loading pack with no panel. My first designs were both slit and top loaders, but I found that eliminating the big hole up on top firmed up the whole pack and didn't affect utility at all. Part of these results are due to the two huge side pockets that I build in. Add a small detachable pocket that attaches to the pack's front to carry the cookset and the day's food, and there is usually no reason to get into the pack body during the day anyway.

It worked. Best pack I've ever used. Weighed 20 ounces plain, or 22 ounces after I added a couple wooden dowels to act as vertical stiffeners (567 g and 624 g, respectively). I made a couple of two-week, 200-mile, no-resupply trips with it. That hurt, but the pack worked. When you're starting out carrying close to 30 pounds (13.5 kg) in food alone, the whole trip revolves around pain and muscle fatigue, and that's unavoidable, but the important part of the story is that the pack worked. It expanded to accept a bigger-than-normal load, and then carried it, uncomplaining.

Since the mostly-closed design meant that I could load the pack on any slope, I could place my equipment exactly where it needed to go, and keep it arranged perfectly until I was ready to compress it all. Things went in in layers through the front slit: sleeping bag first, flat and wide against the pack's back, providing cushioning, then the food bag, placed vertically, then the hammock/tarp/underquilt in an inverted-U shape around the pack's inside perimeter. Put the possibles bag up top, stuff clothing and rain wear in the empty spaces, and you just about have it. Then begin cinching down the straps until the whole pack becomes one solid wad, and go. Beauty, eh?

I miss it.

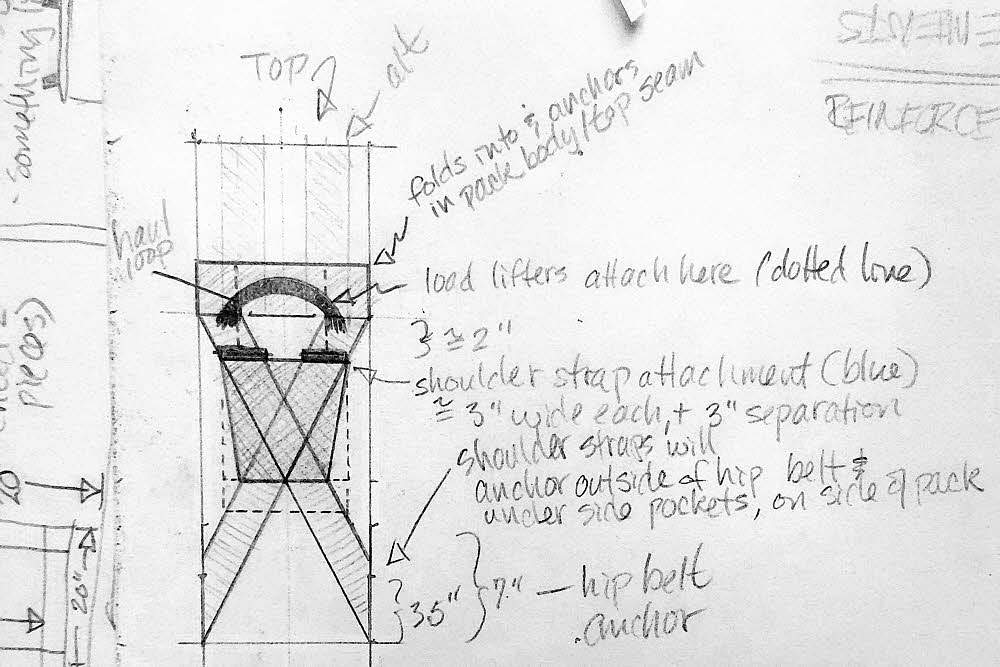
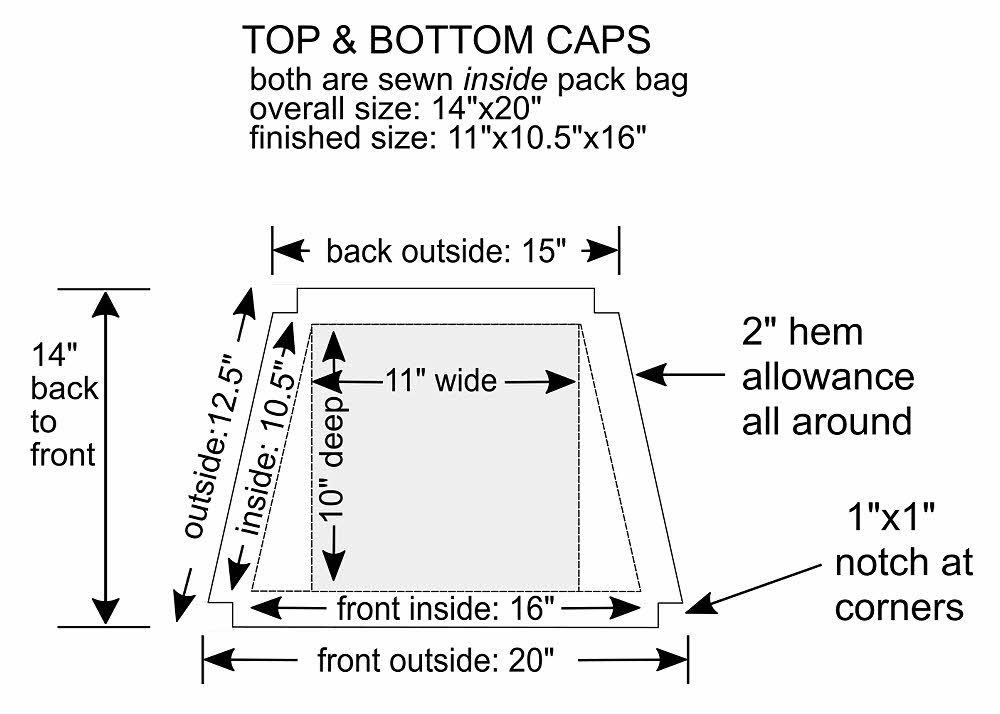
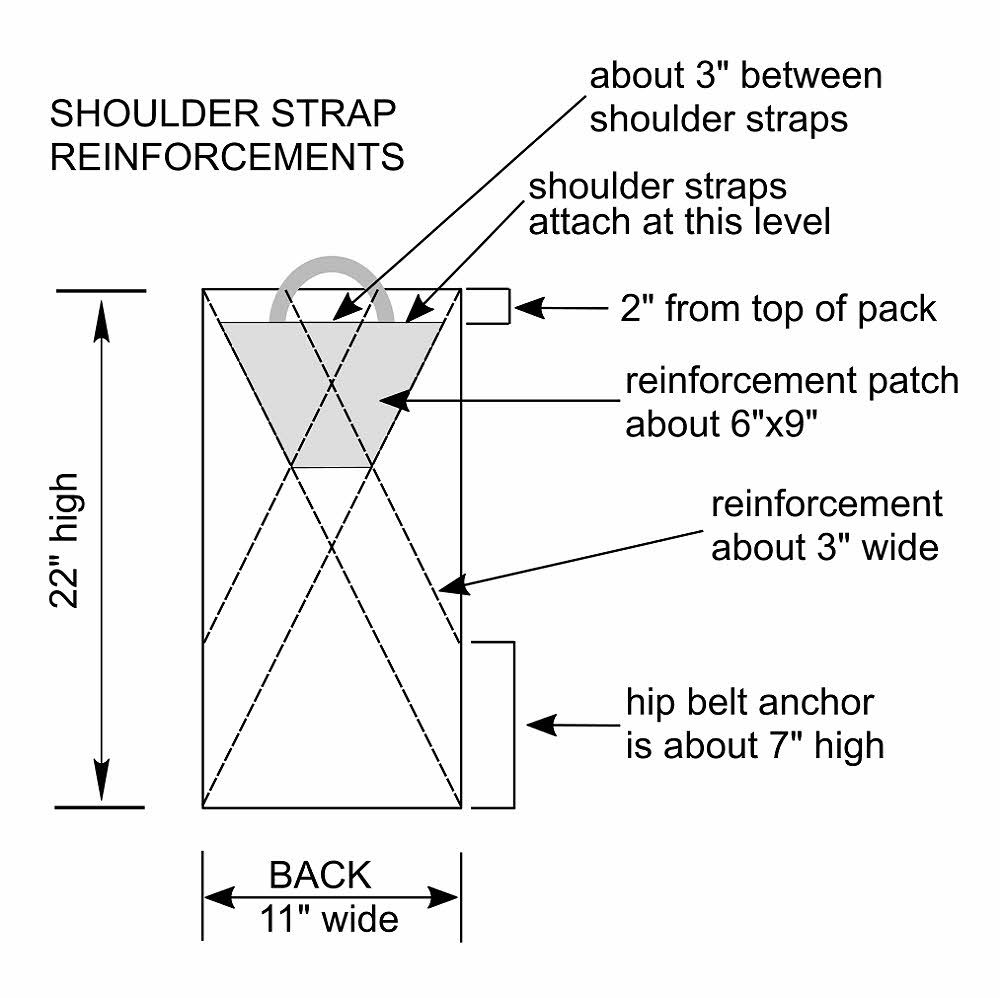
The shoulder strap reinforcements help to pull the pack together.

So I'm trying to resurrect Squeezo by remembering the design. That's easy. The hard part is that I need to have exact dimensions. They have to be reinvented, and my circumstances mean that I have only one chance. I have the fabric and hardware with me, but only enough for one try. The fabric isn't anything fancy, just utility nylon from Jo-Ann fabrics, but where do you find that or anything similar in Ecuador? Closed-cell foam padding? Buckles? Nylon webbing? I don't think so.

I bought a sewing machine for $180. It's probably a $100 model in the U.S., but I have it. I'll sell it for half price when I'm done, which will be soon, because I have an airline ticket waiting to be used. When the time comes I'll either have a pack to fly home with, or not.

I don't know what the problem is, but all the packs I've used since my last Squeezo have hurt a lot, in the shoulders. REI Flash 45, Golite Jam, Granite Gear Crown 60, Mountain Laurel Designs Prophet. I don't know if it's the sharp curve in my collar bone that's unique to me, or the narrowness and stiffness of the commercially-made shoulder straps, but it's been what? Five cases of extreme bone pain? Yes, five — screaming, relentless, all-day, endless collar-bone pain. I had to stuff extra padding between the straps and my bones, which remedied but didn't cure the situation.

I think my former Squeezo straps were wider. I based them on the Gearskin that I had. I don't remember how wide they were, and now I have to guess. At least I have the MLD Prophet to trace from, for strap shape and length. The width and padding details I can adjust when I make the straps, but it will have to be a guess, and I do have only that one chance to get it right. I have both stiff foam and soft foam, so I can use layers. I'm hoping.

What else? I don't remember. Am I making sense? Who can say?

But I'm going to try.

Postscript.

I have more images of a pack I built in 2015 from a "replacement" hip belt and shoulder straps I bought via REI, and stuff sacks I bought at Swain's General Store in Port Angeles, WA. I may post them at some time.

I will post instructions if I get this current pack worked out.

2009 Post.

No Pack Is Made For Me. Has photos of my dear departed Squeezo (insert tears here).

Wednesday, May 31, 2017

Improve Me Once Already! (Alcohol Stove Version)

Use these to cook like an effer.

I've been ruminating. I do that, mainly while walking.

Lately I've been thinking about stoves again, alcohol stoves. I picked up this round of stove fever after reading some old posts about poncho tarps from 2006. Besides doing some fun things with tarps, the author designed and made his own alcohol stove. Like every other alcohol stove in existence, his was the most efficient.

I have done it too. If you start using an alcohol stove you'll likely take your own whack at it. Harmless fun. There are probably hundreds of designs out there by now and they are really two or three basic designs endlessly repeated, with all the same advantages and flaws mirrored in the other designs.

But I did get thinking again.

So what then does it take to make an efficient stove system? More than a stove. The stove is one component, but not the only one. It is a system. There is a cook pot and a way to support it, protection from wind and rain, and sometimes even more components. So what's the deal then, really?

That brings us to now. By writing my thoughts I'll be able to judge the sense of them. Putting together a cooking system is a whole nother thing, as they say. Making one thing better than the others takes a lot of trials and enough record keeping to allow actual comparisons. It takes time and effort and usually one gets bit in the butt.

Knowing and doing are not necessarily related, but the thinking is the most important part, so here come the thought drops.

Ground rules:

  • Let's assume that we're heating water — no actual cooking.
  • No simmering.
  • No roasting.
  • Just heating clean water to a boil or close to a boil.

As I see it, there are at most 4 possible ways to improve the cooking performance of an alcohol stove. (When I say "stove", that's everything needed to heat water: stove, windscreen, pot, pot stand, additional thinamajigs, and so on.)

The four basic ideas are:

  1. Increase stove efficiency.
  2. Increase pot efficiency.
  3. Optimize the exhaust gas dwell time.
  4. Optimize the windscreen.

1. Increase stove efficiency.

There are several ways to do this. Making the flame as efficient as it can be is a decent place to start. An efficient flame, all other things excluded, is partly a matter of keeping it small. (Or actually, right-sized.)

A right-sized flame allows cleaner burning and less flame wasted in shooting off to places where it won't do anything.

For the best flame we should optimize the flame height, the flame shape, the flame-to-pot distance and the flame's contact patch on the bottom of the pot.

I'm not providing any details here on what or how, only noting that these are areas to think about during design.

We also need to isolate the flame from drafts.

Along with this, it's important to reduce heat lost from the stove body itself. This happens by conduction, radiation, and convection. Conduction losses are into the surface that the stove is sitting on. It shouldn't be in contact with any other surfaces but it has to be. With the ground for sure, and with some setups the pot sits directly on the stove. Any conductive loss in that case would be into the cook pot, which would be good if it heated water faster, or bad, if it made the stove less efficient.

I think that it's also a good idea to reduce the stove's heat gain to the optimal amount. A stove has to consume some of the heat it produces or it will go out, but that amount of its output is small. Let the stove soak up too much of its own output and you have a runaway reaction.

A too-hot stove runs too fast and produces an uncontrolled flame, which blows heat all over without putting it where it's needed, so controlling stove overheating by controlling excess radiation and convection inside the system is important too. The stove should generate hot gases which transfer heat to the cook pot and not back to the stove.

So far this sounds reasonable. The next area to think about is to...

2. Increase pot efficiency.

There is an optimal size and shape of cook pot for every stove. The cook pot has to have a large enough surface area to absorb the maximum amount of heat energy. There is more than one way to do this.

Internally.

One way is internal to the pot. Make a pot with a heat exchanger built in. I don't know of any pot made for any cooking system anywhere that has this. What I'm talking about is the equivalent of a standard, building-size steam boiler but sized down for backpacking use. Most people haven't seen a boiler. I worked at a junk yard one summer, and saw one. It looked goofy. It's not what you expect.

Check out the fire tube. (via globalspec.com)

You see a steam locomotive and you think it's a big tank lying on its side with a fire underneath. Nope. Isn't.

It is a big tank with tubes running through it.

They come in two forms. Either the tank is full of water and fire runs through tubes inside the tank, surrounded by water, or the tubes contain water and fire burns in the tank around them.

Either way radically increases the surface area available for energy transfer, and radically increases efficiency. I don't know how to make this in a cook pot of a 24 ounce / 700 ml size, or of any size. If anyone, anywhere in the world makes a cook pot like this, you can bet that it's too big and heavy for backpacking, but it's nice to daydream about. I'd assume that my 700ml pot would weigh around 1 to 2 pounds (500 to 1000g) and cost $100 or more, due to the huge complexity involved in making it. That would be for a pot with water inside and fire running in vertical tubes through the pot.

The Kelly Kettle is the only thing anywhere near this.

Kelly Kettle

Externally.

That's an what I call an internal heat exchanger. The kind you might actually see is an external one. Some canister stoves use this sort of thing. The "MSR XPD Heat Exchanger" is one. It's a piece of corrugated metal that wraps around a cook pot and "funnels heat up the sides for faster, more even heating". Or so they claim, and they may be right.

Couldn't hurt, eh? Well, at $40 and 6 ounces / 170 g, it's a stretch for a canister stove used sitting in a campground. At that weight, it's heavier than a lot of complete alcohol cooksets (stove, pot, windscreen, and so on). And more expensive too. But the bigger issue is whether it would help. Probably not much. Heat running through it would transfer faster to the relatively colder air around it than to the relatively hotter put it's connected to. And there's an infinite amount of cold air available every day, all day.

MSR XPD Heat Exchanger (image via REI)

Selecting the right pot.

The third way to increase surface area is by choosing the right cook pot. The pot with the biggest bottom wins. Shoot a flame up from a stove, let it hit a pot whose bottom has an infinite area, and all the flame's heat energy will be absorbed.

Perfect. Except that things don't work that way.

Make the pot too big in diameter, for a given volume, and then the pot's sides will be too low. This is awkward. Make the pot too tall and narrow, and it will have no bottom surface area to speak of.

There is a balance point in the middle somewhere. Generally, the pot's height will be somewhere vaguely around 80% to 125% of its diameter or it becomes both unwieldy and impractical.

Imusa 1L aluminum mug.

For example, take a pot 5" wide and 4" high (125% wider than it is high). This pot is exceedingly squat. Round off and you get 125 and 100mm for width and height, for a volume of about 1.3L.

Reverse the dimensions and the result is a hair over 1L in volume, with a 4" diameter, a height of 5", and a diameter-to-height ratio of 80%, and it looks more like a standard cook pot or drinking mug. For a volume of around one liter, that's about it. Max efficiency in handling, and about all you're going to get to use for thermal efficiency.

An aluminum frying pan would have a much bigger bottom area for the same volume, but how are you going to handle it? Slosh, slosh, spill if you attempt it. Try to figure out how to keep it over your stove without it tipping over. What about a windscreen? Ah...no, not likely — goofy proportions. And the heat you pour into it at the bottom will jump out the top and run away about as fast as your stove can supply it.

Seems like it would be efficient but actually not. Just like the opposite, the beer can pot, with a diameter around 85mm, with 160mm for height, giving a diameter-to-height ratio of 53% — almost twice as high as it is fat. With a too-narrow pot, a lot of the stove's flame goes up the sides and escapes, which is what happens with the typical beer can pot.

Leaving pot dimensions behind, a third way to increase pot efficiency is to decrease the pot's wall thickness. No matter what the pot is made of, a lighter-weight pot absorbs heat more quickly, and the less energy any already-hot water can lose sitting there because the whole process speeds up and there is less time for that to happen. This is a plus for beer-can pots but they already have an inefficient shape and, since they are made of extremely thin materials, they are also extremely delicate, which brings us back to that other kind of efficiency issue, handling efficiency. Frying pan at one end of the scale, beer can at the other. Not only are beer cans crazy lightweight and frail but they are crazy likely to tip over. No handles either, never.

Absorbing heat better.

There is a fourth way to increase pot efficiency. That is to increase the heat-absorption rate of the pot material itself. Dark-anodized aluminum may be the best choice, because aluminum transfers heat well and a dark surface, which anodizing gives it, soaks up heat well. Titanium is also sort of darkish, though it and steel don't transfer heat nearly as well as aluminum. But on the other hand, since titanium is especially tough, titanium pot walls can be really thin, which means heat energy passes through it relatively easily. (Notice us chasing our tail?)

3. Optimize the exhaust gas flow.

Ideally, you want a bubble of hot gas surrounding the pot and hanging there to form a sort of separate universe. This bubble protects the cook pot from the outside world and allows some of the remaining heat energy in the stove's exhaust to soak into the cook pot.

Most of this process will be controlled by the windscreen, which will stifle the exhaust gas flow and slow it, and will route exhaust gases around the pot in the most efficient way.

The "Nansen cooker" was a gem in this department, but few backpackers would want to carry something so bulky and heavy, especially anyone using a tiny alcohol stove and a correspondingly small cook pot. The Nansen cooker in fact used two pots, one for heating water and one to either warm water or to melt snow — thermally efficient but not ergonomically so.

From: The Home of the Blizzard, Australian Antarctic Division

Anyhow, back to the gases.

The aspects involved are stove design, stove materials, and stove operation, the pot stand design, the pot design (size/shape) and materials, the windscreen design and materials, and the ground reflector design and materials. (The "ground reflector" is what I call any reflective and protective material under the stove, covering the ground, insulating the stove from it, and reflecting heat back upward.)

How? Try your best. The point is to hang on to hot exhaust gases without unduly impeding the stove's operation by depriving it of oxygen, and not to trap the gases so long that they cool so much that they actually suck heat back out of the cook pot.

4. Optimize the windscreen.

Windscreens are important, especially so for alcohol stoves with small flames that burn low energy-density fuel.

Screen wind like an effer. (How it looks in operation.)

The trick is to design the windscreen to isolate everything inside it from the external world while slowing heat lost through the windscreen itself. Block drafts, prevent radiant heat loss, prevent conductive heat loss to the atmosphere, funnel and direct whatever happens inside the windscreen's envelope.

A double-wall windscreen containing insulation would do part of this job, but how does a person make one? I don't know yet.

A windscreen should reflect and focus internal radiation to maximize energy flow into the pot. It should do this while minimizing energy flow into the stove, to prevent overheating it.

If there is another reflector under the stove (the "ground reflector"), covering the whole area inside the windscreen's footprint, and there should be, this needs to be optimized too. Its most important job is to protect the ground.

Using a proper windscreen, it's all too easy to set the ground on fire. Sometimes you find out that it's flammable only after it begins smoking. (True.) Protecting the ground is the ground reflector's first job. After that, it isolates the stove from conductive heat loss, reflects energy back upward toward the cook pot, and helps to maintain a hot environment around the stove.

I really like the direction that Trail Designs took with their Caldera stove systems. Clever.

But as they say in math classes, "Necessary but not sufficient". The tapered windscreen is also the pot support, which is fine. The tapered windscreen focuses the stove's output, which is good. The tapered windscreen is uninsulated, which is not. This is a major design flaw. So far, every windscreen I know of, including mine, has this flaw. What we have is extremely hot gases flowing along a piece of metal, with the entire atmosphere on the other side: an infinite heat sink. The heat should be forced to flow into the pot, not allowed to be sucked out by the atmosphere. Some kind of insulation is needed.

But these shortcomings are good in a way. They give us something to think about. Gives us something to work on — we're not done yet, so things don't have to be boring.

The Caldera Cone also leaves the top of the pot exposed. Bad. (Bad, bad, bad.) Also good, because more improvement is possible there too.

So now I have plenty to think about. I need to design and sew up a new pack. I need to re-design my stove system. And I have lots of ideas.

Could be worse.

More:

Kelly Kettle

Mugged, so says eff, April 24, 2013.

Super Duper Ultralight Windscreen, so says eff, April 13, 2011.

Trail Designs

Wednesday, July 13, 2016

Definitions: Alpine

(1) The region where people eat Alpo or other food from cans.

(2) A colloquialism for "alpen line", a kind of traditional, all-natural, hypo-allergenic climbing and utility rope made from the twisted stems of mountain flowers braided together with strands of flaxen hair removed from high-altitude meadow wenches (the Heidi is preferred).

For a 30-foot (10 m) rope: Take one bushel each of American Bistort, Bracted Lousewort, Fendlers Waterleaf, Sickletop Lousewort, Tall Mountain Shooting Star, Western Hedysarum, Cusicks Speedwell, and Scarlet Gilia. Showy Locoweed, Mountain Oxytropis, Sulpher Cinquefoil, or Rosy Pussytoes may stand in as alternate selections.

Pull off all blossoms and leaves and feed them to your goat.

Lay the stems out to begin drying in the sun, turning frequently.

Meanwhile shear three Heidis, but only their heads.

Save the hair and then gently release the girls back into the wild.

Exercise care in choosing only from the longhaired varieties as the shorthaired breeds, though they may be comely, will not suffice for this purpose. Locks of less than 20 inches (50 cm) make inferior alpen lines. Longer is always better, so keep that in mind.

When the flower stems are nearly dry but still supple and flexible, begin weaving them together, taking care to alternate stalks from different flowers, and mixing in a generous number of golden hairs as your work progresses.

Experience with macrame will help you here, but if you are new to this you may find it advantageous to first experiment with goat hair and grass stalks. (Another reason to keep goats, and they are also edible.)

When you are done weaving your line, stretch and pull it gently to tighten the braiding, store it in a cool and dry place for several days to set, then whip-finish the ends.

Give your rope an occasional gentle brushing to keep it glossy.

Remove soil with a quality shampoo (anti-dandruff is best, unscented).

If treated with care your rope should serve you well for many years.

(3) Alpine also refers to mountain geography residing above timberline, of varying elevation depending on the exact location, but reminiscent of Europe's Alps.

In the United States "alpine" refers to areas high in the Rocky Mountains, the Cascades, or the Sierra Nevada.

The Appalachians also have alpine areas, (regionally known as "homers") but these occur only in small, isolated pockets.

Remember, every alpine zone is delicate. A simple stroll that wanders off an established trail combined with an unsupervised elbow inadvertently colliding with the environment in one of these areas can knock the whole delicate ecology off its pedestal and send it crashing to the floor, so always walk with care. Treat all Heidis with respect.

Wednesday, April 13, 2016

Customize Me, Pleez


When I was a little kid, shoe stores had x-ray machines. True.

You don't remember this because I'm older than you are, but I remember. Sticking my feet into the machine and watching myself wiggling my toes around inside a potential new pair of shoes was the best part of buying shoes.

The idea was that customers could check the fit, see it for themselves, and be sure that everything was A-OK, but I liked to see the wiggling bones. That was the part I liked. This was before TV, and almost better than TV was when we got it, years later. Watching your own feet move around inside your shoes was almost better than seeing 30 minutes of Howdy Doody squirming around with Buffalo Bob's hand stuck up his back.

Almost. X-rays were a modern miracle of merchandise marketing, and the time I spent looking at my feet was definitely a loop of time forever unreachable by the intensely (creepily) unsettling Clarabell the Clown. I still don't understood why a man in a terror-suit was named Clarabell, and what the hell his connection was to Howdy Doody, and I don't want to know. Not today. Tomorrow, ever. He/it be dead now forever, we hope, and gone.

And then they took all the x-ray machines away. They were called "shoe-fitting fluoroscopes", according to Wikipedia. Buggers. All gone.

"The bones of the feet were clearly visible, as was the outline of the shoe, including the stitching around the edges." Yep. That was it. Including "two other viewing portholes on either side [enabling] the parent and a sales assistant to observe the child's toes being wiggled." And then they took all the x-ray machines away. Up to then the early 1950s had been a lot of fun.

And what if "there was not enough data to quantify the level of risk until atomic bomb survivors began to experience the long-term effects of radiation in the late 1940s"? They survived, didn't they? But the machines disappeared anyway. What's a little radiation burn here and there? Kids grow out of stuff all the time, pretty quick too, mostly.

Well, a few years later television came to town, and the rest is misery. Until then I ran around outside, played baseball, fed peanuts to squirrels, watched ants crawl around on peonies, and entered grade school. Very few if any of my toes fell off, and my shoe fit didn't seem to suffer the loss of x-rays, but I missed the scientific method as applied by gimmicky machinery to an annual footwear purchase ritual.

Choice matters.

Especially for older merchandise consumers, like adults. Especially cranky ones like me. Especially cranky ones carrying backpacks around and grunting inside clouds of flies. That's why custom packs are a good idea. There's a custom pack to fit the hump of every grump. Because. That's what custom means, doncha see?

I tried last year about this time. Heard good things and contacted Mr. Sam Jepsen of JepPaks. He got confused. And backed away. Now if I try to go back to the JepPaks web site and see what he's up to, I get only "Website Expired. This account has expired. If you are the site owner, click below to login." So I guess that's over. No more Sam, no more JepPaks.

This year I contacted Mr. Christopher Zimmer of Zimmerbuilt. Sounded good. Got a positive response. He's even made a pack that was sort of vaguely related to what I want, the "ZB2 - Gowler". So I figured he'd be open to trying to do something off the beaten track and back in the bushes about half a mile, which is what my design is like — odd but very simple to make. So I pulled together my specs and dug up a bunch of photos of my original self-made pack, and. Haven't heard a damn thing back from him.

Two possibilities: He's either otherwise occupied, with illness, a vacation, his real job, a crisis in the family, or whatever, or he's blowing me off by playing dead.

"Effort or effit." That's my new motto. I'm not going to whine and beg, so effit then. I'll find a way to make the pack I need, maybe next winter. Meanwhile, I've got a pack on order from a real company, a Mountain Laurel Designs "Prophet". It's close enough to what I can put up with to work for me. I can fudge a little, find a way to stiffen it, add capacity flexibly, add compression. Its relatively generous design should let me move the furniture around, depending on which party I'm headed for.
Hey, I did set off in the summer of 2013 on a 12-day, no-resupply trip carrying a North Face 26L "Verto". And came home again. It can be done. With some fudging. Though that was not fun.

What I did was to customize it. Get the drift here? Customize.

I sewed on two ginormous side pockets which together equaled about a third the volume of the pack bag. Then I added another pocket in front (confusingly, the "front" is the side of the pack that's way out back). This contributed another big boost to the pack's volume. And then I started off carrying my hammock, tarp, and under-quilt in a largish stuff sack lashed on top. I probably had about 45L to work with in the modified pack, and even more in the stuff sack, and stowed more and more things back inside the pack bag as I ate my way through the trip's provisions.

So things can be done.

Also, mistakes were made, lessons were learned, pain was encountered. Such is life among those living desperately.

Which is why I want to get back to where I left off, with a really good and really custom pack. And it looks like I'll have to do it all myself. Such is life, period. OK, fine. I'll do it then. But not at this moment, I guess, because I don't have materials here, or time, or a sewing machine. Right now.

And yes, this is really necessary. Necessary and normal. We're all different even in the midst of our seeming sameness. Last year I tried two different packs. Both worked. Both were wrong. The first was an REI "Flash 45" and it had all sorts of confusing little straps routing themselves here and there and beyond, and the shoulder straps made me howl in pain. The second was a Granite Gear "Crown 60". Tighter, lighter, bigger, better-designed, kinda, but the shoulder straps also made me howl in pain. And a pocket ripped the first time out. And the hip belt was permanently too big.

And I'm a good fit. If I buy clothes in my size, they fit. Like they were made right for me, you know? Pants, shirts, socks, underwear — all OK. Not so much with packs. I don't know. Something's off. If you can't fight 'em, can't join 'em, then effit, 's what I say. Eff-M-All, and make your own. Which I guess I'll have to do when I can, if I can.

Which brings us around to actual evidence. Because I'm not making up all of this. Not all of it. I have the U.S. of A.'s own Force d'Air on my side here. Right here. On my very own side. And them fellas is smart some of the time. "In the late 1940s, the United States air force had a serious problem: its pilots could not keep control of their planes." See? That's Step One, observe symptoms. "'You never knew if you were going to end up in the dirt.' At its worst point, 17 pilots crashed in a single day. The two government designations for these noncombat mishaps were incidents and accidents, and they ranged from unintended dives and bungled landings to aircraft-obliterating fatalities." Check.

Step Two is to locate the cause of said symptoms. This can be hard. "After multiple inquiries ended with no answers, officials turned their attention to the design of the cockpit." Hmmm. Maybe if we take sort-of average pilots, and measure the hell out of them, and average all the measurements, we'll be able to design a cockpit that will fit...all pilots, they thought. So. What? Then what?

Zero. "Out of 4,063 pilots, not a single airman fit within the average range on all 10 dimensions. There was no such thing as an average pilot. If you've designed a cockpit to fit the average pilot, you've actually designed it to fit no one." A true WTF moment, folks, sponsored by your tax dollars, or those of your parents, or your grandparents, depending, of course.

Step Three is solving the actual problem. Which for the Air Force was not the crashing planes (that was a symptom), or pilots that didn't fit the planes (that was another symptom), but the lack of understanding that "there was no such thing as an average person". And to solve the problem the Air Force had to actually do something. Because "any system designed around the average person is doomed to fail." Rather than finding hikers or pilots average enough to fit the ideal backpack or fighter-plane cockpit, the solution is to customize the hardware so it will fit actual humans.

As for the Air Force, "they were able to focus on fitting the cockpit to the individual pilot. That's when things started getting better...They designed adjustable seats, technology now standard in all automobiles. They created adjustable foot pedals. They developed adjustable helmet straps and flight suits."

As for the outdoor industry?

What. We have 16 different packs from one company, all made on the same basic plan, all in your choice of Medium or Large, so take your pick. You're sure to find a great fit, assuming that you like a three-foot-tall, six-pound, top-loading pack (empty weight) with two tiny mesh pockets outside, no noticeable compression, and a hip belt that fits anyone with a waist size from 32 inches to 48 inches. And you can stand shoulder straps carved from wood. And you think maroon and yellow go well with the outdoors.

And if you're a woman, well this year they're introducing a special model just for you. It's exactly the same as their real pack, except it costs more and has a tiny label over on the side that says "Designed Especially for Women".

Love it or effit.

Meanwhile, back at the ranch: "By discarding the average as their reference standard, the air force initiated a quantum leap in its design philosophy, centered on a new guiding principle: individual fit. Rather than fitting the individual to the system, the military began fitting the system to the individual...it was a practical solution to an urgent problem.." Pretty good for government work, right?

Step Four Let's see more custom-designed and custom-made backpacks because I've got a body and goals and attitude that aren't exactly like yours, and I don't like being ornery out on the trail. Are ya with me or agin' me? (Hint: I don't really care what you think, though I'm not actually too scary in person most of the time, and not all that hard to get along with, and if you get bothered you can push me down and take my lunch money and make me cry, if that's what you like. True. So don't worry.)

Criteria (There are two.): (1) My pack has to fit me. (2) It also has to suit me: durable, comfortable, capable.

That's all then. Is this really, truly impossible? More difficult than building supersonic warplanes?

More:

When U.S. air force discovered the flaw of averages

Review: Granite Gear Crown 60

Shoe-fitting fluoroscope

Desperate Living

Wednesday, March 25, 2015

Fresh Squeeze

The Setup

Hoping to make it simple again.

I had to discard my self-designed, self-made pack when I moved out of the country in November, 2012.

Since then I've used a modified North Face summit pack (base volume: 32L), and a GoLite Jam (50L), but neither one came close to the light weight and usability of my own design.

The North Face is great for what it is. I added a deep pocket on each side, and another huge pocket on the front to roughly double the volume. Still, I had to strap on a large stuff sack when setting out on an 11-day trip, and it hurt. The pack is well-designed and well-made, but the shoulder and hip padding are light, and being a top-loader, the pack is as hard to load as any other of its kind.

Last summer, after my second winter out of the country, and running short on time, I bought a GoLite Jam. Some famous superlong-distance hikers use it, and at $109 it was super cheap. The pack was well-made and carried well, but was poorly designed. Another top-loader, it suffered from having that tiny hole to put things into, and its side pockets were laughably small — useless in fact, like most pack pockets.

I sloppily and quickly sewed up a couple of big side pockets, and made do.

But Ow!

The padding was even less capable than the summit pack, and the Jam weighed at least twice as much since it was made of some kind of over-sturdy miracle fabric that can withstand nuclear war. Empty, the pack weighed around 2.5 pounds. I don't remember exactly but its heft startled me every time I picked it up.

I'm talking past tense here because I cut up the pack to get the straps and hardware off it. I also cut off the front pocket and might use that until I have time to sew up one for my new pack. It might seem like a waste of money to chop away like this, but after only two trips I got to hate this pack. As noted, it did carry well, but it was a bitch to actually live out of.

Right now I'm learning to sew again. I've been away from it for several years and I'm having to re-make all my previous mistakes. At this point I'm on my third try, but doing better. Just yesterday I stopped work on the pack yet again because I found out that REI sells hip belts and shoulder straps. I ordered two of each, from different makers.

Shoulder straps and hip belts are hard to make. They're detailed, full of little bits, fussy to sew, and critical. I've successfully made several sets in the past, but that's no reason to go through all the trouble again, so I'll just attach what someone else has made and concentrate on the pack bag, which is what is unique about my design — the only part that is really important to me.

Waiting another week for the parts to get here is really a wash anyway — it would take me at least that long to sew up my own, considering all the mid-course design tweaks I'd need, and all the sewing mistakes I would make and have to undo. I've been spending at least half my time ripping stitches that I've just sewn. Yes, I need help. This might make the difference.

Until the stuff gets here on April 1, I'll work on my hammock.

OK then, what follows is the beginning of my documentation. I'm developing non-paper-based plans this time, so I don't have to lose them next time I move. I'll update this as I go along, and will probably include the plans in my upcoming book on backpacks.

Squeezo Pack

Finished Dimensions And Volumes

Pack body dimensions:

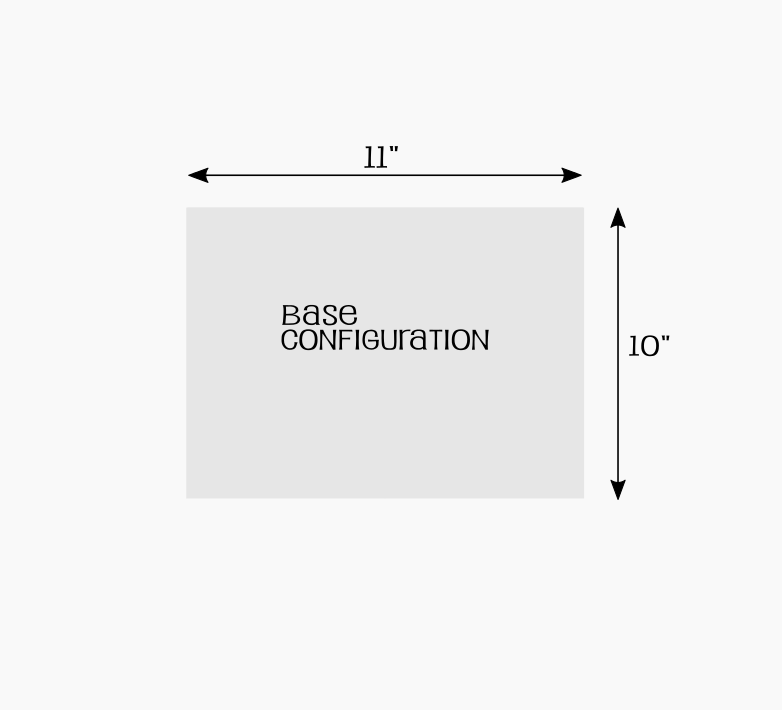
  • Width : 11 inches
  • Depth : 10 inches
  • Height: 22 inches

Note on the design illustrations:

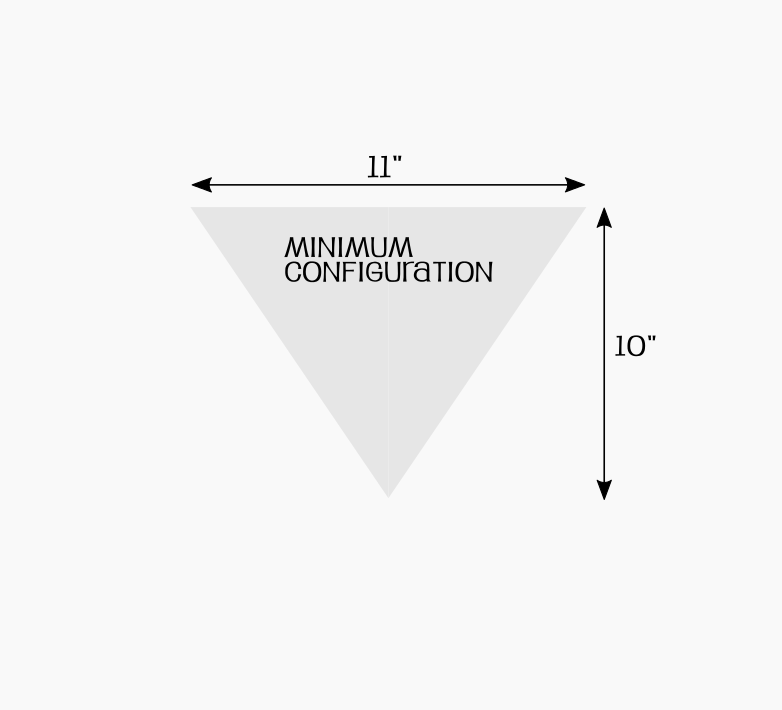
  • Base volume has a rectangular, nearly square pack area. This is a sort of standard or "normal" configuration.
  • Minimum volume has a triangular pack area in the design.
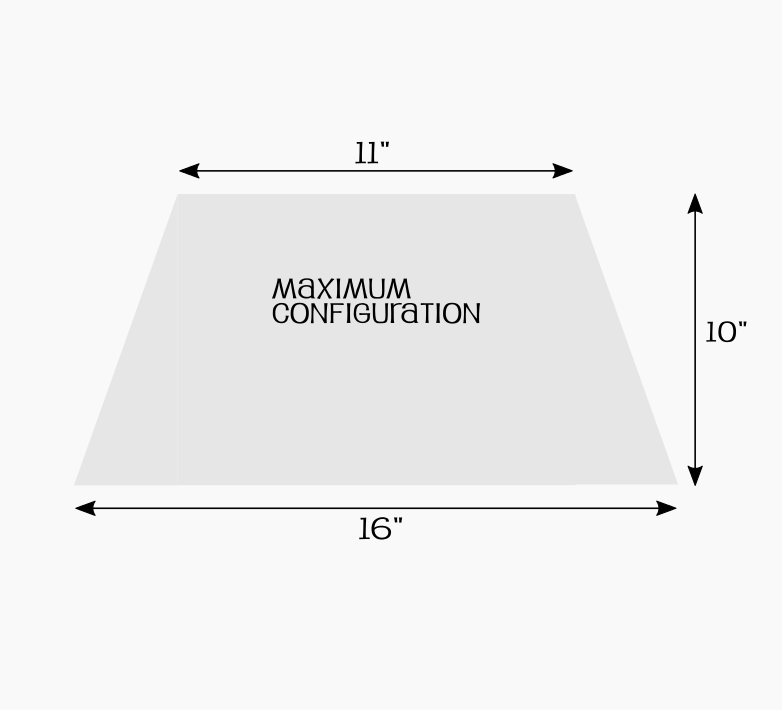
  • Maximum volume has a trapezoidal pack area in the design.

In practice, these areas collapse to a more circular configuration, with the pack assuming a cylindrical shape.


Pack body volume range (ignoring the side pockets).

Pack ConfigurationDimensionsEffective DiameterVolumeVolume
 (inches)(inches)(cubic inches)(liters)
Base ("normal")10*11*2213.4308851
Minimum (fully scrunched)3*5.5*229.87121028
Maximum (fully expanded)11*10*16*2215.0386763


Side pocket dimensions.

  • Width :  8 inches
  • Depth :  8 inches
  • Height: 20 inches

These are nominal dimensions. The pocket fabric folds over and is sewn to itself at the bottom end, making the pockets sort of funnel-shaped — almost flat with no volume at the very bottom end but square-ish and full-sized for roughly the top two thirds.


Side pocket volumes.

Nominal pocket volumes according to their raw measurements.

  • Each pocket : 1280 cubic inches / 21L
  • Both pockets: 2560 cubic inches / 42L

Estimated pocket volumes according to their actual shapes.

  • Each pocket : 1090 cubic inches / 18L
  • Both pockets: 2180 cubic inches / 36L


Total volume: pack body plus side pockets.

Pack ConfigurationVolumeVolume
 (cubic inches)(liters)
Base ("normal")526886
Minimum (fully scrunched)339056
Maximum (fully expanded)604799


Pocket Construction

Raw fabric dimensions: Two pieces 28 inches wide by 22 inches high. There are two pockets, so this requires two identical pieces of fabric.

Finished dimensions: Two pockets of 10 inches wide by 20 inches high.

Notes:

  • Each pocket sews to the side of the pack within a space that is 10 inches deep front-to-back and 22 inches high.
  • Pockets have elastic sewn into their top hems. (Optional, depending on personal taste.)
  • Each pocket has a grommet in the top hem for additional support when carrying heavy loads, like water. Run a cord through the grommet of each pocket and across the pack's top, then pull it tight and tie it off. (Optional, depending on personal taste.)

Construction sequence:

  • Hem the raw fabric to 1 inch all around.
  • Run a cord through the tube-shaped hem at the top of each pocket before closing off its ends.
  • Use that cord to pull an appropriate length of elastic into this tube, then solidly bar tack each end of the elastic. (To have any effect the elastic must be significantly shorter than the pocket's width.)
  • Fold and pin the fabric at bottom of the pocket so it will fit into a 10-inch-wide space.
  • Sew the pockets onto the pack, flush with the pack's bottom side. Use plenty of bar tacking along the bottom and sides.
  • The finished pockets will be 2 inches shorter than the pack is tall but will take up the full width of each side.

More:

Previous generation Squeezo (Looks goofy — I've since changed the blog formatting. And I don't remember if there was ever a "Part 2".)

Wednesday, February 25, 2015

Tyvek Wallets

I never know what I'll find there. At Swain's General Store. It's a guy place here in town.

Got stuff. Fishing stuff. Hunting stuff. Camping stuff. Hardware hardware. Household hardware. Outdoor clothing.

In the outdoor clothing area, that's where I saw the wallets. $12.87 each. Tyvek wallets.

I came home and looked them up. Made by an outfit called Dynomighty. Got a bunch of tyvek wallets, them, with a selection of printed designs. Go there and see.

Or you can make your own, either the right way (see link to instructions below), or the sloppy way (i.e., whatever).

Might be right for someone out there. Might be right for you.

The Mighty Wallet is tear-resistant, water-resistant, expandable and recyclable. Made from Tyvek (think express mail envelopes), these cool wallets resist tearing because of thousands of interlocking plastic fibers spun in random patterns, giving them incredible strength.

The ingenious origami construction was and is the original folded paper wallet designed by Terrence Kelleman. The stitch less design reinforces the materials own strength and allows these very slim wallets to instantly expand and adapt to your own personal storage needs. The Mighty Wallet will expand right before your eyes.

Because of the slim, lightweight and water resistant features, you can take these cool wallets anywhere. They make great "night out" wallets for a slender silhouette and the writable surface conveniently acts as a quick note pad on the go.

In time, the Mighty Wallet will gradually soften and patina but, even after years of wear, it will still offer surprise and solicit intrigue.

Check them out...

Mighty Wallets on YouTube

Dynomighty Tyvek Wallets

At Amazon

How-to at Instructables

Make your own gear: 5-gram Basso Bifold Wallet (via Andrew Skurka's site)

Selected print samples...

Alaska

Camo

Comics

Hiroshige

Wednesday, July 30, 2014

What's Good For Poking, Then?

Try some of these.

Last time I wrote about fish bags. This time it's about potato pokers. Not a new series of card games but tools. For those who like to do naughty things to vegetables.

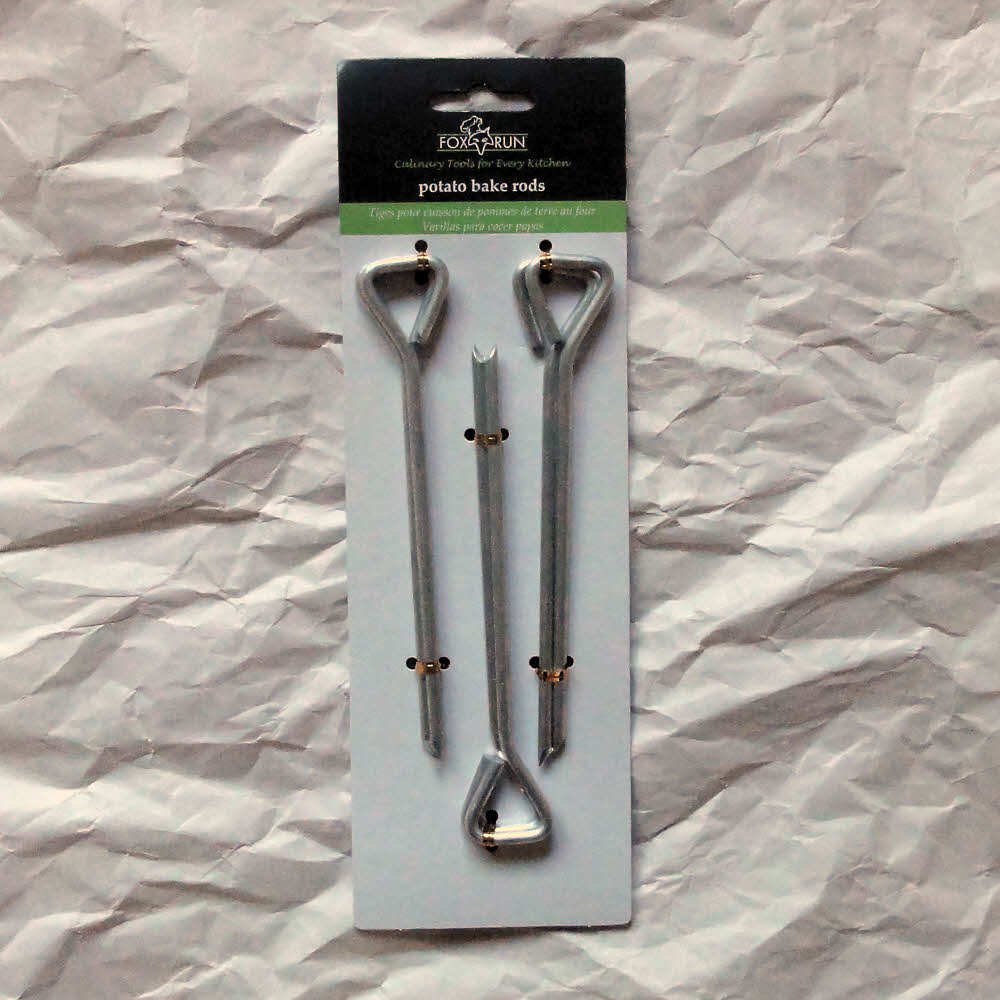
I guess they do have a legitimate use — coaxing potatoes to bake a bit faster. The intent seems to be that an aluminum rod shoved through a raw potato will convey oven heat into the tuber's inside, encouraging it to cook faster.

OK fine. If you really want to.

But baking is naturally inefficient anyway, so why fuss? If you want fast, go straight to steaming, after hacking the lumpy root into manageable pieces. Steaming's wicked fast, but then, who am I to judge those who enjoy the slow, juicy shove?

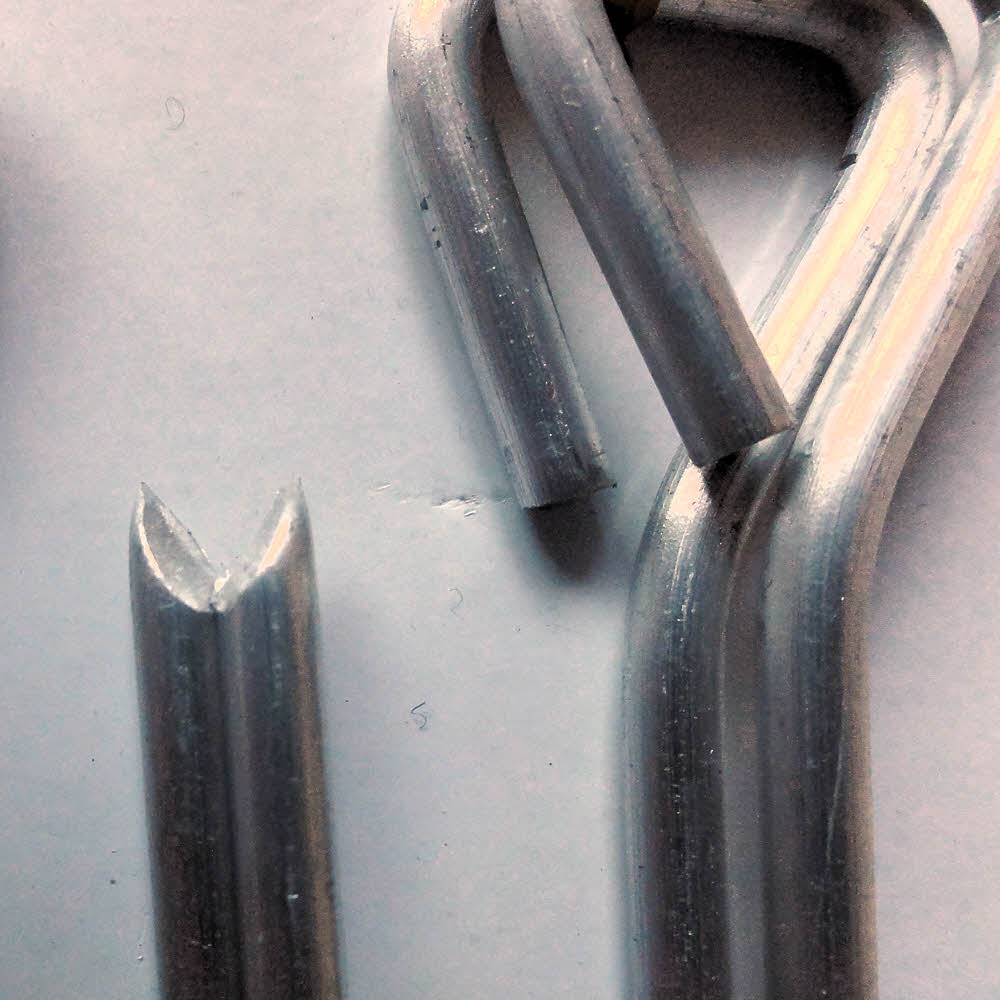
I did, however notice the points. They are pointy, these implements. And cheap.

I forgot to write down the cost, but it was around $2.75 for the six of them, much cheaper than official tent pegs. And I need a set of pegs, since I recently got two little shelters that I need to try out.

Did I say pointy? Pointy and light. Very light. Large-diameter but light — all aluminum. They should work, but if not, I know where the potatoes live if I want to do some serious pricklement, indoors some night. When I'm in one of those moods.

More:

Potato Bake Rods – 5588

Wednesday, July 23, 2014

Bagses For The Fishes

My New Plastic Pals.

A little item, but fun.

Living in western Washington state as I do, I never go anywhere without preparing for rain. For years I've been using three kinds of plastic bags to protect my things:

  • Trash bags
  • Cleanup bags
  • Compactor bags

Trash Bags

One is the ordinary large trash bag or leaf bag. These have a capacity of around 32 gallons (121 L), and are made of extremely lightweight plastic (I'm guessing that it's about 0.7 mil or 0.02 mm). That's good and bad.

Good: These are big bags, big enough to cover a lot of gear inside a pack, but weigh only about an ounce (28.4 g).

Bad: They're extremely easy to tear, either by stretching if grabbed the wrong way, or by snagging on the smallest, most innocent-looking thorn or bramble.

If the weather is likely to be gentle I may use these inside the pack, and take an extra one as a pack cover.

Cleanup Bags

Cleanup bags or contractor cleanup bags are seriously hefty. They're about the same size as the ordinary trash bag, but each one weighs four ounces (113 g). Add a few of these to your load and, although you probably can't actually feel the weight difference, you'll feel guilty anyway.

Good: These bags are extremely tough and durable. And large. So if you don't need the bag's full volume, you can cut it down to size.

Bad: Heavy and stiff. They're heavy enough to make you wish there was an in-between weight. But there isn't. Not for this size of bag — it's either the too-light trash bag or one of these, which feels more like a wooden box than a plastic bag.

Compactor bags

Trash compactor bags are smaller than the previous two types, with intermediate strength and weight. They weigh two ounces each. In slightly less amiable weather, I may use one to hold my sleeping bag, but they're too short. Usually I take two, one with its open end up, holding the sleeping bag, and a second compactor bag as a lid, going over both the other bag and my sleeping bag, with its open end down.

This way, I get lots of protection and since nothing is tied shut, it's easy to squeeze the air out of the sleeping bag and both protective bags as I close up my backpack. And if anything goes wrong and one compactor bag goes out of commission, I have a backup plastic bag to put my sleeping bag in.

I normally use this type bag for my food. I bag my food as individual meals, collect and bag separate meals as a bunch, and keep the whole shebang in a compactor bag. The more layers the better, because my goal is to be aromatically undetectable, food-wise. The bags' white color also helps me to keep track of it while it's hanging overnight, and in re-locating it the next morning.

Also, using compactor bags gives me a target.

When I stop at the end of the day, I lay out a compactor bag flat, and then put my loose things on it. No matter how dark things get, I can always see where that bag is, and know that the last little thing I laid down is right there, on top of it. Although morning light is stronger, I use the same technique — the white square is a flag I can't miss.

Meh.

But there is a problem: all these bags are opaque. The first two kinds are black or brown-black, and the compactor bags are white. White is an anti-stealth flag, but has its uses, as just noted. Black, gray, or any other dark color is more stealthy but hides the bag's contents just as well as the white bags.

Which is where fish bags come in.

Hmmm.

At the moment I'm living next to salt water. People fish in it. Less than two blocks from my place is an old-fashioned general store which leans toward the hardware end of things. You never know what they have until you wander through the entire store and look at everything one more time. It's amazing. And they have fishing equipment.

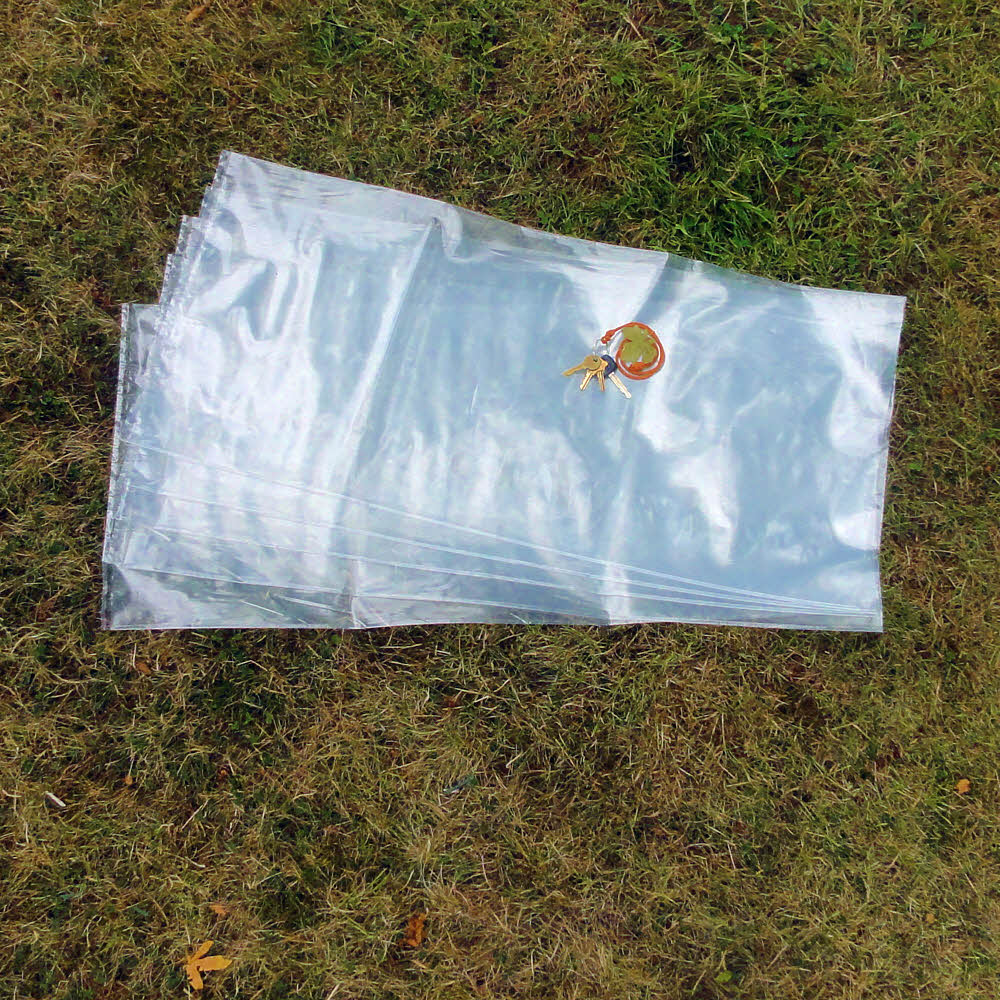
One item I walked by about two dozen times without looking was a box full of polyethylene bags. Clear polyethylene bags. Big ones. Huh. Ninety-seven cents each. I didn't know what I'd found until I tugged at the corner of one. Wo. Large, tough, heavy, and transparent. That's what I've got now. I bought five.

I don't know how common this sort of thing is. I found only one reference to it, which says 'These are heavy duty bags that are great for keeping your catch it [sic] until you can get it back home. They are 22"x39" 4 mil poly ice bags.'

That sounds about right. I thinks that's exactly what I've got.

Now I'll try them out on the trail, hanging my food in one, and, well, we'll see. Maybe one for food and one for bedding this time. They're perfectly transparent so there will be no doubt about what's inside, and the way they're built, each bag should be good for several trips — maybe the whole season.

More:

Heavy Duty Fish Ice Bags

Thursday, May 30, 2013

May The ForceFlex Make You Glad

Going totally tubular.

Did you ever go to a music festival, and wake up in garbage?

I mean, like, surrounded by it? Like, as far as you can see?

So think about that, and then think about this too, OK? When you're out backpacking sometime, just look.

So you're there on the ground, right at eye level with it, and what is out there? Garbagy stuff, mostly.

What fell off trees, and twigs, and leaves, and random pieces of nameless whatever covering the ground, what is it?

Garbage. Tree boogers. Forest hair in the brush.

None of it won't clean itself up.

So what do you do at a music festival - you leave, right? You go home and don't mess with it. You leave the garbage for someone else, but what if that's you? Then what?

See, someone has to, so the folks at Glad (The Glad Products Company) are all smiles, because they invented disposable trashbag tents. For rock festivals and stuff. So if you're the dude (or dudette) which has to do the cleaning, and everybody's crashing in Glad ForceFlex Trash Bag Tube-Tents, then you have a field full of trash bags to chuck stuff into after the premises are evacuated.

And this will work when backpacking too, 'cause there's lots of trash out there, as was noted. You can continue leaving everything as-is and walking away, or, if you want to, with your trash bag tent, which wouldn't be that hard to make, you can do some policing of the area during said exit.

Cool.

Now, what's next? I vote for an edible sleeping pad.

Most of the inflatable ones have some kind of rubbery foam inside, so why not sponge cake? And the shell could be like a fruit leather, you know - flexible but tough. And tasty. I like grape, or apple cinnamon.

This would be the ultimate in multiple use and gradual weight reduction since you eat it up as you get used to sleeping on the ground, and your pack weight drops accordingly, day by day.

And what about bug netting? Toilet paper works, it is breathable.

Hang it over the tent's open end to keep out the bugs, and there it is in your face the next morning when you need it the most. Handy, right?

Speaking of screening, you probably have an old backpacking stove that hasn't been used in years sitting in a corner of the garage, and the white gas in it is all gelled. At this point you think "Toss or not?" Sure thing on the stove, it's toast, but you can still use the fuel, which is good for two different things.

See how we're all multiple use today?

Take this old gummy gelled fuel and rub it on any exposed skin areas you may have. There's a little-known fact here, that this stuff makes great sunscreen. True. Then when you get to lunch, scrape it off again, plunk that residue in your little alcohol stove, and cook. A reasonable amount of hair or peeled skin in it won't hurt - the smoke makes skeeters back way off, though it does attract some flies, and the occasional grizzly. It's like Sterno with a fur coat. (The fuel, not the bears. Bears are like fur coats with an appetite.)

Now, upping it a notch, some people use quilts instead of sleeping bags, but this is still single use, right? And wrapping up in either one to keep warm in camp is still kinda single use, so what can you do with a sleeping bag (or quilt) that's rad?

This one is easy, so easy, for everybody that's done a lot of seam sealing, and has all these half-squeezed tubes of the stuff - just dilute it and paint it on your sleeping bag (or quilt). Make sure you have enough before you start, so as to cover it all.

So when this is now dry, glue on a valve from an old air mattress and you have a sleeping-bag (or quilt) pack raft. It still works to sleep in, and now it's also got a vapor barrier, so it's warmer too, and when you get to a lake or a river you don't have to hike around any longer. Instead, you inflate your bag (or quilt) do some paddling, and if that makes you tired, you've already got everything out, so you can go right to sleep. Repels rain too.

No ideas yet on a second use for a pack. So far it's just a hole with some dead things at the bottom, where it's all dark, but maybe an idea will come along.

More:

EAT

Disposable Trashbag Tents Are the Cleverest Way To Keep Camping Clean