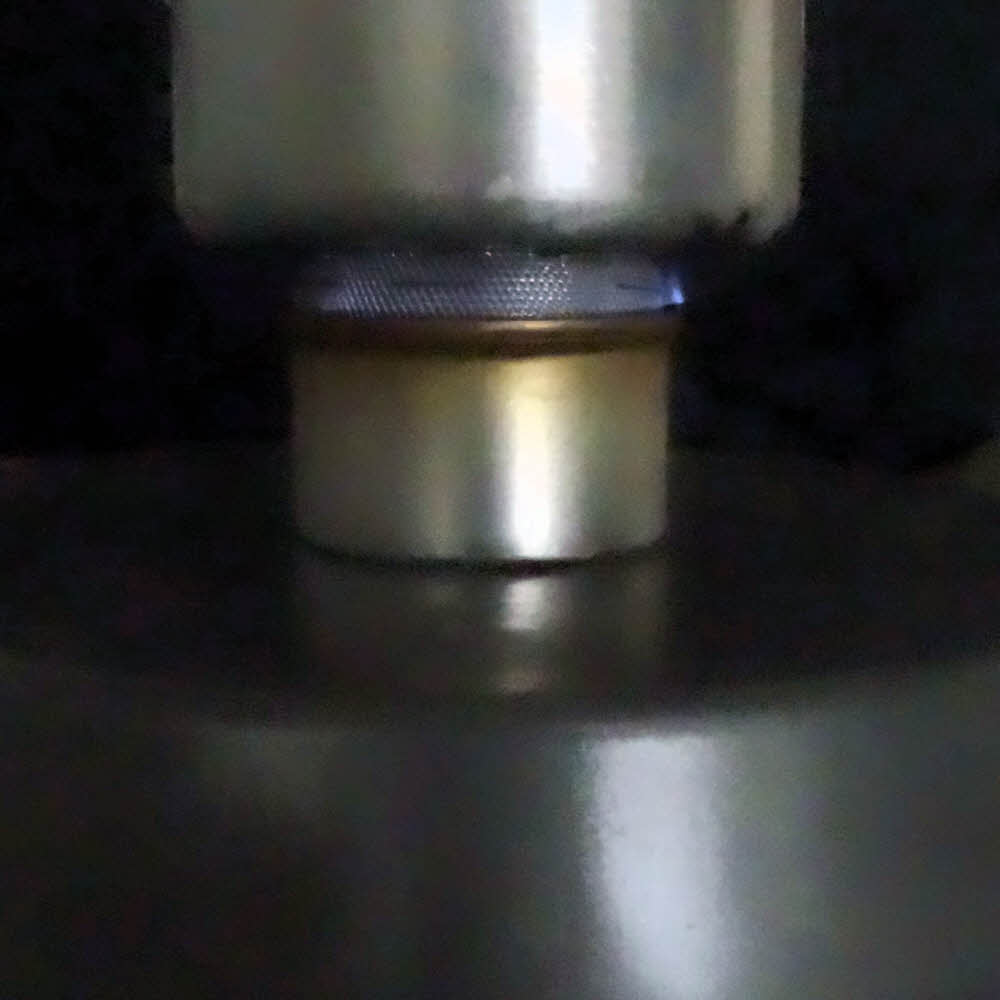
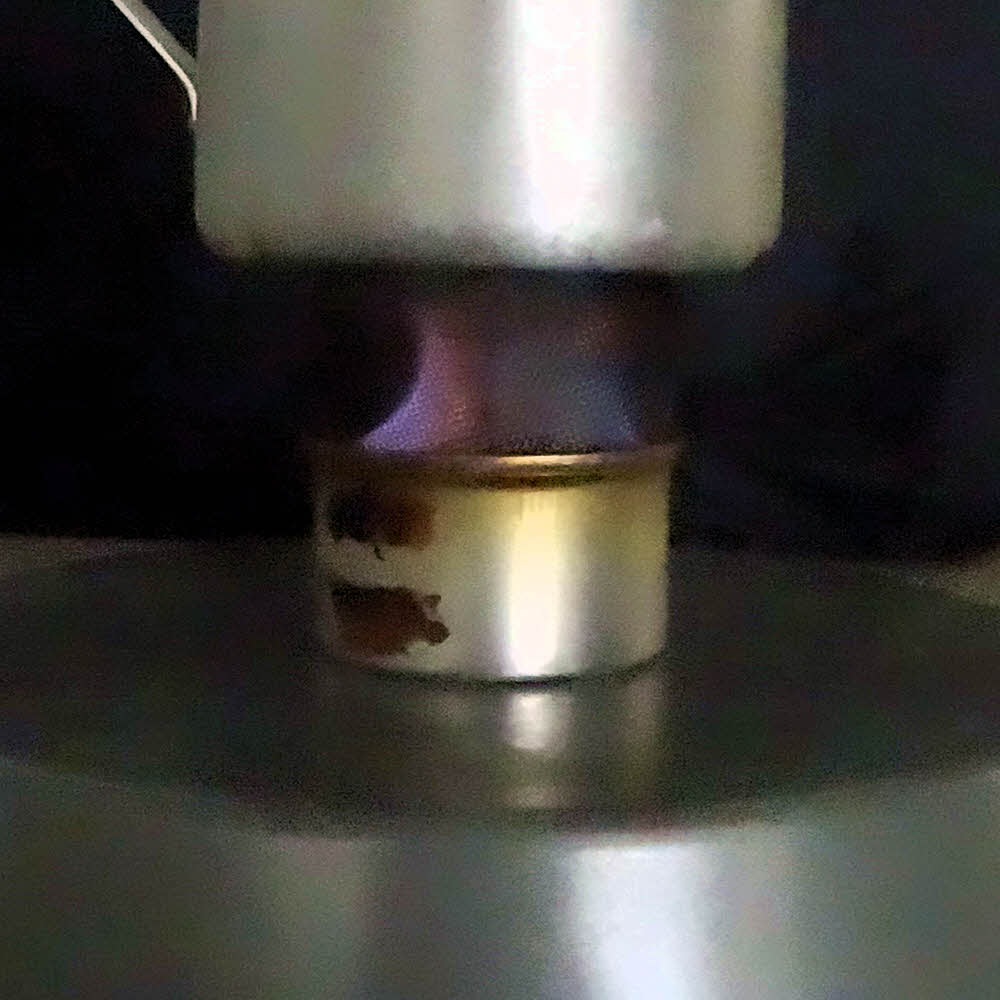
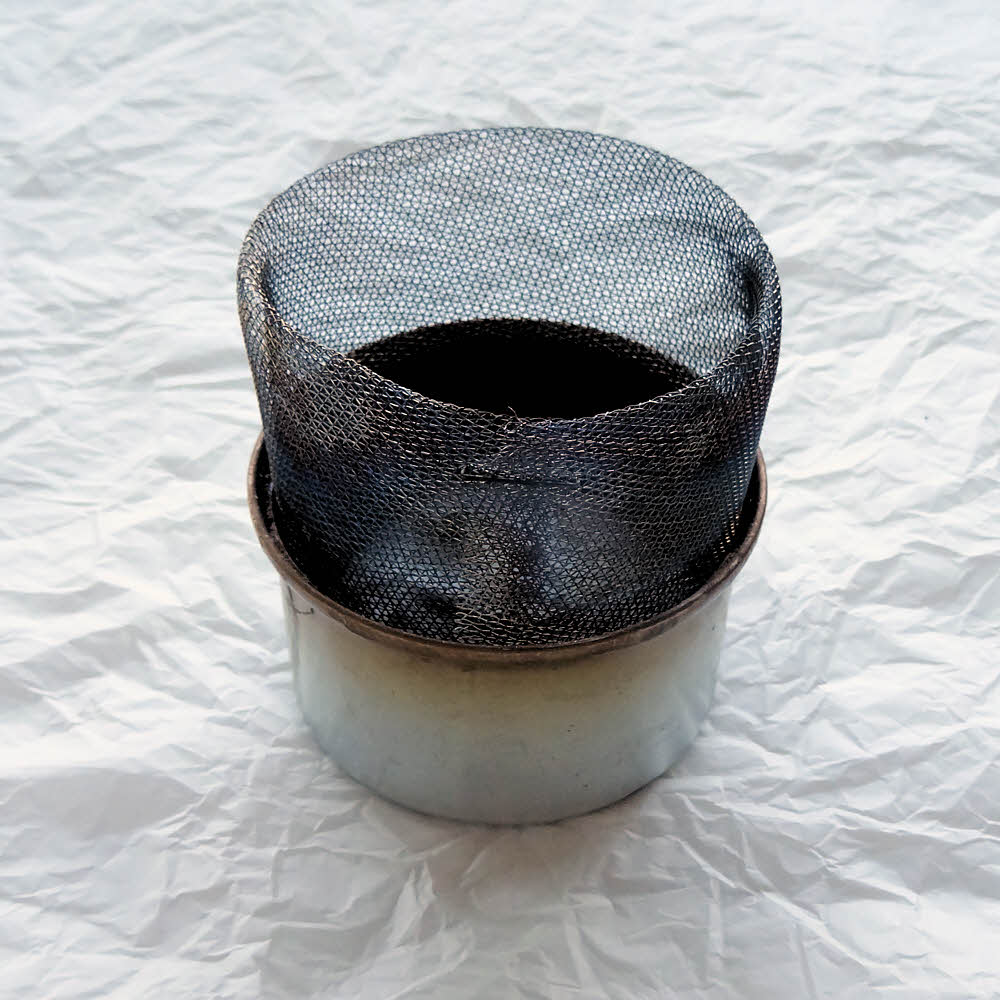
Showing posts with label stoves. Show all posts

Friday, June 7, 2024

Pot Stand

Pot Stand

(1) A pot stand is a support that goes under a cooking pot to hold it above the stove's burner. Some stoves have them built in. (Are you excited yet?)

(2) A marijuana patch found back in the hills. In the recent past these were usually watched over by cutthroats, but nowadays they may be watched over by upstanding, cutthroat, and yet legal entrepreneurs. Go figure.

(3) Pot Stand is a game played by long-distance backpackers who are desperate for entertainment after endless weeks on the trail.

This so-called game consists of putting a cooking pot down in a level place and then doing a headstand on top of it. The one who lasts the longest wins. If no one can do this at all, then the one who comes closest to getting upside down is the winner. If no one can get close to being upside down, then the hikers may just roll around in the dirt. Some of them like that sort of thing.

But sometimes the hikers just eat, grunt a few times, scratch a bit, and go to bed, often without washing up first.


Have anything worth adding? Then try sosayseff@nullabigmail.com
Me? Grunted once. Maybe twice. No one seemed to notice.


Etc...

so says eff: sporadic spurts of grade eff distraction
definitions: outdoor terms
fiyh: dave's little guide to ultralight backpacking stoves
boyb: dave's little guide to backpacks
snorpy bits: nibbling away at your sanity
last seen receding: missives from a certain mobile homer
noseyjoe: purposefully poking my proboscis into technicals

Wednesday, October 25, 2023

Isobutane

Isobutane

(1) Methylpropane or 2-methylpropane. That's what some people call it anyway. You can call it Fred if you like. There are those who will think you're clever.

So hey, this stuff is an isomer (chemical variant) of CH4H10 that's found in natural gas. No — the natural gas that comes out of the ground, not that other kind that you make at home.

Isobutane as we're talking about it is used as a propellant in aerosol sprays such as hair spray and cooking sprays. It also replaced Freon in refrigeration systems. True. Get a hot stove burner and then shoot flammable gas all over the stove, or gas your hair while smoking or even being in the general vicinity of a spark (FIREBALL!!!). Replace Freon, a fire-suppressing chemical with flammable gas. (GREAT idea!!! Let's do it NOW!!!)

And, of course, this stuff is also sold in pressurized canisters as fuel for backpacking and camping stoves. (Almost makes you want to yawn, right?)

(2) A fuel used in canister stoves. An isomer of butane with a lower boiling point that provides an almost constant level of pressure even if a canister is nearly empty.

(3) A fuel used in canister stoves. (Heard this one before?)

It is an isomer of butane (The simplest alkane with a tertiary carbon!) with a lower boiling point than butane's, which provides a more constant level of pressure even if a canister is nearly empty.

Isobutane is also used as a more environmentally-benign refrigerant than chlorofluorocarbons or hydrofluorocarbons, which eat ozone, and as a propellant for the products inside aerosol cans, such as hair spray.

So there you are... You already have the hair spray, and if you have a comb too, and a bear grabs you by the leg, you can bargain your way out by offering an impromptu perm job. Maybe. If the bear isn't that hungry. And doesn't really have time to properly kill you. And you can run really fast when it finds out that its new 'do will only stay put for around sixteen minutes, max, because it just doesn't hold on greasy fur, and tastes only half as good as bug poison when you try to lick yourself clean.

Example: "Ike sold isobutane down by the icy shore. And burned it too to make soup and stew."


Have anything worth adding? Then try sosayseff@nullabigmail.com
Me? Never touch the stuff. My hair's good as-is.


Etc...

so says eff: sporadic spurts of grade eff distraction
definitions: outdoor terms
fiyh: dave's little guide to ultralight backpacking stoves
boyb: dave's little guide to backpacks
snorpy bits: nibbling away at your sanity
last seen receding: missives from a certain mobile homer
noseyjoe: purposefully poking my proboscis into technicals

Wednesday, August 9, 2023

Wood Gas Stove

Wood Gas Stove

(1) A gasifier.

Gasification is a process that converts wood into gases and then burns them at very high temperatures.

The process combusts the wood smoke to a point in a way such that the outputs are only heat and ash.

The process is extremely efficient and gets the most energy out of wood while creating no smoke.

Wood gasification turns wood into carbon monoxide and hydrogen by reacting it at high temperatures with a minimal amount of oxygen.

Without oxygen, the wood doesn't burn but transforms into gas, which then burns.

(2) A simple but clever type of wood-burning stove in which the fuel burns from the top down, so that the heat of the flame generates smoke, which then rises into the flame and is cleanly consumed.

Such a stove can be made simply enough to serve as a lightweight and nearly foolproof backpacking stove.

(3) A stove that burns fumes from wood that's been eating the wrong stuff.

(4) A mythical device created to burn naturally-occurring but elusive gas emanating from forests.

That was based on the "swamp gas stove", which burns naturally-occurring gas emanating from swamps. (Also mythical.)

This in turn was derived from the "spirit burner" a device used by third degree initiates into the secret society of transcendental esoteric ectoplasmic spiritualist chemists, who worked exclusively in the dark, behind heavy, locked, oaken doors draped with thick, sound-deadening curtains. (Also mythical, and so on.)


Refs:
Gasification
Wood gas
Wood gas generator
Batch-Loaded, Inverted Down-Draft Gassifier (wood gas stove)


Have anything worth adding? Then try sosayseff@nullabigmail.com
Me? Not quite acceptable in polite company any more.


Etc...

so says eff: sporadic spurts of grade eff distraction
definitions: outdoor terms
fiyh: dave's little guide to ultralight backpacking stoves
boyb: dave's little guide to backpacks
snorpy bits: nibbling away at your sanity
last seen receding: missives from a certain mobile homer
noseyjoe: purposefully poking my proboscis into technicals

Wednesday, July 5, 2023

Optimus

Optimus

(1) One inclined to assume that only good things will happen. "The optimist claims that we live in the best of all possible worlds. The pessimist fears that this may indeed be true." — Queen Elizabeth II (now dead), et al.

(2) Brand of mountaineering and backpacking stoves made in Sweden, from the 19th century through the present. (Woot, and so on.)

(3) A Swedish company founded on June 19th 1899 by three engineers, and still in business as a producer of outdoor stoves, cooksets, utensils, and cutlery. Although the company makes modern liquid-fuel and canister stoves, it still has in production two models that it has been making for many decades, one for 70 years and one for over 100 years. The company is now owned by the Katadyn Group.


Have anything worth adding? Then try sosayseff@nullabigmail.com
Me? Still trying not to burn my fingers while picking my nose.


Etc...

so says eff: sporadic spurts of grade eff distraction
definitions: outdoor terms
fiyh: dave's little guide to ultralight backpacking stoves
boyb: dave's little guide to backpacks
snorpy bits: nibbling away at your sanity
last seen receding: missives from a certain mobile homer
noseyjoe: purposefully poking my proboscis into technicals

Wednesday, June 28, 2023

Nimblewill Nomad Stove

Nimblewill Nomad Stove

A.K.A. "Little Dandy stove", this is a collapsible solid-fuel-burning stove made from flat plates of steel or titanium that link together with tabs and slots in the metal.

Disassembled it is an easily packable set of flat plates but sets up again in seconds.

It was invented by Meredith "Eb" Eberhart (trail name "Nimblewill Nomad"). Its five flat, thin steel plates assemble without fasteners, and quickly unhook again and fold flat for storage.

It was used by Eberhart in 1998 during his 4400 mile, 10 month walk from Key West, Florida to Cape Gaspe, Quebec along the International Appalachian Trail. The stove allowed him to burn anything at hand, and thus to carry no fuel. Smart guy, that one.

As for what to burn in it, see "The Firewood Poem" by Lady Celia Congreve from 1930.

O hey — I guess I have it right here...

These hardwoods burn well and slowly,
Ash, beech, hawthorn oak and holly.
Softwoods flare up quick and fine,
Birch, fir, hazel, larch and pine.
Elm and willow you'll regret,
Chestnut green and sycamore wet

Beechwood fires are bright and clear
If the logs are kept a year.
Chestnut's only good, they say,
If for long 'tis laid away.
But Ash new or Ash old
Is fit for a queen with crown of gold.

Birch and fir logs bum too fast
Blaze up bright and do not last.
It is by the Irish said
Hawthorn bakes the sweetest bread.
Elm wood bums like churchyard mould,
E ' en the very flames are cold.
But Ash green or Ash brown
Is fit for a queen with golden crown.

Poplar gives a bitter smoke,
Fills your eyes and makes you choke.
Apple wood will scent your room
With an incense like perfume.
Oaken logs. if dry and old.
Keep away the winter's cold.
But Ash wet or Ash dry
A king shall warm his slippers by.

Oak logs will warm you well
That are old and dry
Logs of pine will sweetly smell
But the sparks will fly
Birch logs will burn too fast
Chestnut scarce at all sir
Hawthorn logs are good to last
That are cut well in the fall sir
Holly logs will burn like wax
You could burn them green
Elm logs burn like smouldering flax
With no flame to be seen
Beech logs for winter time
Yew logs as well sir
Green elder logs it is a crime
For any man to sell sir.

Pear logs and apple logs
They will scent your room
And cherry logs across the dogs
They smell like flowers of broom
But Ash logs smooth and grey
Buy them green or old, sir
And buy up all that come your way
They're worth their weight in gold sir.

Logs to Burn, Logs to burn, Logs to burn,
Logs to save the coal a turn,
Here's a word to make you wise,
When you hear the woodman's cries.

Never heed his usual tale,
That he has good logs for sale,
But read these lines and really learn,
The proper kind of logs to burn.

Yawn. (Who is this person?) Are we having fun yet?


More info:
at "Wings, the home-made stove archives"
at "Zen Stoves"


Have anything worth adding? Then try sosayseff@nullabigmail.com
Me? Not that smart, usually.


Etc...

so says eff: sporadic spurts of grade eff distraction
definitions: outdoor terms
fiyh: dave's little guide to ultralight backpacking stoves
boyb: dave's little guide to backpacks
snorpy bits: nibbling away at your sanity
last seen receding: missives from a certain mobile homer
noseyjoe: purposefully poking my proboscis into technicals

Wednesday, March 8, 2023

Zip Stove

Zip Stove


Official Story

"Zip Stove" was the original name of the ZZ Manufacturing stove. It's now called the "Sierra" stove. It is a self-contained wood stove with a battery-operated fan which keeps the fire going strong. The stove weighs over a pound (half a kilo, but less for the titanium version), plus the weight of a battery (AA or D cell).


Alternate Reality Story

(1) A sort of wood-burning stove made of discarded metal zippers. Can be zipped together for cooking, and then quickly unzipped again for breakdown and storage. When broken down, it resembles a pile of useless zippers, and can safely pass even the most rigorous customs inspection, though it might take hours or even days to reassemble if you lose the instructions, which will likely spoil your lunch and make you cranky.

(2) A sort of wood-burning stove made of sheet metal. (This sounds better already, doesn't it?) And this stove is now called the "Sierra" stove. It has a battery-powered electric fan built into its base so it can operate like a tiny blast furnace. No, really. Has a battery-powered electric fan built into its base? What the fork? Actually said to work pretty well, but it's big and bulky. Some clever individuals have made their own from empty coffee cans and computer fans. A no-moving-parts, no-battery-required wood gas stove works just as well, and is simpler, cheaper and lighter. And you can make it yourself, even with a limited selection of tools, and/or limited intelligence. (Worked for me.) So there.


Have anything worth adding? Then try sosayseff@nullabigmail.com
Me? Still AC-powered. (Cord not included.)


Etc...

so says eff: sporadic spurts of grade eff distraction
definitions: outdoor terms
fiyh: dave's little guide to ultralight backpacking stoves
boyb: dave's little guide to backpacks
snorpy bits: nibbling away at your sanity
last seen receding: missives from a certain mobile homer
noseyjoe: purposefully poking my proboscis into technicals

Wednesday, February 1, 2023

Svea

Svea


Brass & Gas

(1) Wheezing sound made as your stove runs out of fuel.

(2) Whistling sound coming from your nose when it's full of goop.

(3) Brand of brass, white-gas-burning Swedish stove first made around 1880 and only recently discontinued, then maybe not again. Anyhow, last listed a few years back by Recreational Equipment Inc. as the "Optimus Climber Svea 123R." I used to have one. Fun. Made in Sweden. Noisy. Ran incredibly hot. Pretty small overall.

(4) A Swedish female name, popular during the first half of the 20th century. Also "Mother Svea", the Swedish national emblem and the female personification of Sweden. (Yay, more or less then — yet another woman who can beat me up without breaking a sweat.)


Refs:
Svea 123


Have anything worth adding? Then try sosayseff@nullabigmail.com
Me? Got gas? No, just a mild case of svea.


Etc...

so says eff: sporadic spurts of grade eff distraction
definitions: outdoor terms
fiyh: dave's little guide to ultralight backpacking stoves
boyb: dave's little guide to backpacks
snorpy bits: nibbling away at your sanity
last seen receding: missives from a certain mobile homer
noseyjoe: purposefully poking my proboscis into technicals

Wednesday, December 28, 2022

MSR Whisperlite

MSR Whisperlite

(1) A liquid white gas stove that has been in production for over 25 years. It has an external fuel tank (fuel bottle) connected to the burner by a tube. The basic Whisperlite burns only white gas but the "International" version burns multiple types of fuel. It has three foldable metal legs forming both the base of the stove and the pot stand. Before use the fuel bottle has to be pressurized by pumping air into it, and the burner needs to be pre-headed by burning a small amount of fuel before the stove is lit. A properly functioning stove will have a blue flame and sound something like a jet (aircraft).

(2) Most amusing liquid fuel stove ever made. Camped across a small lake, we arose one fine, still morning in early fall to admire the sunrise and begin preparing breakfast. Suddenly from across the lake came the sound of a jet plane warming up for takeoff. It was another group firing up their "Whisperlite" stove, as it's called. Love them marketing folks. Our ears still ring a little most days.


Have anything worth adding? Then try sosayseff+eff@nullabigmail.com
Me? Recently noticed that my pants are on fire again.


Etc...

so says eff: sporadic spurts of grade eff distraction
definitions: outdoor terms
fiyh: dave's little guide to ultralight backpacking stoves
boyb: dave's little guide to backpacks
snorpy bits: nibbling away at your sanity
last seen receding: missives from a certain mobile homer
noseyjoe: purposefully poking my proboscis into technicals

Wednesday, June 8, 2022

O-Ring

O-Ring

Closeup of a torus being eaten by ice cream.


(1) An O-ring is a gasket consisting of a flat ring of rubber or plastic shaped like a doughnut, but not really a doughnut. Only shaped like a doughnut. A little one. An overly-chewy little one.

It is used to seal a connection against high pressure gases or liquids.

So pressurized stoves use them. To seal connections against high pressure gases or liquids.

You can think of an O-ring as your personal ring of power. With it, your stove works and you can make supper. Without it you're only cold and hungry again. Your choice. Remain alert! Mind your torus, Horace!

(2) Also known as a packing, or a toric joint, an O-ring is a mechanical gasket in the shape of a torus, a doughnut, or if you lack imagination, the letter O. (Lions! and Tigers! Or Owes. Meh.)

This thingy is a loop of elastomer (rubbery stuff) made to be seated in a groove and squeezed in tight between two or more parts during assembly, creating a seal between them. And so it is used in pressurized stoves, of course. To seal its connections against high pressure gases or liquids.

The Dark Lord didn't need an O-Ring, but his stove did.

Come to think of it, he didn't need a stove either.

Never mind that then.

(3) An O-ring is a stove part that forms a seal, in stoves that need seals. These rings are usually made of some sort of flexible material, like silicone-based rubber. They are not needed in simple alcohol-burning stoves.

Like every other complex thing, your O-ring usually fails at the worst possible time, and can't be replaced by any old whatever that you might find lying around. So keep in mind how well O-rings served that space shuttle, then maybe take another look at alcohol stoves. You could do worse, mate. And the onus is back on you.


See tabs at the top for definitions and books.
Have anything worth adding? Then try sosayseff+eff@nullabigmail.com
Me? O Mama! Presently surrounded by rats, some of them educated.

Wednesday, May 11, 2022

Kelly kettle

Kelly kettle

Boiler in a bottle: Shiny, contains fire, makes hotness.


This is also often called a volcano kettle. It's a one-piece pot and stove thingy, designed vaguely like a thermos bottle, but these things are useful only for heating water.

Some were used by Irish fishermen in the early 20th century, though other versions of the story vary. Anyway, damn clever lot, they. Another reason to love the Irish, if you're so inclined.

The place where you'd have your coffee stored is a firebox. The part around that, where the thermos bottle would have an insulating vacuum chamber, is actually a water jacket surrounding the firebox. Hot gases from a fire of burning twigs heat water in the water jacket as they rise through the central chimney and escape out the top. Kettles like these can rapidly boil water even in windy weather.

More names: Benghazi Boiler, Storm Kettle, Ghillie Kettle, Thermette, Survival Kettle, and so on.

More: "How the Kelly Kettle Works", and what is it, really? And some other stuff...
Company site., Internet Archive, Wikipedia.


See tabs at the top for definitions and books.
Have anything worth adding? Then try sosayseff+eff@nullabigmail.com
Me? Getting all hotted up.

Wednesday, October 13, 2021

Nansen Cooker

Nansen Cooker

Devised in the 19th century by the Norwegian Arctic explorer Fridtjof Nansen, this may be the most efficient stove setup ever.

Heat passes up from the burner and around the outside of the cooking pot. This is normal, what you would expect from any stove, but in the Nansen Cooker the cooking pot is surrounded by a ring-shaped container holding cold water, ice or snow, and the combustion gases also heat this.

Then, when these hot gases have risen above the cooking pot, they hit another container sitting above it. This next container contains cold water, ice or snow, so some heat is absorbed there as well. Finally, the gases are forced to flow back down the outside of that ring-shaped container, giving up the last bit of heat they contain.

This arrangement is said to be 90% to 93% efficient at extracting energy from the burning fuel. Who said nineteenth-century technology was only about slabs of pig iron and lumps of coal?

As Nansen said: "The hot gases from the combustion of the kerosene, before they escape into the outside air, have to circulate along a tortuous path, passing from the hot interior to the colder exterior compartments, losing heat all the time. Thus a hot hoosh is preparing in the central vessel side by side with the melting of snow for cocoa or tea in the annulus. By the combination of 'Nansen Cooker' and primus stove one gallon of kerosene oil properly husbanded is made to last for twelve days in the preparation of the ordinary ration for three men."

A Nansen cooker is indeed highly efficient but also highly specialized. I think you need to be Norwegian and need a note from your mom or you aren't even allowed to touch one.


Stove Evolution


See tabs at the top for definitions and books.
Have anything add? Then try sosayseff+ul@nullabigmail.com
Me? Still cookin'

Wednesday, May 31, 2017

Improve Me Once Already! (Alcohol Stove Version)

Use these to cook like an effer.

I've been ruminating. I do that, mainly while walking.

Lately I've been thinking about stoves again, alcohol stoves. I picked up this round of stove fever after reading some old posts about poncho tarps from 2006. Besides doing some fun things with tarps, the author designed and made his own alcohol stove. Like every other alcohol stove in existence, his was the most efficient.

I have done it too. If you start using an alcohol stove you'll likely take your own whack at it. Harmless fun. There are probably hundreds of designs out there by now and they are really two or three basic designs endlessly repeated, with all the same advantages and flaws mirrored in the other designs.

But I did get thinking again.

So what then does it take to make an efficient stove system? More than a stove. The stove is one component, but not the only one. It is a system. There is a cook pot and a way to support it, protection from wind and rain, and sometimes even more components. So what's the deal then, really?

That brings us to now. By writing my thoughts I'll be able to judge the sense of them. Putting together a cooking system is a whole nother thing, as they say. Making one thing better than the others takes a lot of trials and enough record keeping to allow actual comparisons. It takes time and effort and usually one gets bit in the butt.

Knowing and doing are not necessarily related, but the thinking is the most important part, so here come the thought drops.

Ground rules:

  • Let's assume that we're heating water — no actual cooking.
  • No simmering.
  • No roasting.
  • Just heating clean water to a boil or close to a boil.

As I see it, there are at most 4 possible ways to improve the cooking performance of an alcohol stove. (When I say "stove", that's everything needed to heat water: stove, windscreen, pot, pot stand, additional thinamajigs, and so on.)

The four basic ideas are:

  1. Increase stove efficiency.
  2. Increase pot efficiency.
  3. Optimize the exhaust gas dwell time.
  4. Optimize the windscreen.

1. Increase stove efficiency.

There are several ways to do this. Making the flame as efficient as it can be is a decent place to start. An efficient flame, all other things excluded, is partly a matter of keeping it small. (Or actually, right-sized.)

A right-sized flame allows cleaner burning and less flame wasted in shooting off to places where it won't do anything.

For the best flame we should optimize the flame height, the flame shape, the flame-to-pot distance and the flame's contact patch on the bottom of the pot.

I'm not providing any details here on what or how, only noting that these are areas to think about during design.

We also need to isolate the flame from drafts.

Along with this, it's important to reduce heat lost from the stove body itself. This happens by conduction, radiation, and convection. Conduction losses are into the surface that the stove is sitting on. It shouldn't be in contact with any other surfaces but it has to be. With the ground for sure, and with some setups the pot sits directly on the stove. Any conductive loss in that case would be into the cook pot, which would be good if it heated water faster, or bad, if it made the stove less efficient.

I think that it's also a good idea to reduce the stove's heat gain to the optimal amount. A stove has to consume some of the heat it produces or it will go out, but that amount of its output is small. Let the stove soak up too much of its own output and you have a runaway reaction.

A too-hot stove runs too fast and produces an uncontrolled flame, which blows heat all over without putting it where it's needed, so controlling stove overheating by controlling excess radiation and convection inside the system is important too. The stove should generate hot gases which transfer heat to the cook pot and not back to the stove.

So far this sounds reasonable. The next area to think about is to...

2. Increase pot efficiency.

There is an optimal size and shape of cook pot for every stove. The cook pot has to have a large enough surface area to absorb the maximum amount of heat energy. There is more than one way to do this.

Internally.

One way is internal to the pot. Make a pot with a heat exchanger built in. I don't know of any pot made for any cooking system anywhere that has this. What I'm talking about is the equivalent of a standard, building-size steam boiler but sized down for backpacking use. Most people haven't seen a boiler. I worked at a junk yard one summer, and saw one. It looked goofy. It's not what you expect.

Check out the fire tube. (via globalspec.com)

You see a steam locomotive and you think it's a big tank lying on its side with a fire underneath. Nope. Isn't.

It is a big tank with tubes running through it.

They come in two forms. Either the tank is full of water and fire runs through tubes inside the tank, surrounded by water, or the tubes contain water and fire burns in the tank around them.

Either way radically increases the surface area available for energy transfer, and radically increases efficiency. I don't know how to make this in a cook pot of a 24 ounce / 700 ml size, or of any size. If anyone, anywhere in the world makes a cook pot like this, you can bet that it's too big and heavy for backpacking, but it's nice to daydream about. I'd assume that my 700ml pot would weigh around 1 to 2 pounds (500 to 1000g) and cost $100 or more, due to the huge complexity involved in making it. That would be for a pot with water inside and fire running in vertical tubes through the pot.

The Kelly Kettle is the only thing anywhere near this.

Kelly Kettle

Externally.

That's an what I call an internal heat exchanger. The kind you might actually see is an external one. Some canister stoves use this sort of thing. The "MSR XPD Heat Exchanger" is one. It's a piece of corrugated metal that wraps around a cook pot and "funnels heat up the sides for faster, more even heating". Or so they claim, and they may be right.

Couldn't hurt, eh? Well, at $40 and 6 ounces / 170 g, it's a stretch for a canister stove used sitting in a campground. At that weight, it's heavier than a lot of complete alcohol cooksets (stove, pot, windscreen, and so on). And more expensive too. But the bigger issue is whether it would help. Probably not much. Heat running through it would transfer faster to the relatively colder air around it than to the relatively hotter put it's connected to. And there's an infinite amount of cold air available every day, all day.

MSR XPD Heat Exchanger (image via REI)

Selecting the right pot.

The third way to increase surface area is by choosing the right cook pot. The pot with the biggest bottom wins. Shoot a flame up from a stove, let it hit a pot whose bottom has an infinite area, and all the flame's heat energy will be absorbed.

Perfect. Except that things don't work that way.

Make the pot too big in diameter, for a given volume, and then the pot's sides will be too low. This is awkward. Make the pot too tall and narrow, and it will have no bottom surface area to speak of.

There is a balance point in the middle somewhere. Generally, the pot's height will be somewhere vaguely around 80% to 125% of its diameter or it becomes both unwieldy and impractical.

Imusa 1L aluminum mug.

For example, take a pot 5" wide and 4" high (125% wider than it is high). This pot is exceedingly squat. Round off and you get 125 and 100mm for width and height, for a volume of about 1.3L.

Reverse the dimensions and the result is a hair over 1L in volume, with a 4" diameter, a height of 5", and a diameter-to-height ratio of 80%, and it looks more like a standard cook pot or drinking mug. For a volume of around one liter, that's about it. Max efficiency in handling, and about all you're going to get to use for thermal efficiency.

An aluminum frying pan would have a much bigger bottom area for the same volume, but how are you going to handle it? Slosh, slosh, spill if you attempt it. Try to figure out how to keep it over your stove without it tipping over. What about a windscreen? Ah...no, not likely — goofy proportions. And the heat you pour into it at the bottom will jump out the top and run away about as fast as your stove can supply it.

Seems like it would be efficient but actually not. Just like the opposite, the beer can pot, with a diameter around 85mm, with 160mm for height, giving a diameter-to-height ratio of 53% — almost twice as high as it is fat. With a too-narrow pot, a lot of the stove's flame goes up the sides and escapes, which is what happens with the typical beer can pot.

Leaving pot dimensions behind, a third way to increase pot efficiency is to decrease the pot's wall thickness. No matter what the pot is made of, a lighter-weight pot absorbs heat more quickly, and the less energy any already-hot water can lose sitting there because the whole process speeds up and there is less time for that to happen. This is a plus for beer-can pots but they already have an inefficient shape and, since they are made of extremely thin materials, they are also extremely delicate, which brings us back to that other kind of efficiency issue, handling efficiency. Frying pan at one end of the scale, beer can at the other. Not only are beer cans crazy lightweight and frail but they are crazy likely to tip over. No handles either, never.

Absorbing heat better.

There is a fourth way to increase pot efficiency. That is to increase the heat-absorption rate of the pot material itself. Dark-anodized aluminum may be the best choice, because aluminum transfers heat well and a dark surface, which anodizing gives it, soaks up heat well. Titanium is also sort of darkish, though it and steel don't transfer heat nearly as well as aluminum. But on the other hand, since titanium is especially tough, titanium pot walls can be really thin, which means heat energy passes through it relatively easily. (Notice us chasing our tail?)

3. Optimize the exhaust gas flow.

Ideally, you want a bubble of hot gas surrounding the pot and hanging there to form a sort of separate universe. This bubble protects the cook pot from the outside world and allows some of the remaining heat energy in the stove's exhaust to soak into the cook pot.

Most of this process will be controlled by the windscreen, which will stifle the exhaust gas flow and slow it, and will route exhaust gases around the pot in the most efficient way.

The "Nansen cooker" was a gem in this department, but few backpackers would want to carry something so bulky and heavy, especially anyone using a tiny alcohol stove and a correspondingly small cook pot. The Nansen cooker in fact used two pots, one for heating water and one to either warm water or to melt snow — thermally efficient but not ergonomically so.

From: The Home of the Blizzard, Australian Antarctic Division

Anyhow, back to the gases.

The aspects involved are stove design, stove materials, and stove operation, the pot stand design, the pot design (size/shape) and materials, the windscreen design and materials, and the ground reflector design and materials. (The "ground reflector" is what I call any reflective and protective material under the stove, covering the ground, insulating the stove from it, and reflecting heat back upward.)

How? Try your best. The point is to hang on to hot exhaust gases without unduly impeding the stove's operation by depriving it of oxygen, and not to trap the gases so long that they cool so much that they actually suck heat back out of the cook pot.

4. Optimize the windscreen.

Windscreens are important, especially so for alcohol stoves with small flames that burn low energy-density fuel.

Screen wind like an effer. (How it looks in operation.)

The trick is to design the windscreen to isolate everything inside it from the external world while slowing heat lost through the windscreen itself. Block drafts, prevent radiant heat loss, prevent conductive heat loss to the atmosphere, funnel and direct whatever happens inside the windscreen's envelope.

A double-wall windscreen containing insulation would do part of this job, but how does a person make one? I don't know yet.

A windscreen should reflect and focus internal radiation to maximize energy flow into the pot. It should do this while minimizing energy flow into the stove, to prevent overheating it.

If there is another reflector under the stove (the "ground reflector"), covering the whole area inside the windscreen's footprint, and there should be, this needs to be optimized too. Its most important job is to protect the ground.

Using a proper windscreen, it's all too easy to set the ground on fire. Sometimes you find out that it's flammable only after it begins smoking. (True.) Protecting the ground is the ground reflector's first job. After that, it isolates the stove from conductive heat loss, reflects energy back upward toward the cook pot, and helps to maintain a hot environment around the stove.

I really like the direction that Trail Designs took with their Caldera stove systems. Clever.

But as they say in math classes, "Necessary but not sufficient". The tapered windscreen is also the pot support, which is fine. The tapered windscreen focuses the stove's output, which is good. The tapered windscreen is uninsulated, which is not. This is a major design flaw. So far, every windscreen I know of, including mine, has this flaw. What we have is extremely hot gases flowing along a piece of metal, with the entire atmosphere on the other side: an infinite heat sink. The heat should be forced to flow into the pot, not allowed to be sucked out by the atmosphere. Some kind of insulation is needed.

But these shortcomings are good in a way. They give us something to think about. Gives us something to work on — we're not done yet, so things don't have to be boring.

The Caldera Cone also leaves the top of the pot exposed. Bad. (Bad, bad, bad.) Also good, because more improvement is possible there too.

So now I have plenty to think about. I need to design and sew up a new pack. I need to re-design my stove system. And I have lots of ideas.

Could be worse.

More:

Kelly Kettle

Mugged, so says eff, April 24, 2013.

Super Duper Ultralight Windscreen, so says eff, April 13, 2011.

Trail Designs

Wednesday, April 1, 2015

Poking At The Potty Feast Stove

OK I did it. Finally.

Raw material.

Last summer I thought I'd try the Fancy Feast stove or the Fancy Feest or whatever you want to call it.

Original screening.

If you can call it it. Because there are several varieties going under identical or similar names. I chose the one that had the pot sitting on a screen sitting inside a cat-food-sized-can. Not a great design, but this was a feasibility study.

Closeup view (kina blurred, I know...).

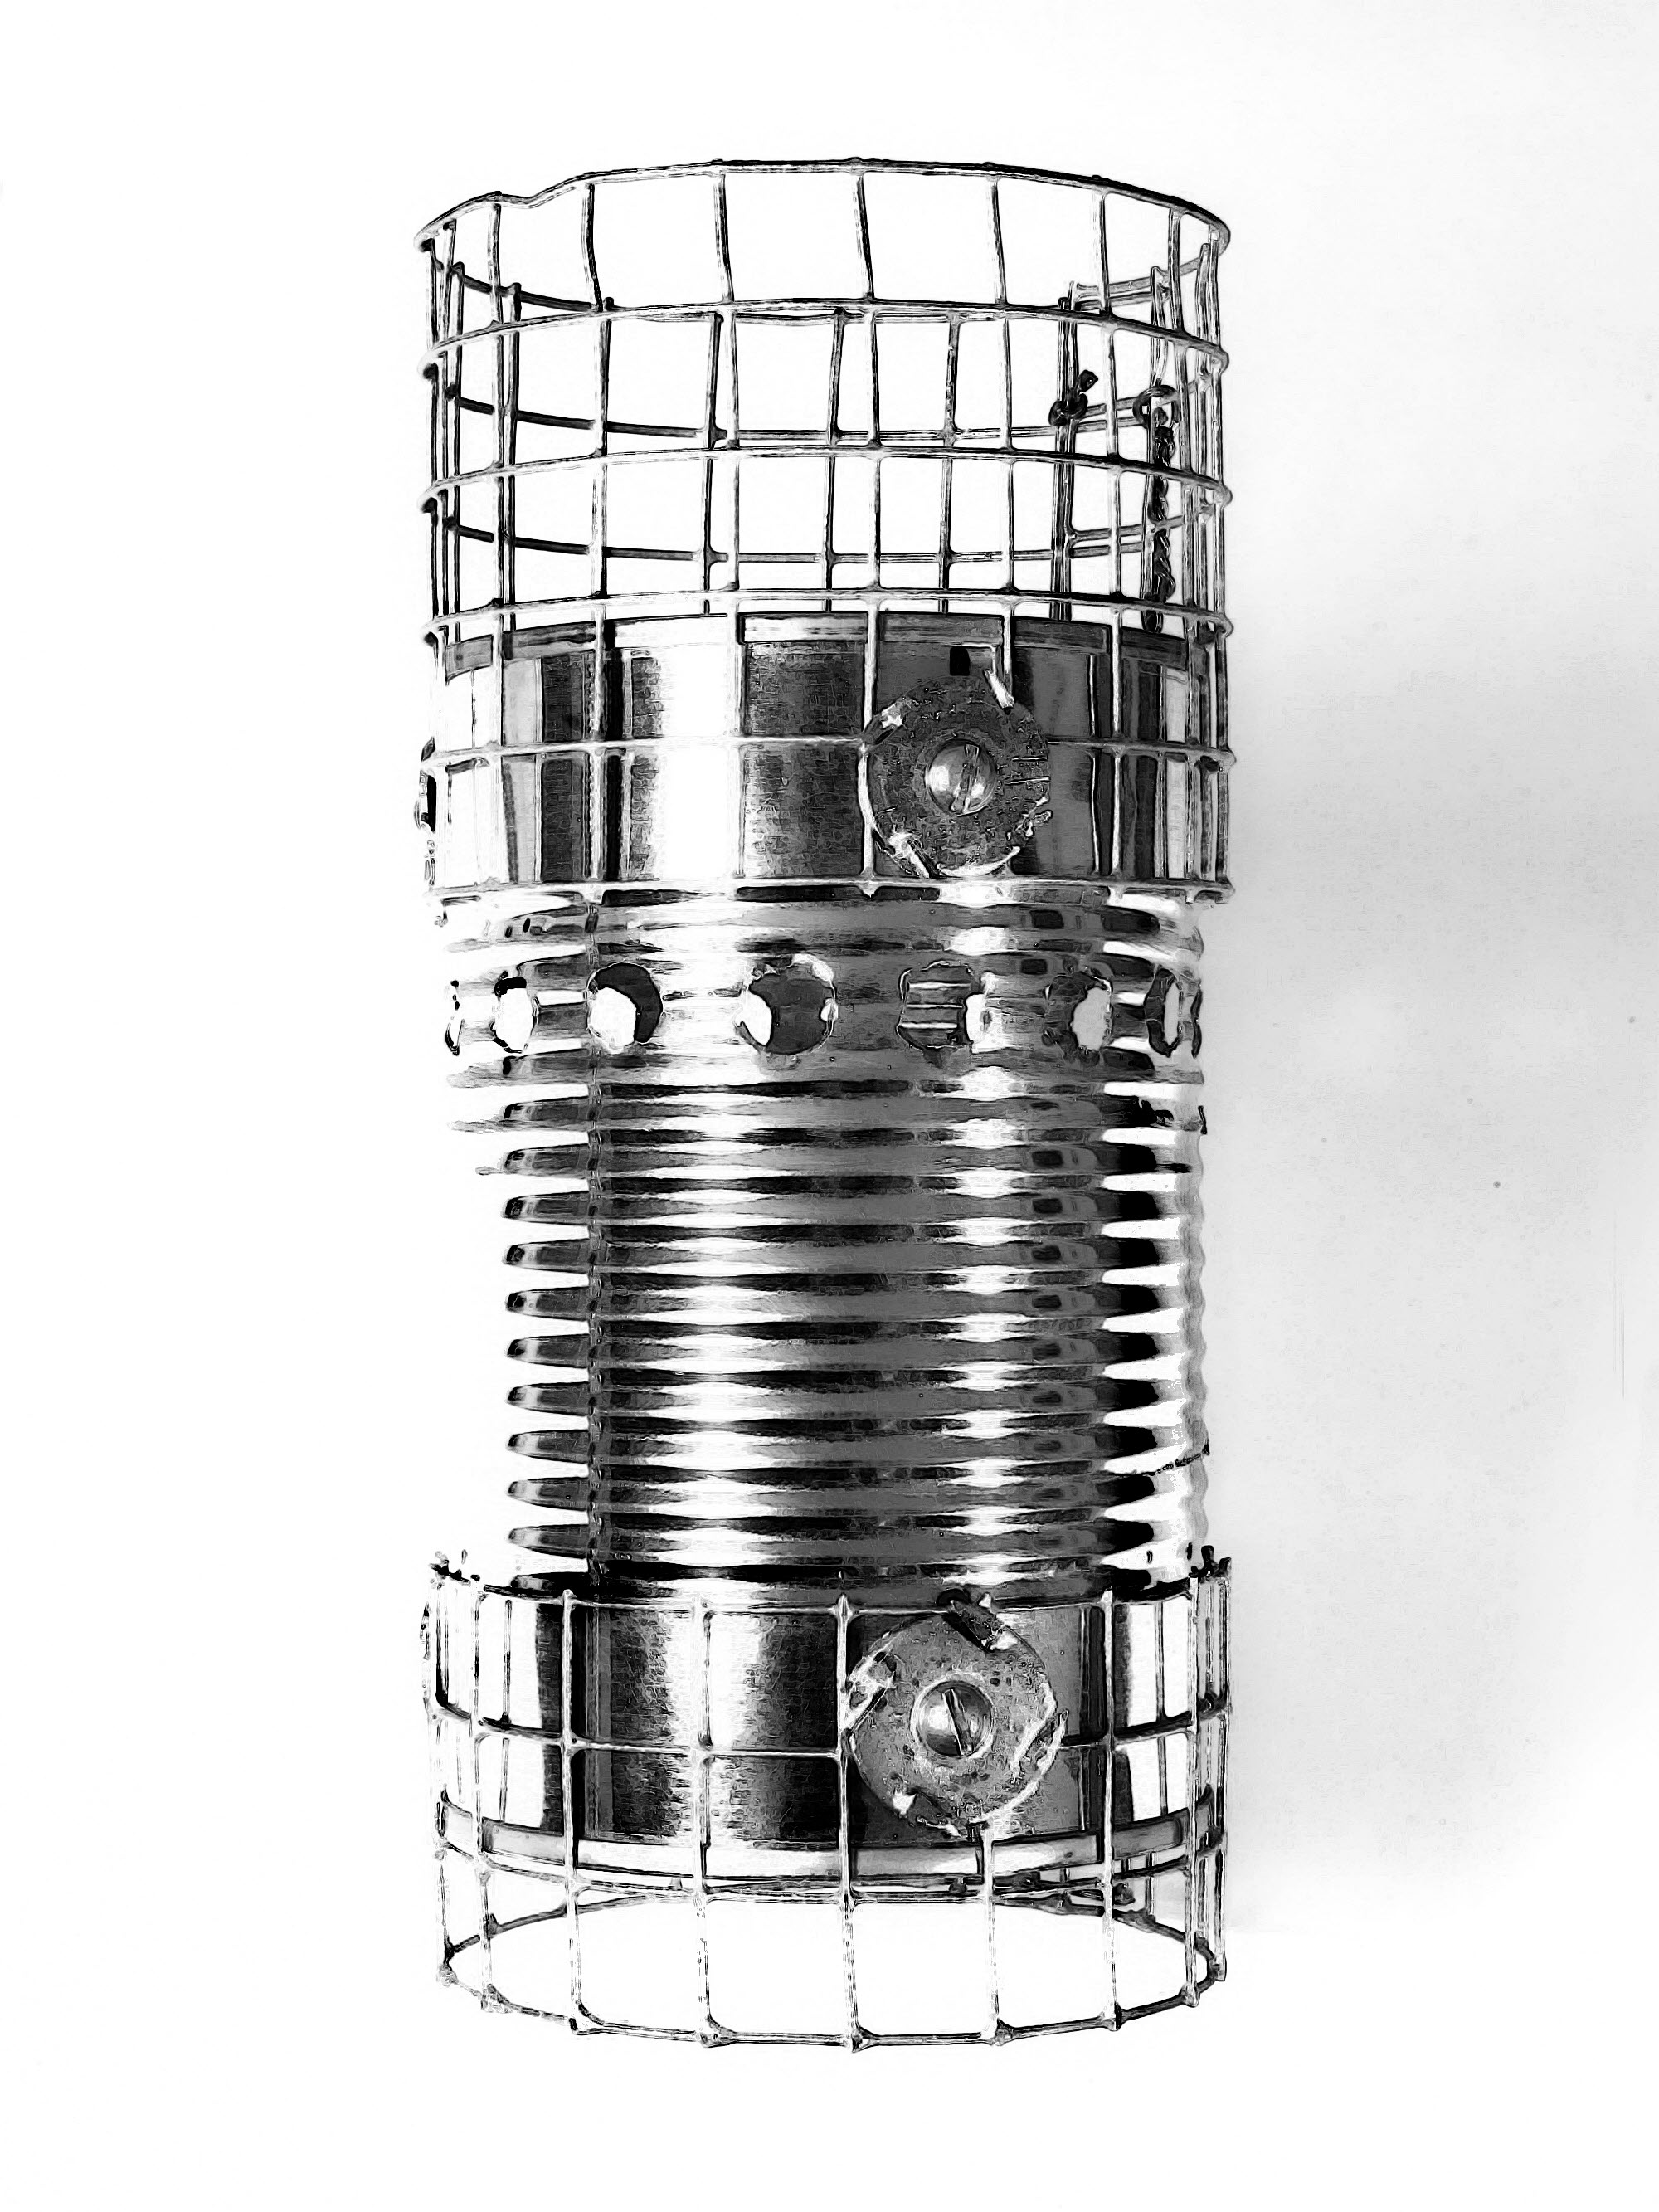
For the last 14+ years I've been using a pot stand made of half-inch hardware cloth, with the stove sitting on the ground (on top of a reflector). In my scheme the stove provides heat but no support. My pot stand is as wide as I can make it, given the size of my "pot" (an aluminum cup). That means that the pot has a wide and stable support.

The new stuff (much better).

The Fancy Feast-style of stove puts the cooking pot on top of a stove whose base diameter is 2.3 inches (60mm). My current pot stand is 3.25 inches (83 mm), so it's roughly an inch larger in diameter. This can save lunch.

Screen cut out of its retaining ring.

A tippy pot support is never good. And besides being wider, my hardware-cloth stand has sharp nubbins on both ends. These bite into the bottom of my pot and the ground, adding to stability.

A double-width section cut to size.

But the Fancy Feast seemed worth trying, so I tried it.

Rolled, with ends stapled together.

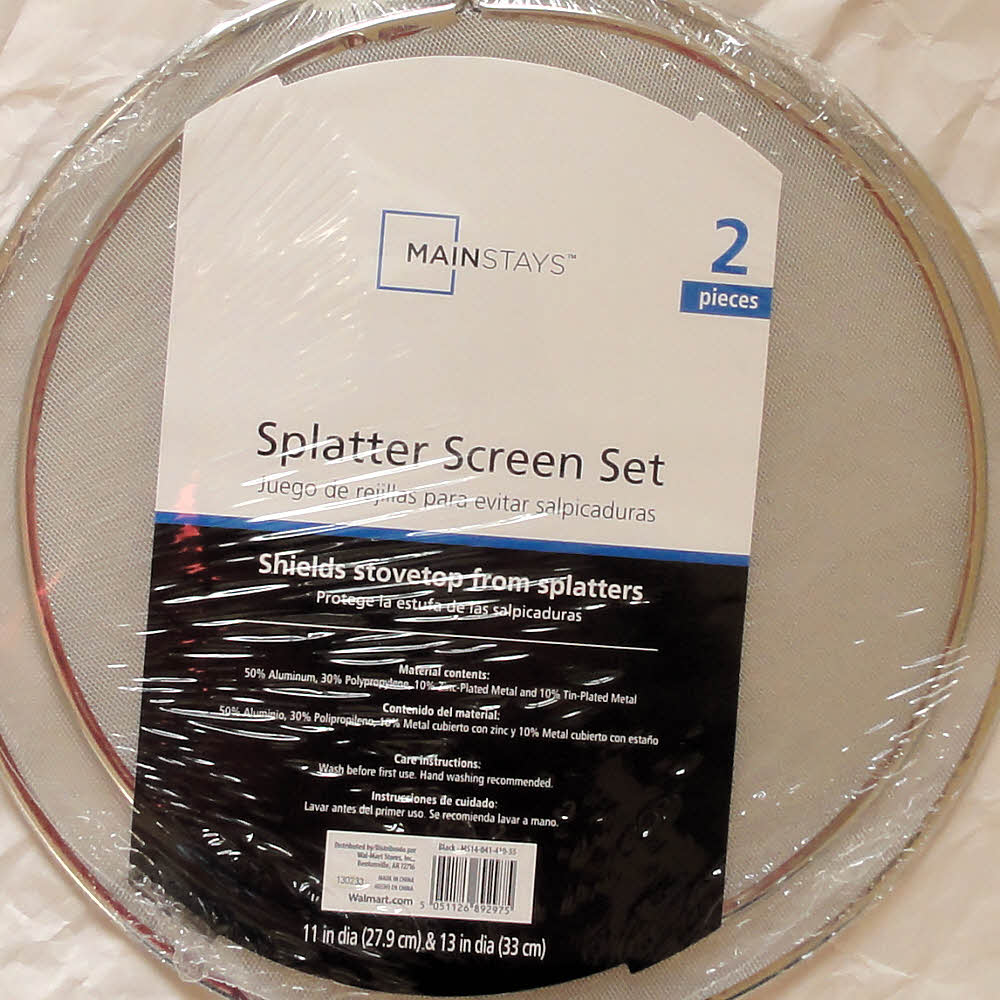
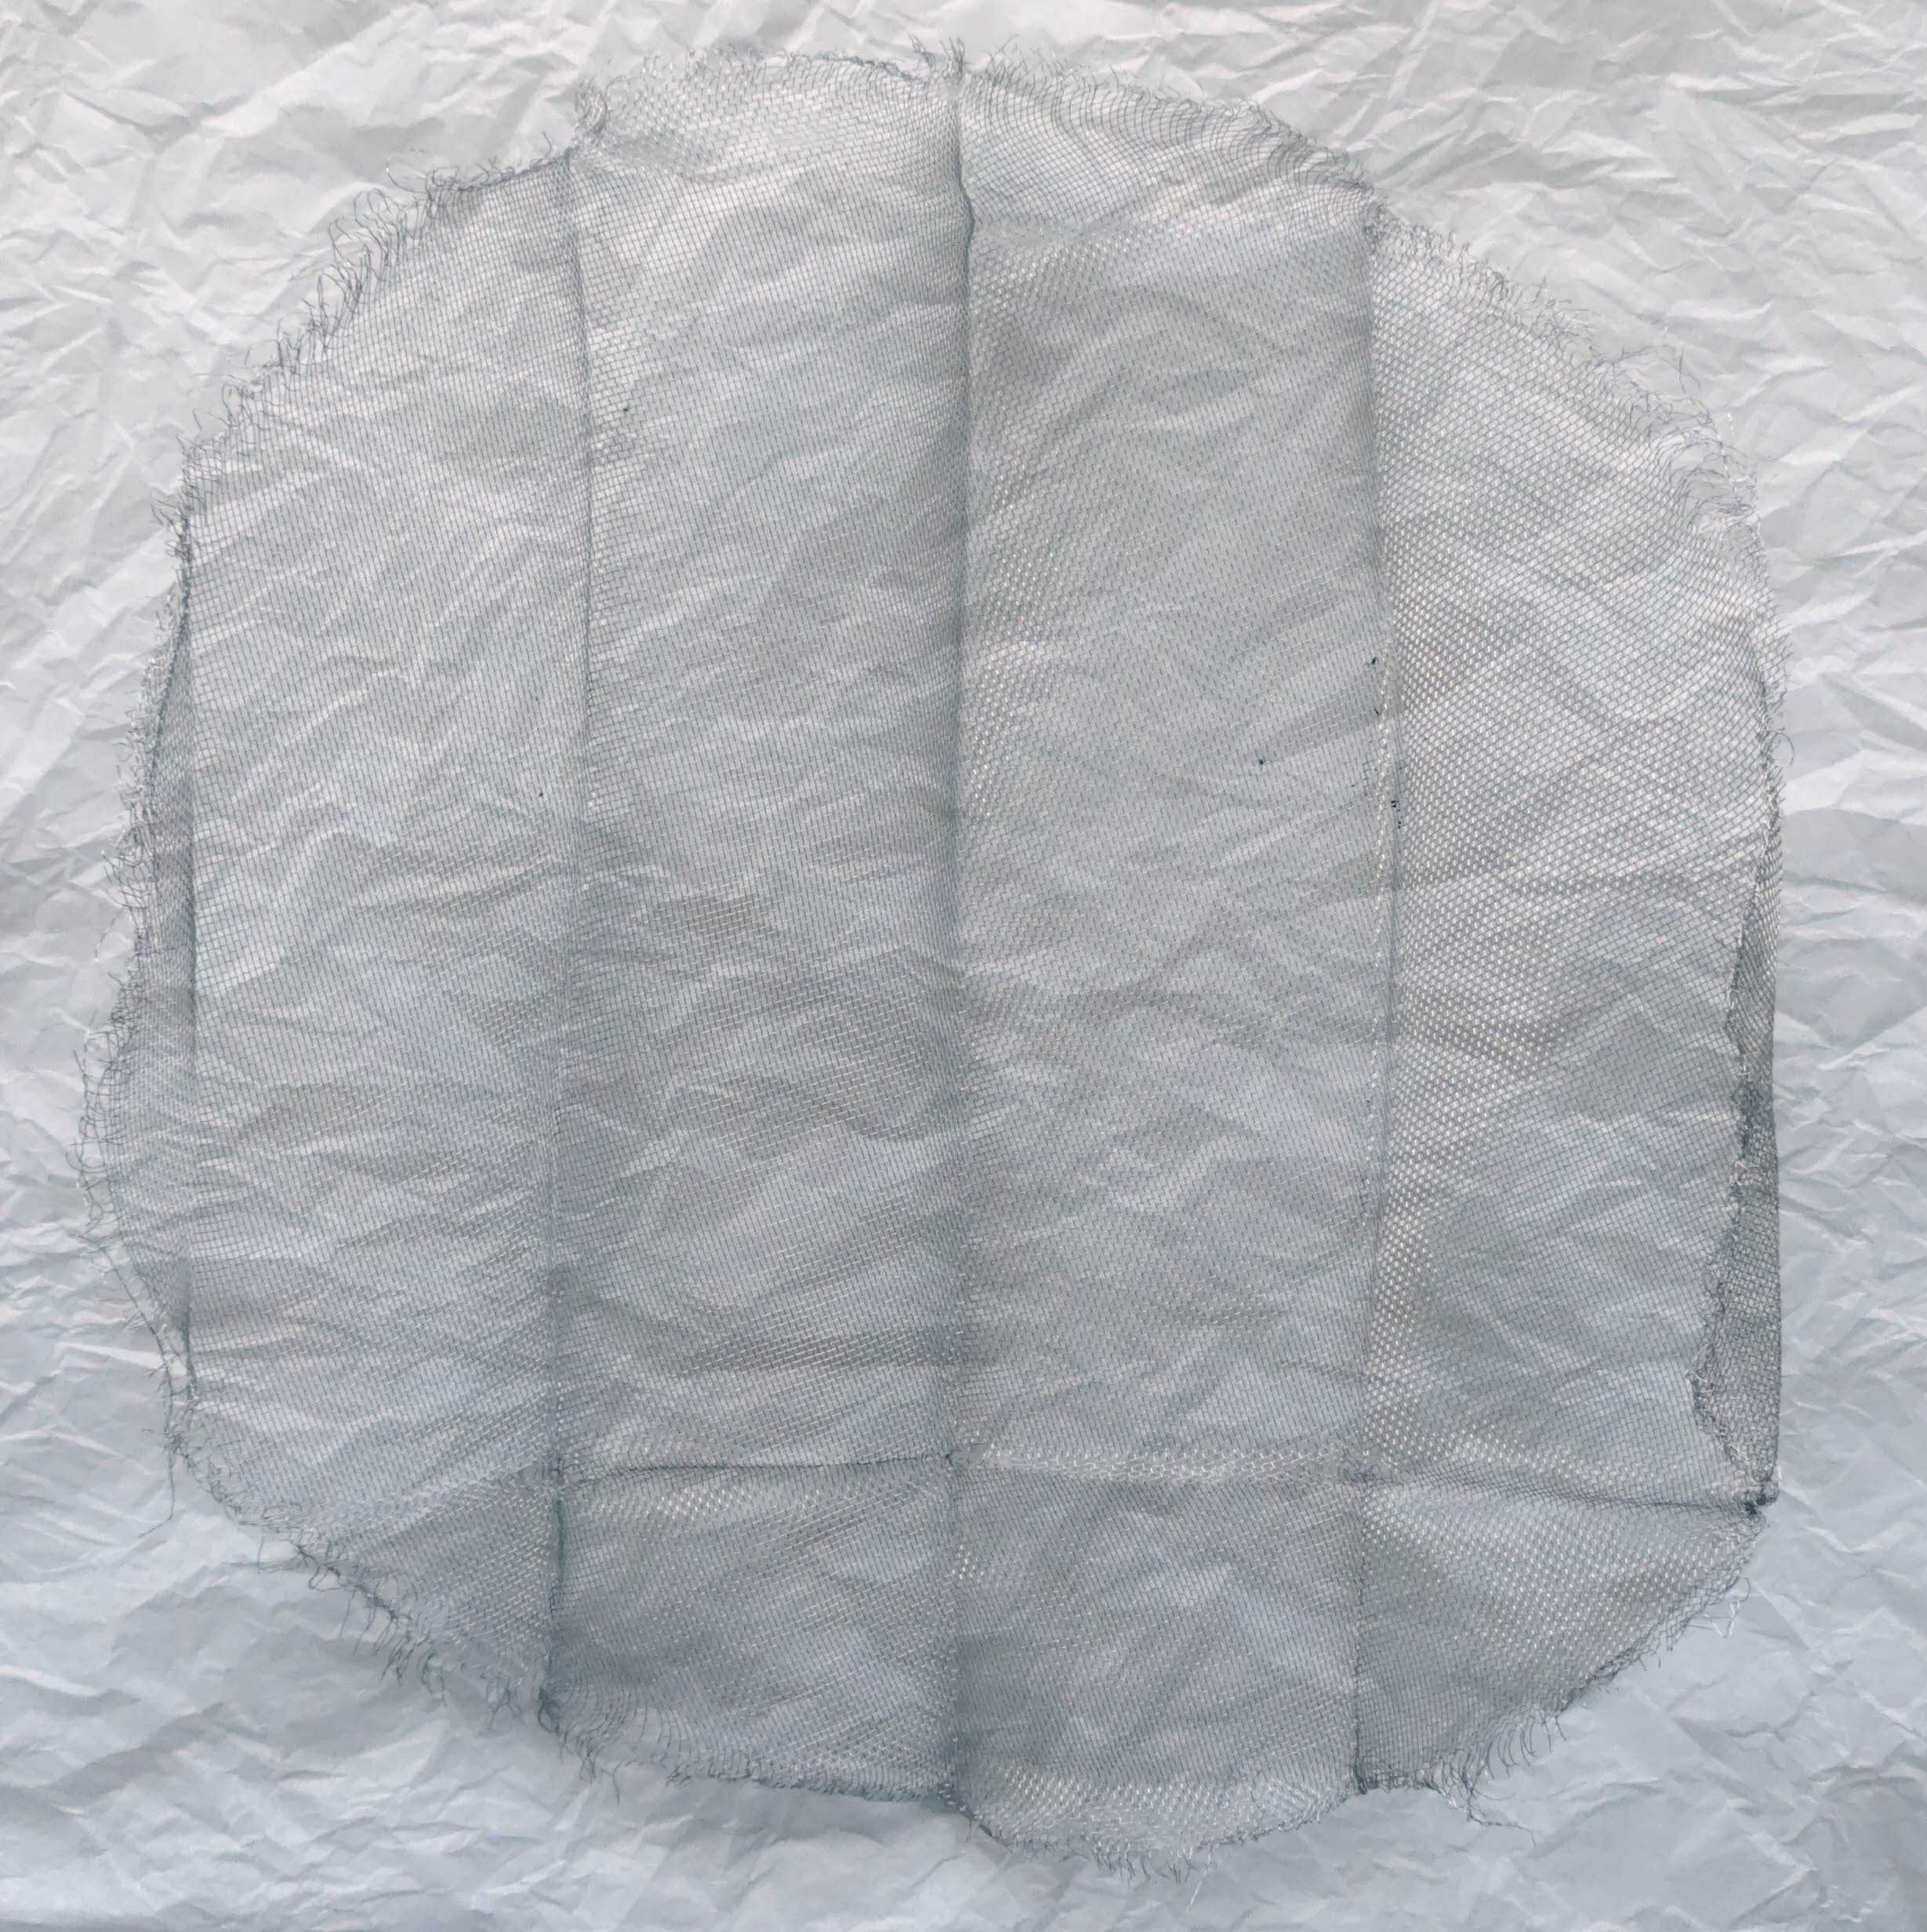
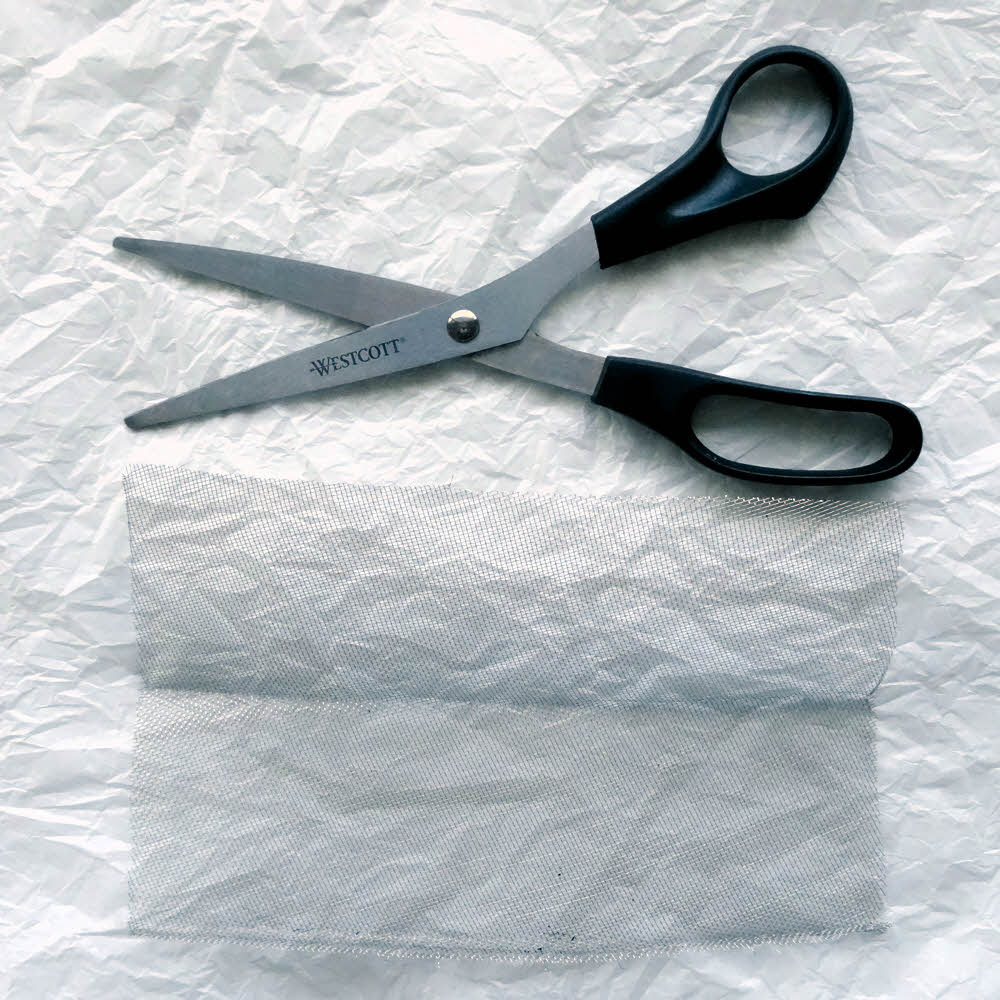
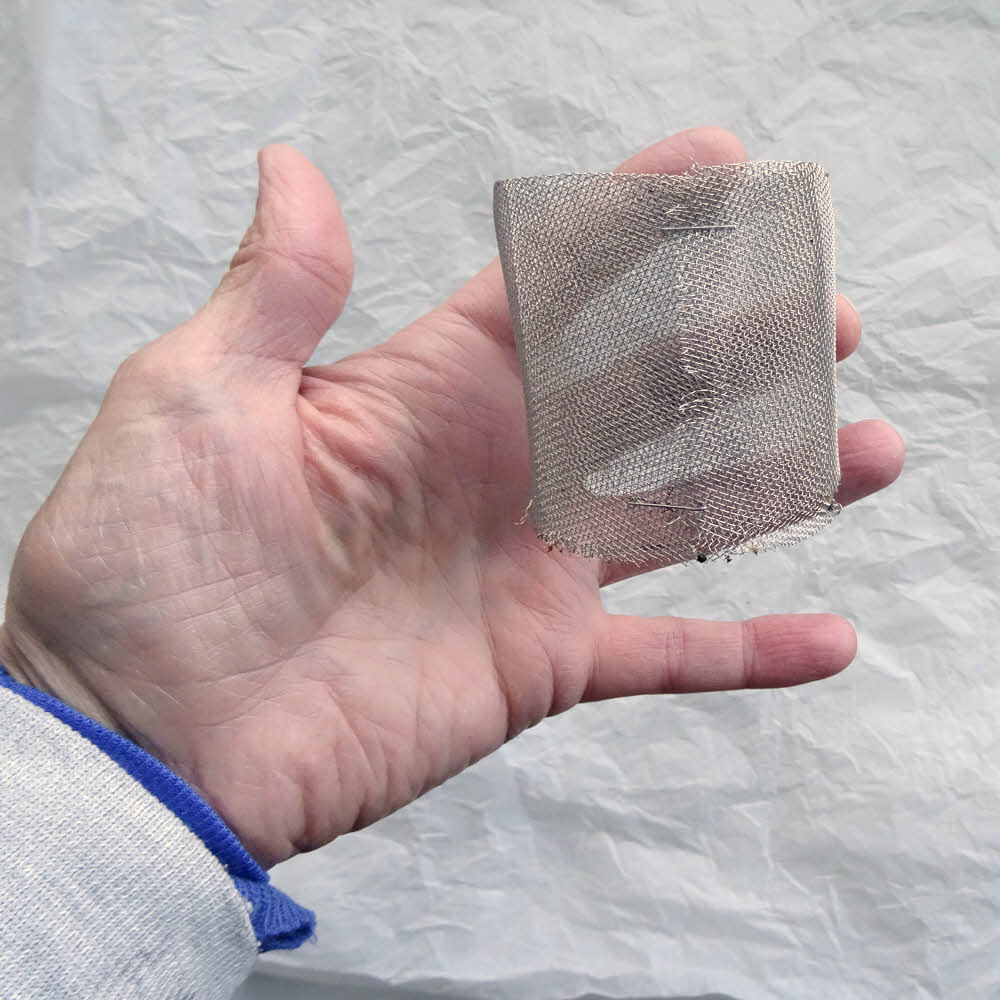
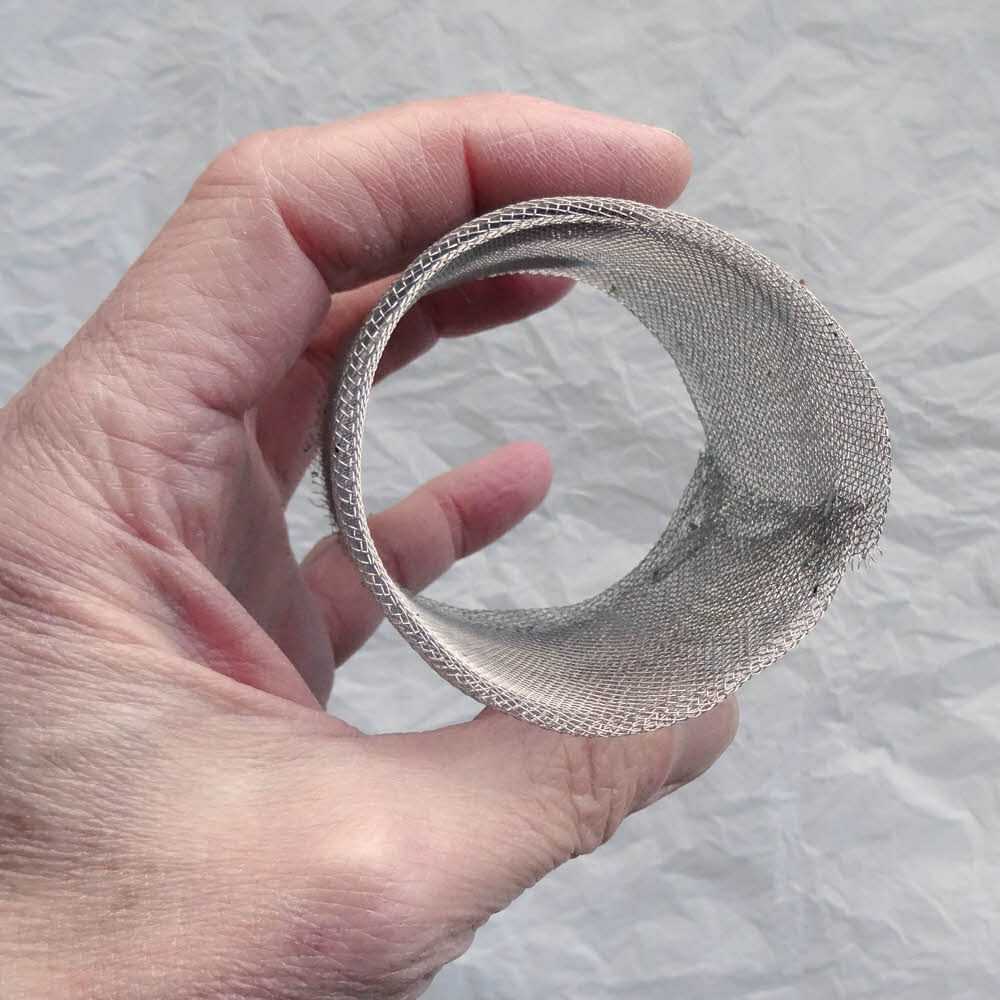
I got a cheap frying-pan spatter screen from Wally World and cut out the screen. Then I rolled it into a tube and stuck that inside an empty can of potted meat. Inside the can I have a small wad of fiberglass insulation. The fiberglass insulation helps a bunch in getting the alcohol lit, especially on cold days. On several cold days I've had to use half a dozen matches before I managed to get my stove lit, and then had it go out again due to frigid fuel.

Top view of the same.

Fiberglass has thousands of tiny points and all sorts of thin, interlocked fibers that increase the surface area hugely, giving a match flame a much bigger chance of lighting the fuel. Fiberglass also mediates the burning, so the fuel isn't barely burning, then raging, and then suddenly out altogether. With fiberglass I get a much more even response all the way through, and as I said, the stove is immensely easier to light with a fiberglass wick.

Last summer's version burning.

So last summer I made the screen and tried the stove. It worked really well but had problems:

  • It was too narrow as a pot stand.
  • The screen wasn't stiff enough.
  • The screen wasn't durable enough.
  • The stove had to prime itself.

What's that last point?

Well, putting the pot on top of the screen after lighting the stove snuffed the stove out. I had to wait a minute or two (a minute or two) for the stove to get up to working temperature and heat up the screen, and then it was great, but not before.

And where are we today?

Today's version (very crummy photo, innit?).

Mostly at the same place.

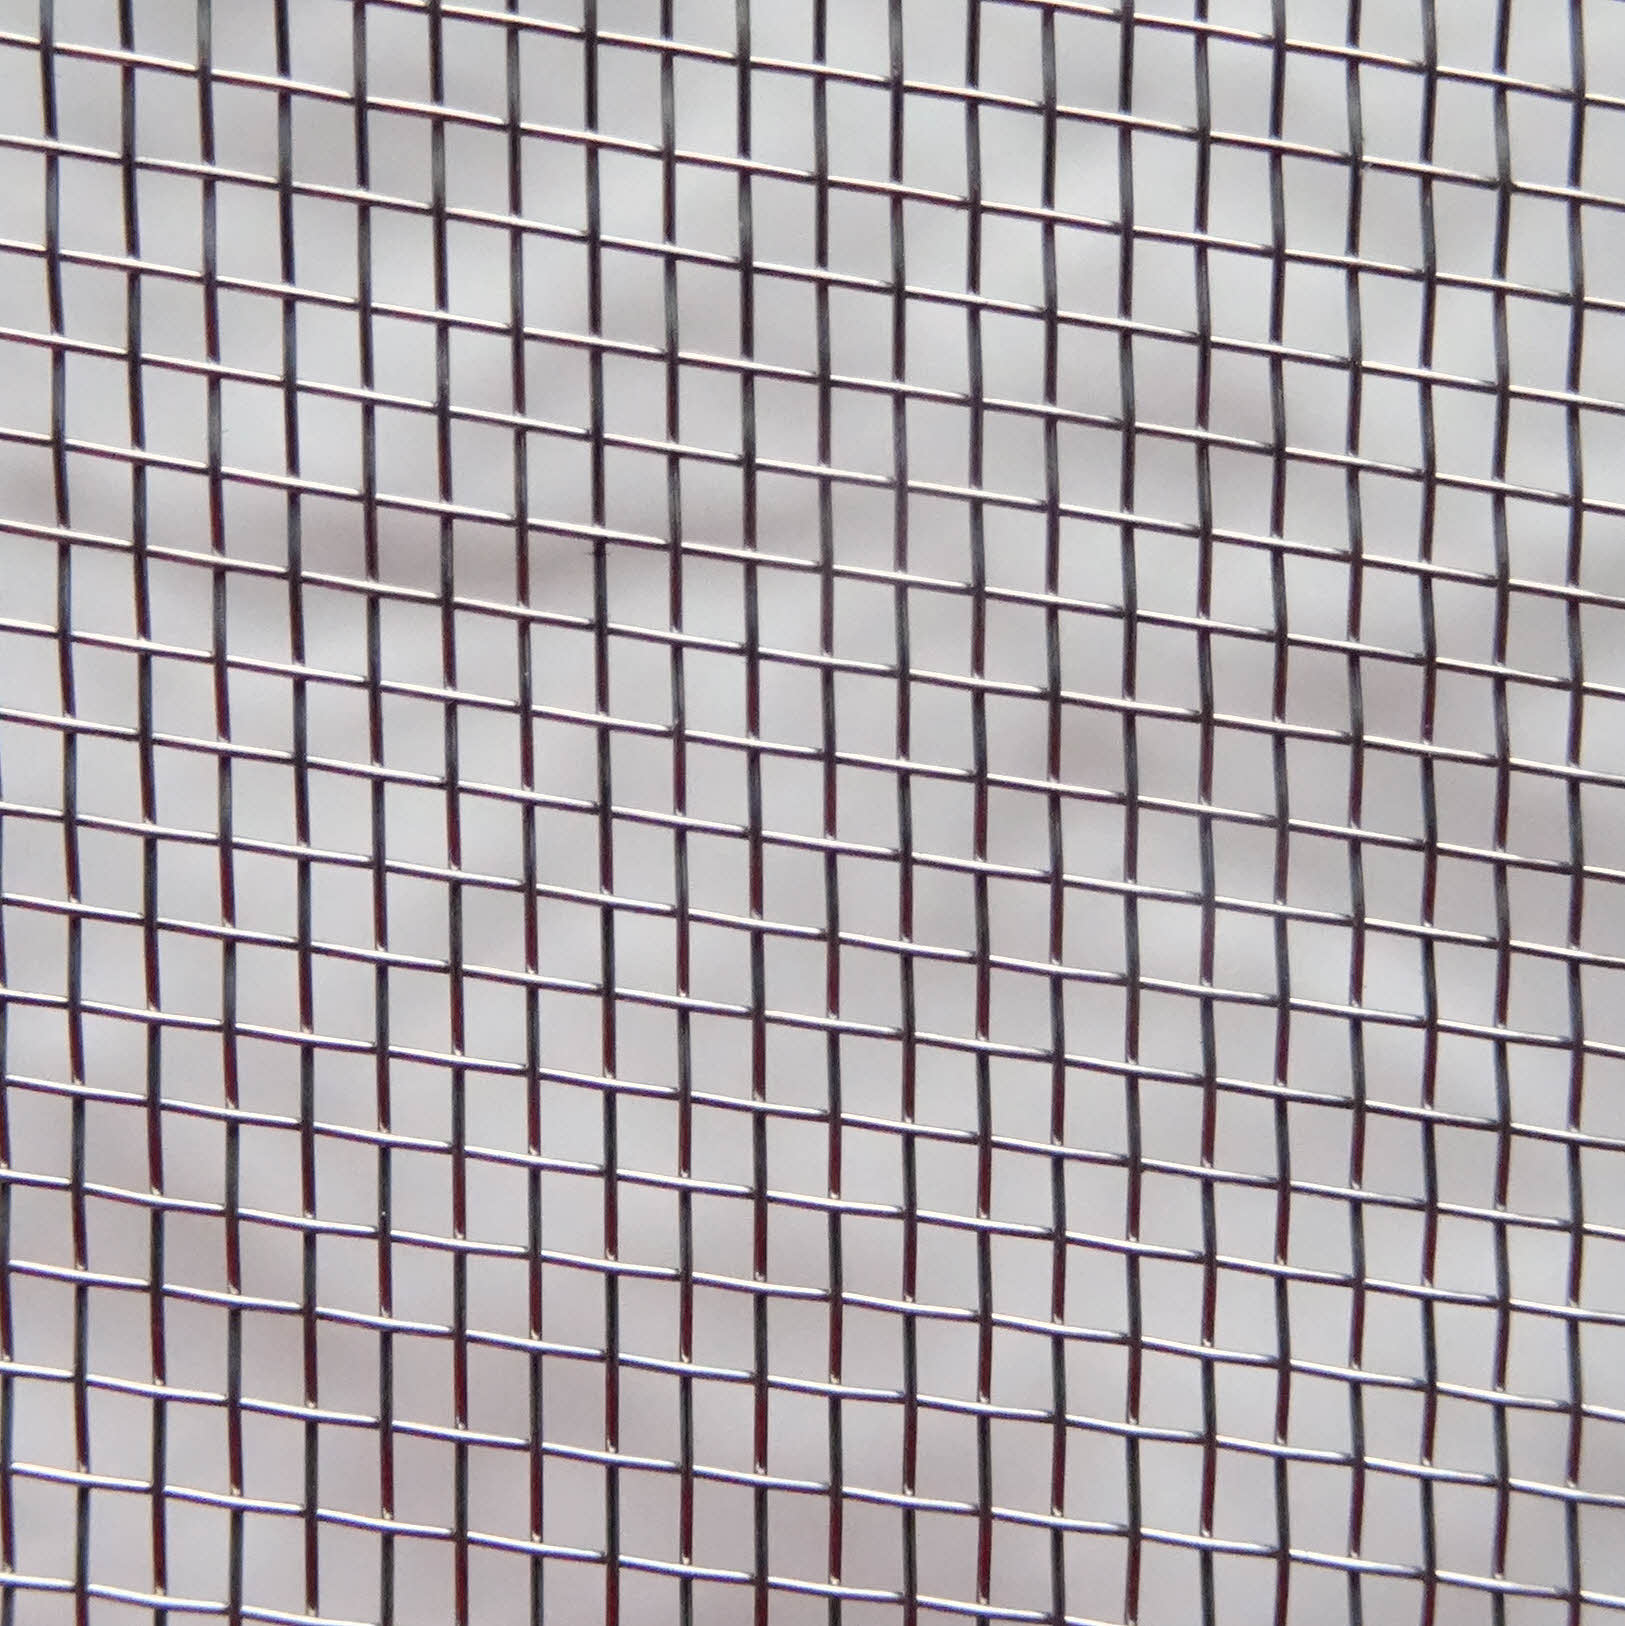
The original screen that I got at Wally World was punched-and-expanded aluminum — very cleverly done, but an aluminum screen is not going to stand up to intense heat for long, so recently I bought another screen. This one is definitely steel, and woven of wires. Maybe it isn't stainless steel, but I don't really care about that.

Also, I wanted to leave a gap between the top of the screen and the bottom of my pot so the screen would act as a kind of chimney and draft-defeater, but because of the gap between the screen and the pot, setting my pot down wouldn't put out the stove.

Waiting one or two minutes for the stove to reach operating temperature is nuts, so I used my pot stand to support the pot, and let the stove do only the heating.

Results.

Eh. Not much to rave about, but I think I'll try this new setup on the trail.

Today's screen mounted in potted meat can.

The screen adds a few grams to the stove, but should protect and steady the stove's flame while routing the flame straight up to the bottom of the pot. That's what I want most.

I use a full-coverage windscreen made of folded aluminum foil (see link to previous post). I also have some aluminum foil wrapped around my pot support. Adding this new screen will give me a third layer of protection. Ideally, I'd like to have a hot flame burning in still air, and now I have three shots at getting to that state.

Better stove efficiency means the fuel goes farther, or the cooking goes faster, or both. Them are both good. Not having my stove fall over is a third good thing, which is why I'm staying with my pot support.

And, on top of all that, I'm not really ready to do a lot more experimenting. I've used Sgt. Rock's Ion stove for years, but the heat output is low, and partly because the flame is small, it's sensitive to being blown around by the lightest whiff of air.

Top view. (Yes, it is a crude hack job.)

Using a wide-open cat-food-sized-can gives a bigger flame but a sloppier flame. Adding a fiberglass wick helps, but it's still a big, sloppy flame. This new screen ought to improve things even though I have been actually getting by fine. It's an improvement, not a revolution.

I think I'll stop here unless I have a real need to change things. The other Feast/Feest stove models don't look interesting.

  • The (Andrew Skurka) version with holes punched in its sides shoots flame out the sides where it does no good.
  • The spacecraft-quality solid-chimney model from Zelph does more than I need and would be unstable anyway, if I did use the stove as a pot support.
  • The 2007 pot-stand-and-stove version with a stainless-steel screen is another wobbly variation I can do without, although it is nicely made.

More.

Sunday, November 10, 2013

EPA Bans More Fun Stuff

Life as we know it to end soon.

Say you want to go backpacking and you kind of think about taking your uncle Fred's cast-iron wood-burning stove along because you like flapjacks.

Forget for the moment that the stove weighs 400 pounds and won't quite fit in your pack, even though your pack is a Kelty Tioga that you bought in 1983, and they said it could haul anything.

Also forget that you might be stupid.

For right now, let's focus on more important things, like the U.S. Environmental Protection Agency saying that Uncle Fred's stove, and other stoves like it can't be used no more, even in Uncle Fred's cabin.

They're doing all this because they like meddling, and they just about have ran clean out of other ways to meddle, so now they're going to come on their black mountain bikes in their shiny stretch pants and confiscate your onliest way of making breakfast.

What does this mean, really?

For one thing, maybe more backpackers will try the FrickStove, recently patented by Elias Horff. It looks like a two-pound coffee can. Inside is a powerful spring and a spool of heatproof and fireproof titanium wire. You just pull on the wire until the spring is wound (takes only an hour or so), set your pot on the top, and flip the switch.

From then on, environmentally-healthy friction from counter-rotating plates inside the stove creates heat, and that creates super-heated air, which shoots out the top of the stove like an F-22 on full afterburner, and your noodles are cooked in seconds.

It's mostly silent too, except for an occasional friendly sonic boom if a stove should tip over. In that case its massive thrust vector can power it into the upper atmosphere at supersonic speeds. (One early FrickStove prototype was clocked at Mach 2.17 on a cool day with light southeasterly winds in early autumn – data about production models is still classified, so we can't tell you that.)

Hey – maybe it's worth a look.

Meanwhile, back inside the Beltway, the pointy-headed EPA has banned production and sale of stoves used by about 80 percent of real men. You know – men who enjoy inhaling "airborne fine-particle matter" at a rate of over 12 micrograms per cubic meter of air. No real man knows or cares what a meter is, let alone a microgram, and most of them are just fine using a bit of fine-particle stove scale as seasoning.

The whole deal is govmint encroachment, and most of us don't like that, expecially when it comes to having safe streets and highways, fecal-free food, and socialist, tax-supported police and fire departments, which would be privately owned in a true free-market system.

Rumor has it that next year the National Socialist Park Service will require all overnighters to carry a change of underwear and wash their armpits daily. We all know where that might lead.

Srsly:

EPA Bans Most Wood-Burning Stoves

Friday, November 30, 2012

Gas Me, Gas Me Not

No more huffing and puffing, not even a little.

Wheezing. Coughing. Swearing. Choking.

More swearing.

That was me one July.

Gagging over a wood fire with smoke up my nose and tears in my eyes. Trying to blow life into a reluctant fire under my pot.

Simply heating water over an alcohol stove and dumping it into a ziplock bag of premixed food is my usual style. But I just had to try cooking this other way, using wood to save fuel.

Bad move.

Really bad move.

Finding a way to make it work sounded like a challenge. Sadly, I like a challenge.

I guess that explains my "Dumbnuts" tattoo.

Ray Garlington said "I inexplicably became inspired to try building a wood stove that would not require a battery and fan. I decided, more or less arbitrarily, that the stove would have to be very light (5 oz or less), would have to boil 1 quart of water, hold a simmer for 10 minutes, and be fun to use."

Clean burning, no moving parts, light, small, and dead simple. And even I could understand how to make one. WooHoo!

Take an empty steel can. Cut out the ends and put a grate and legs at the bottom. Add air holes higher up, and a pot support at the top.

Dump in some twigs, then some kindling.

Prime at the top with a few drops of flammable liquid and light it.

The fire then burns from the top down, converting unburned fuel into smoke as it goes.

Air sucked in at the bottom pushes the smoke up, into the flames. Vents higher up add oxygen, and it burns like crazy.

As long as the twigs are small enough, there are plenty of air holes, and the pot is at least two inches above the top of the stove, it's smoke-free.

Toward the end you've got a charcoal fire that cools down slowly and leaves only a tiny pile of clean ash.

With a metal shield or flat rock underneath and maybe a wind screen, you're all set. The fuel supply is infinite.

This is true.

WooHoo!

Again!

Some places to go for basic, practical information:

The Garlington WoodGas Stove

Risk's WoodGas Stove

Penny Wood Stove

Zen Stoves (wood gas section)

For more technical info on how I did it, sift through my previous posts for the plans.

Wednesday, November 9, 2011

Hazbro EZ-Bake UL

A new trail boy toy.

You aren't a girly man - you're smart!

When it crashed onto the scene in 2004 the TurboBoil Mach4 CookSystem looked majorly major.

Fuel-efficient, wind-resistant, trendy, costing less than a pair of snow tires, it took every backpacker's attention off that nasty hiking stuff and kept it stuck on salesroom shelves.

The TurboBoil Mach4 was a huge step toward hot soup anywhere. Before that, too many hikers wasted precious hours hacking at beer cans only to get feeble alcohol stoves that could barely warm up a dish of cat food.

But all too soon the TurboBoil Mach4 itself became dated. There was that whole retro "fossil fuel", 20th-century aspect. And all those half-empty fuel canisters in the closet. And so on.

Well, backpacking stoves have now hit the bigtime.

Ta Da!

Today Hazbro, maker of the revolutionary EZ-Bake Oven, has entered the backpacking stove market. You heard it right, folks. As of today, Hazbro is on our side, with a new backcountry cooker.

Now you can look anyone in the eye and say with pride, "I hike like a girl." Because you can have tasty hot meals wherever, whenever, without burning lunch, your beard, or anything else. And how many of your friends can say that with a straight face?

The EZ-Bake goes anywhere a TurboBoil, SnowPoke, or SRM WhiskerLite can go. And because it's all electric you don't need old-style fuel. Of any kind!

Fumble-fingered? No problemo. Without flames you have zero chance of setting even one national park on fire.

Can't cook? Another non-issue. Just take along a supply of HikrChow PreMix Food-Paks, add water, heat, and swallow. As often as you want.

Practically completely bug-free!

Each PreMix Food-Pak is safely sealed off from air, sunlight, bugs, rats, mice, toads, bush weasels, flies, and basically anything with an appetite. Except you! And your friends!

And if you're shy about carrying bags of batteries, just pony up a few extra bucks for a couple of ChargeMor Batry Paks. Fit one Batry Pak on each knee and store up those kilozots as you hike. When you're set to cook, simply plug one into your EZ-Bake and have at it.

OK, you're more traditional? Bring a few EZ-Cellz Baker Batrys, alkaline or lithium. Your choice. They work just fine.

Wet it! Heat it! Eat it!

Want toast? Use the optional EZ-Broylr attachment.

Bowl of hot soup? Use the optional LektriKoyl heating unit up top. Hot drinks are ready almost as fast as you can pour water.

And though the standard EZ-Bake is only cupcake-sized, it is quick. Really quick. Especially with Hazbro's HikrChow PreMix Food-Paks. Wet it, heat it, eat it. That's what we say.

You can have a whole basket of baked goodies before you know it. Great for entertaining.

Colors? The EZ-Bake Oven comes in SnowWhite, PrettyPink, or AmmoKammo, with or without sparkles.


Technical details:

  • Size: 4x4x6 inches / 10x10x15 cm
  • Weight: 6 oz. / 170 g (without batteries)
  • Suggested retail: $19.95
  • ChargeMor Batry Pak (each): 7 lb / 3.18 kg, 9x11.5x4 in / 23x29x10cm, 75.32 volts, 10 amps, $187.59
  • EZ-Cellz Baker Batrys (each): 12 lb / 5.5 kg, 75.32 volts, 10 amps, $71.64
  • EZ-Broylr: 4 lb / 1.8 kg, $187.43
  • LektriKoyl: 1.5 lb / 0.7 kg, $93.26


HikrChow PreMix Food-Paks

  • Fudgie ChocoLike Chip Cookie Circles
  • SuprSugry ChocoLike Brownie Puddles
  • Hot-N-Sweet Sugry Pretzl Chews
  • GoopyChoco Snackie Pies
  • Mak-N-Cheez-N-Syrup (Maypl, RazlBerry, Proon)
  • FishyChips (with PynAppl chunks) *
  • Sausage-N-Spuds (with RazlBerry topping) *
  • CowMeat-N-Cabbage (with ChocoLike FlavrSprinklz) *
  • GeneriChow (misc. animal parts and animal part byproducts with SparklSprinklz) *

* (Makes its own gravy!)

Great for slumber parties too! You'll never be a "has-been" with Hazbro.

Wednesday, August 17, 2011

Mini G Stove

Scott Henderson's Mini G Stove


Note from editor: I originally got interested in making my own stoves after reading Scott Henderson's instructions, first published in 2001.

In the years since then, those instructions have gone away, along with the site where they were published. But, I did manage to piece together the originals a couple of years back.

The rest is the original, except that the formatting is different, and I've removed dead links.

If anyone owns this information and objects to it being published here, let me know. Otherwise share and enjoy.


These instructions are abbreviated. They are meant to be used in combination with the detailed instructions for the Pepsi-G Stove. Differences between the stoves are noted below.

Please use the images there as guides.

Stove Parts

Aluminum cans in mint condition (no dents), two from among the following:
  • 8.3 oz (250 ml) Red Bull Energy Drink can, or
  • 5.5 oz juice can (V-8, Welch’s, TreeTop, etc.)

Note: The cans listed above have the same diameter, so you can mix and match if you want. However, an 8.3 oz Red Bull can is preferred for the top section of the stove because it mates best with the 12 oz can used to make the simmer ring.

Parts For Optional Simmer Ring

Aluminum can, one of:
  • 12 oz can made by Ball Corporation. Look for a parabolic oval shaped indentation in the top of the can. The Ball logo may or may not be on the can.

Note: A 12 oz Ball Corp. can is preferred for the simmer ring because the pop top opens a wide mouth hole and the indented parabolic oval on the top of the can is a nice guide for enlarging the hole.

For metric / imperial converstions, see the BackpackGearTest.org Conversion Utility.


Step 1. Make The Burner Holes

The top section of the stove is constructed in STEPS 1-3 from an 8.3 oz Red Bull can (preferred) or a 5.5 oz juice can. In STEP 1 a sewing needle with a shaft diameter of 0.6 mm (0.024 in) is used to make a circular ring of 24 evenly spaced holes outside and concentric with the circular ridge on the bottom of the can.


Step 2. Form The Large Central Hole

Concentric with the circle of burner holes you made in STEP 1 is a raised circular ridge. Inside this ridge is a bowl-shaped area about 40 mm (1 9/16 in) in diameter. Cut out the bowl at the base of the circular ridge, but leave the circular ridge and its sides intact. Round the rough edge of the hole with a half round file and smooth it with fine sand paper.


Step 3. Cut Out The Top Section

Cut out the top section of the stove with a utility knife blade or a pair of scissors so that the finished height is 20.5 mm (13/16 in).

The height of the top section is not that critical, although the suggested range is 19-22 mm (3/4-7/8 in). Use fine sand paper to prepare the interior surface of the sidewall for epoxy. Clean with warm water. Cut 8 evenly spaced vertical slits in the sidewall to a depth of 3 mm (1/8 in) from the shoulder of the can. Burnish the slits.


Step 4. Cut Out The Bottom Section

The bottom section of the stove is made from a 5.5 oz juice can or an 8.3 oz energy drink can. Cut the bottom section 32 mm (1 1/4 in) in height. The height of the bottom section is important. It should be within the range of 30.5 to 33.5 mm (1 3/16 to 1 5/16 in) around the entire circumference. Use fine sand paper to prepare the upper third of the sidewall exterior surface for epoxy. Clean with warm water.


Step 5. Make The Inner Wall Of The Stove

From the remainder of the can used for the bottom section or from a spare generic can, fabricate a rectangular band 38 mm (1 1/2 in) wide and 162 mm (6 3/8 in) long.

The width of the rectangular band is important. The acceptable range is 37-38 mm (1 15/32-1 17/32 in). Form 3 gaps along one of the long edges, each 5 mm (3/16 in) deep.

The center gap is at the midpoint of the edge and the other two gaps are 46 mm (1 13/16 in) from it. Opposing slits, 140 mm (5 1/2 in) apart, are optional and are explained in the Note at the end of STEP 5 in the Pepsi-G Instructions.

Overlap the short sides of the rectangle to form a cylinder that fits snugly into the circular groove of the top section. Use tape and/or Krazy glue on the outside surface to temporarily bond the cylinder together. Follow with a thin bead of J-B Weld over the external tag end of the band to permanently cement the cylinder.


Step 6. Assemble The Stove

Fit the gapless edge of the inner wall into the circular groove of the top section. Slide the bottom section inside the top section. When the bottom section barely fits inside the top section, apply a thick bead of J-B Weld around the entire circumference of the bottom section just below the edge of the top section.

Compress the sections together until the inner wall is tightly trapped between the top and bottom sections. Wipe off the excess epoxy. Install rubber bands around the sidewall of the stove to compress the slit sides. Invert the stove and put a weight on top. Cure for at least 5 hr.


Step 7. Seal The Top Section

Use J-B Weld to seal the three potential sites for flame leaks: 1) the junction of the top edge of the inner wall and the circular groove, 2) under the circular edge of the top section on the sidewall of the stove, and 3) the 8 vertical slits in the top section. Skip #1 if the inner wall fits snugly in the groove of the top section and you are not a perfectionist. Skip #2 if the top and bottom sections are undented and generously bonded with J-B Weld. The slits (#3) must be sealed with a thin bead of J-B Weld.


Step 8. Test The Stove

Test the stove for proper operation and flame leaks. Seal any leaks with J-B Weld.


Step 9 (Optional). Finishing Touches

Some artisans may want to befuddle their buddies and beautify their burner by disguising the graphics and junction of the top and bottom sections with 1 in wide heat resistant tape.


Step 10 (Optional). Make A Simmer Ring

The simmer ring is made from the top of a 12 oz Ball Corporation can. Enlarge the pop top hole with a half round or round file by about 50% and smooth the edge with fine sandpaper. Tear the sidewall of the can away from the top. That’s all for the simmer ring. You do not have to pound or press down the flat inner surface as you do for the Pepsi-G stove.


Step 11. Make A Pot Stand And Windscreen

Instructions for pot stands and windscreens are already well described on the internet. Below is a suggested link.


See also:

And Deems Burton has put a lot of effort into designing and making stoves. See The Pika Stove for all kinds of information.

.

Wednesday, August 10, 2011

Version Two

Scott Henderson's Pepsi-G Stove

Note from editor: I originally got interested in making my own stoves after reading Scott Henderson's instructions, first published in 2001.

In the years since then, those instructions have gone away, along with the site where they were published. But, I did manage to piece together the originals a couple of years back.

My comments are denoted by "Note from editor". The rest is the original, except that the formatting is different, and I've removed dead links.

If anyone owns this information and objects to it being published here, let me know. Otherwise share and enjoy.


STOVE PARTS

Aluminum cans in mint condition (no dents), one each of:
  • 12 oz PepsiCo (Budweiser, Lipton's Ice Tea, Mountain Dew, Mug Root Beer, Pepsi, Sierra Mist, or Slice).
  • 14.9 oz Guinness Draught, Caffrey's Irish Ale, or Murphy's Irish Stout.
  • If you use a Murphy's can see Notes in STEP 5 for special instructions.
  • If you substitute a 12 oz can (PepsiCo or other) for the 14.9 oz Irish beer can, see Notes in STEPS 3, 5, and 7 for special instructions.
Note: If you can't obtain the specific cans listed above don't worry. The stove may be made from just about any two 12 oz aluminum cans.

However, there are advantages to the suggested cans. A 12 oz PepsiCo can is preferred for the top section because the circular ridge on the bottom of a PepsiCo can is narrower than that of other brands and forms a circular groove on the inner surface that holds the inner wall of the stove snugly. [Note from editor: I've never seen this. All 12-ounce (355 ml) aluminum drink cans are the same as far as I can tell.]

The 14.9 oz Irish beer cans listed above are favored for the bottom section of the stove because the diameter of these cans is slightly smaller than the diameter of a 12 oz can which fits snugly over a 14.9 oz can without having to cut slits, crease, or otherwise weaken either can. If a 12 oz can is used for the bottom section the stove will be slightly more difficult to make and will have a less finished look from the vertical beads of epoxy on it's exterior (see Fig. 17), but the stove will function just as well.

OPTIONAL SIMMER RING

Aluminum can, one of:
  • 24 oz Miller beer.
Note: The inner diameter of the raised rim on the top of a 24 oz Miller beer can is 62 mm (2 7/16 in). Other large cans with a top rim diameter of 58 to 62 mm (2 5/16 to 2 7/16 in) may perform as well, but all large cans do not have the same size top.

For metric / imperial converstions, see the BackpackGearTest.org Conversion Utility.


STEP 1. MAKE THE BURNER HOLES

Summary. The top section of the stove is constructed in STEPS 1-3 from a 12 oz PepsiCo can. In STEP 1 a sewing needle with a shaft diameter of 0.6 mm (0.024 in) is used to make a circular ring of 32 evenly spaced holes outside and concentric with the circular ridge on the bottom of the PepsiCo can.
Figure 1

Details. Remove the pop-top tab from the top of the can and set the can upside down on a hard, flat surface such as a work bench or a cutting board placed on a table top.

Tip. To achieve evenly spaced burner holes, mark their location with a marking pen before punching the holes (Fig. 2).

Using a hose clamp, fasten the sewing needle to a rod with a diameter of about 13 mm (1/2 in) and a length of about 70 mm (2 3/4 in). The needle should be parallel to the long axis of the rod (i.e., straight, not crooked) with only 4 mm (3/16 in) of the needle extending past the end of the rod (Fig. 3). This lessens the likelihood that the needle will bend and break off. For the same reason, the edge of the hose clamp should be nearly flush with the end of the rod.
Figure 2

Note: The rod and hose clamp are not required, they just make the job easier. Two optional methods of making holes with a needle are described. Option 1, pierce a cork stopper with a needle so that the pointed end extends about 3 mm (1/8 in) beyond the cork. Position the needle where you want a hole and tap on the blunt end of the needle with a hammer. The cork prevents bending of the needle. To further prevent bending, you can trim the blunt end of the needle with wire cutters to within about 6 mm (1/4 in) of the cork. Option 2, simply grip the needle near the point with vice grips or needle nose pliers, position the needle where you want a hole, and pierce the aluminum can with hand pressure..

Tip. Use one or two new needles for each stove. New needles are sharp and pierce the aluminum better than dull, used needles.

Cautionary Note: Protect your eyes with safety glasses or goggles when making the burner holes.
Figure 3

Position the point of the needle where you want a hole, adjust the rod so that the needle is perpendicular to the surface at the hole, and rap gently on the end of the rod with a hammer or simply push the needle into the can with hand pressure. After the 32 holes are punched with the 4 mm (3/16 in) offset needle, go back over the holes with a needle offset 9 mm (3/8 in) past the end of the rod. Push the needle in for most, if not all, of its exposed length. If the needle shaft feels rough at any time during this process, smooth it with fine sandpaper (400 grit). The goal is for each hole to have the same diameter so that the flame will be uniform.

Tip. The burner holes are more easily made with a push pin than a sewing needle. For that reason and for safety, a push pin and a small hammer are the preferred tools of young hands. However, push pins shafts are thicker than needles, typically 1 mm (0.040 in) in diameter, thus they make a larger hole and the fuel doesn't burn as cleanly. If you use a push pin make 24 holes instead of 32.


STEP 2. FORM THE LARGE CENTRAL HOLE (Fig. 4)
Figure 4

Summary. Concentric with the circle of burner holes you made in STEP 1 is a raised circular ridge. Inside the ridge is a bowl-shaped area about 45 mm (1 3/4 in) in diameter. Use a utility knife to cut out the bowl at the base of the circular ridge, but leave the circular ridge and its sides intact. Round the rough edge of the hole with a half round file and smooth it with fine sand paper.

Details. To cut the large central hole with a utility knife, arm the utility knife with a keen (not dull) sharp point (not round point) blade. A dull blade may damage this section of the stove. Hold the can firmly, bottom side up on a hard, flat surface. Score the aluminum can at the base of the circular ridge all the way around its circumference (Fig. 5). On the first pass use very light pressure to obtain a smooth circle. After the first complete turn, continue the process 3-6 more times with light to moderate pressure (never heavy pressure) until the bowl-shaped area of the can pops out.
Figure 5

Tip. With a sharp blade and good technique there is no need to push the blade through the aluminum. Nevertheless, in difficult cases you may find it advantageous to push through the well scored circle with the tip of the blade making a 3 mm (1/8 in) long slit, or if necessary, several consecutive slits to form a longer slit. While making the last slit (the first could be the last), the bowl-shaped section will pop out or drop down with a tearing sound. If it drops down but doesn't pop out, rap in the center of the circle with the base of the utility knife handle, but don't rap so hard that you bend the can.

Shape the large central hole to the base of the circular ridge with a half round file (smooth cut). Smooth the edge of the hole with 320 to 500 grit sand paper.

Tip. Place the can bottom side up on a hard, flat surface and file vertically. Remove material right up to the base of the ridge. Then, use your fingers to gently bend the remaining thin aluminum edge up into the large central hole so that it can be filed off in the opposite direction (i.e., reverse the file).

Tip. When cutting, filing or sanding, hold the can high at the end to avoid putting a permanent dent in the weak side walls of the can particularly within 25 mm (1 in) of the burner holes. Exert downward pressure toward the opposite end, not inward pressure toward the center.

Tip. Save the cut out aluminum "bowl" for mixing epoxy.


STEP 3. CUT OUT THE TOP SECTION (Fig. 6)
Figure 6

Summary. Cut out the top section of the stove with a utility knife blade or scissors so that the finished height is 22 mm (7/8 in). The height of the top section is not as critical as the bottom section and inner wall. The suggested range is 20-24 mm (13/16-15/16 in). Use fine sand paper to prepare the interior surface of the sidewall for epoxy. Clean with warm water. If and only if the bottom section of the stove will be made from a 12 oz can, cut 8 vertical evenly spaced slits in the side wall to a depth of 3 mm (1/8 in) from the shoulder of the can. Burnish the slits.

Details. Two methods are given for cutting the aluminum can. Each works well, but practice on spare cans before cutting the real stove top.
Figure 7

To make an even cut with a sharp point utility knife blade, hold the blade horizontal and steady 22 mm (7/8 in) in height above a flat surface, such as a table top. The blade can be trapped in a hard cover book (Fig. 7) or fixed to a block of wood. A blade with a hole in the middle is easy to secure to the top of a block of wood with a screw and a brad or two. To hold the blade in a book, tape the blade to a stiff piece of paper or thin cardboard, insert the cardboard between the pages of the book, and close the cover. When scoring the can, push down firmly on the book with even pressure to lock the blade in space.
Figure 8

By block or by book, the point of the blade extends about 10 mm (3/8 in) past the edge. Place the PepsiCo can bottom down on a hard, flat surface. Bring the point of the blade in contact with the can and the side of the can in contact with the block or book. Rotate the cutting tool (wood block method) or rotate the can (book method) so that the blade scores the can (Fig. 7). Repeat for about 3 to 5 complete rotations until the can is well scored. Apply gently pressure to the side of the can so that you don't put a permanent crease in the can or pierce through the can with the blade.

When the can is well scored, take the utility knife and cut through the side of the can all the way around its circumference far enough above the score line that you don't dent the can below the score. A couple of centimeters (1 in) above the score line is usually sufficient. From the edge of the new cut, use scissors or a utility knife to cut toward the score at a 45 degree angle until within about 3 mm (1/8 in) of the score. Grab a corner where the last cut was started and tear the aluminum along the score all the way around the can. Tear the aluminum by pulling outward, i.e., away from the center of the can.

Alternatively, cut the can with strong scissors. First draw a line around the entire circumference of the can with a marking pen (Fig. 8). Keep the marker stationary while you rotate the can about its long axis with its bottom on a flat surface. To keep the marker stationary, use a piece of cardboard with a hole punched in it to insert the marker tip. Actually the cardboard should have two holes, one 22 mm (7/8 in) from a straight edge and one 28.5 mm (1 1/8 in) from a straight edge for the top and bottom sections, respectively.

Take the utility knife (including the handle) and cut through the side of the can all the way around its circumference far enough above the marked line that you don't dent the can below it. A couple of centimeters (1 in) above the line is usually sufficient. From the edge of the new cut, use scissors to cut toward the line at a low (acute) angle. Approach the line slowly. It may take 5 or more complete revolutions to finish the cut and the last revolutions may trim off 1 mm at a time.

Tip. The stove looks best if the height is consistent around the entire circumference. To check the height, place the stove top upside down on a flat surface and hold a ruler vertically next to the can. Rotate the can and check the height of the cut edge against the ruler.
Figure 9

Lightly sand the interior of the side wall of the top section with 320 to 500 grit sandpaper. This prepares the surface for J-B Weld (see STEP 6). You can also sand the cut edge of the top section, but if you care about stove cosmetics and you aren't going to cover the stove exterior with tape (see STEP 9) then don't sand the outer surface.

Clean metal particles and dried soda from the top section, especially that in the groove, with warm water from a faucet. A bottle brush or old toothbrush is helpful.

If you plan to use a 12 oz can for the bottom section instead of a 14.9 oz Irish beer can, cut vertical slits in the sides of the top section of the stove with scissors. The slits start from the cut edge of the top section and end 3 mm (1/8 in) from the shoulder (rounded edge) (Fig. 9). Make 8 slits evenly spaced around the circumference of the can. Burnish the slits with a hard, rounded object such as an old spoon, a coin, or the handle of a felt-tipped pen to close up the slit and smooth it. This is done by holding the top section sideways on a hard, flat surface so that the length of a slit contacts the flat surface, and rubbing the slit on the inside of the top section.


STEP 4. CUT OUT THE BOTTOM SECTION (Fig. 10)
Figure 10

Summary. The bottom section of the stove is made from a 14.9 oz can of Guinness Draught, Caffrey's Irish Ale, or Murphy's Irish Stout. Cut the bottom section 28.5 mm (1 1/8 in) in height. The height of the bottom section is important. It should be within the range of 27 to 30 mm (1 1/16 to 1 3/16 in) around the entire circumference. Use fine sand paper to prepare the upper third of the side wall exterior surface for epoxy. Clean with warm water.

Note: A 12 oz can (preferably one that matches the top section) may substitute for the 14.9 oz Irish beer can, but you must cut slits in the top section as described in the last paragraph of STEP 3.

Details. Cut the bottom section following either the utility knife blade or the scissors procedure of STEP 3 and the tips below.

Tip. Check the height with a ruler. Place the stove bottom right side up on a flat surface and hold a ruler vertically next to the can. Rotate the can and check the height of the cut edge against the ruler. Actually, I make my 14.9 oz Irish beer stove bottoms 30 mm (1 3/16 in) and my 12 oz stove bottoms 27 mm (1 1/16 in) tall.

Tip. If you are careful not to dent the unused portion of the aluminum can, you may use it to make the inner wall of the stove (STEP 5). Otherwise you will need an extra undented, generic aluminum can.

Lightly sand the cut edge of the bottom section and the upper 1/3 of the exterior surface of the side wall with 320 to 500 grit sandpaper. This facilitates stove assembly and bonding of J-B Weld, respectively. Clean the bottom section with warm water.


STEP 5. MAKE THE INNER WALL OF THE STOVE (Fig. 11)
Figure 11

Summary. From the remainder of the Irish beer can (or a spare 12 oz can) fabricate a rectangular band 35 mm (1 3/8 in) wide and 180 mm (7 in) long (Fig. 12). The width of the rectangular band is important. The acceptable range is 34-36 mm (1 11/32-1 13/32 in). The length is less important. It can be 170-180 mm (6 11/16 to 7 1/16 in). Form 3 gaps along one of the long edges, each 2.5 mm (3/32 in) deep. The center gap is at the midpoint of the edge and the other two gaps are 50 mm (2 in) from it. Opposing slits, 150 mm apart, are optional and are explained in the Note at the end of STEP 5.

Note: If you use a 14.9 oz Murphy's Irish Stout can or any 12 oz can for the bottom section (STEP 4), make the rectangle 38 mm (1 1/2 in) wide and the 3 gaps 5 mm (3/16 in) deep.

Overlap the short sides of the rectangular band to form a cylinder that fits snugly into the circular groove of the top section. Use tape and/or Krazy glue on the outside surface to temporarily bond the cylinder together. Follow with a thin bead of J-B Weld over the external tag end of the band to permanently cement the cylinder.

Details. Use a utility knife to cut off the remaining end (the top) of the Irish beer can, or the top and bottom of a generic can, about 2.5 cm (1 in) from the end(s) so that you have a cylinder with ragged edges. With scissors, cut vertically straight across the cylinder to form a ragged rectangle. Lay the aluminum down on a cutting board and place a straightedge on top parallel to a long side. Trim off one ragged long side with the utility knife using the straightedge as a guide.
Figure 12

Tip. When cutting the aluminum with the straightedge and utility knife, score the aluminum lightly and repeat several times. Hold the straightedge firmly in place and bend the aluminum at the score upright 60 to 90 degrees and then back down. Repeat this bending process until the aluminum breaks off evenly at the score

Measure 35 mm (1 3/8 in) from the new smooth edge and repeat the cut to form the opposite long side. The long sides should be as parallel as possible. You now have a long rectangle. Call it a band. Trim one of the short sides of the band perpendicular to the long sides. Cut the other short side 180 mm (7 in) from its opposing side.
Figure 13

To allow the alcohol fuel to flow from the middle of the stove to the space between the walls, make three gaps along one of the long edges of the band. One gap is at the midpoint of a long edge and the other two gaps are 50 mm (2 in) out from the midpoint. Mark their location with a marking pen. Form arch-shaped gaps by using a hole punch set in from the edge about 40% of its diameter or 2.5 mm (3/32 in) deep.

Alternatively, if you don't have a hole punch, make the gaps with scissors or a utility knife. To form a rectangular gap, cut two slits perpendicular to the long edge of the aluminum band 2-3 mm deep and 3 mm apart. Bend the aluminum between the slits flat against the painted side of the band.
Figure 14

Wipe the surface of all three stove parts with tissue paper soaked in denatured alcohol. Denatured alcohol removes marking pen ink as well as cleans the surface for bonding of J-B Weld.

Convert the inner wall band into a cylinder as follows. Pull off a 2 cm (3/4 in) piece of masking tape and set it aside. Place the top section of the stove upside down on a flat surface. Overlap the ends of the band about 30 mm (1 3/16 in) to form a cylinder. Seat the cylinder into the circular groove of the top section. Tighten the cylinder, making sure it remains fully seated in the groove. Holding the area where the ends of the cylinder overlap, carefully remove the cylinder without changing its diameter. Make sure the overlapped edges of the cylinder are even and place the piece of masking tape on the outside of the cylinder across the tag (free) end (Fig. 13).

Check the diameter of the cylinder as follows. Reinsert the cylinder, overlapped area first, into the circular groove. The cylinder should fit snugly in the groove but not tightly. In other words, it should take a little force, say 0.5-1 kg (1-2 lb), to push the cylinder into the groove but it should not take so much force that the cylinder goes out of round. Adjust the diameter of the cylinder until it is correct. If the cylinder is close to the right diameter, small adjustments of 0.5-1 mm make a difference. A snug cylinder makes stove assembly (STEP 6) easier and properly directs vaporized fuel out the burner holes. A cylinder that is too tight may buckle during stove assembly. When you are satisfied with the cylinder size, glue down the tag end on the outside of the cylinder with a drop or two of Krazy glue.

Tip. Place two small pieces of masking tape across the top and bottom edges of the cylinder in the middle of the overlap. Remove the original piece of tape from the tag end on the outside surface of the cylinder and apply Krazy glue under the tag end.

After the Krazy glue bonds (10-15 sec), remove the tape. To prepare the surface for J-B Weld, lightly sand the tag end on the outside of the cylinder and a few mm on either side of it. Retest the cylinder diameter by fitting it into the circular groove of the stove top so that the edge WITHOUT the gaps is in the groove. If it fits snugly, leave it in the groove. If the cylinder fits loosely see STEP 7 for how to correct a loose fit. If the fit is too tight break the Krazy glue bond with heat and readjust the cylinder diameter, or make a new cylinder.

Use a wooden match stick or toothpick to apply a thin bead of J-B Weld about 3 mm (1/8 in) wide covering the edge of the tag end on the outside surface of the cylinder. Allow the J-B Weld 5 hr or more to partially cure before proceeding with stove assembly (STEP 6), or immediately proceed with stove assembly being careful not to touch the uncured epoxy.

Note. J-B Weld is necessary because the heat produced during stove operation loosens the Krazy glue bond and the cylinder would otherwise unravel. If you choose to let the epoxy cure before proceeding you might as well apply the epoxy with the cylinder unattached to the top section. It's easier that way.

Note. In the first version of the Pepsi Stove instructions, the cylinder was held together with two interlocking slits rather than J-B Weld. This design is stronger than the one above, though more difficult to execute because precise slit distance is critical to obtain a snug fit. [See STEP 7 for how to seal a loose fit.] Slit instructions are repeated here for those that prefer them. Measure 15 mm (5/8 in) in from one of the short sides of the rectangle and cut a slit into one of the long sides of the rectangle. Slit depth is slightly more than half the length of a short side, or 18 mm (3/4 in) for a 35 mm (1 3/8 in) wide band. Make the slit as perpendicular to the long sides as possible.

Measure 150 mm (5 29/32 in) parallel to the long sides and make the second slit in the edge of the opposite long side. Interlock the two slits of the long rectangle to make a cylinder so that the tag ends are outside the cylinder (Fig. 14). Tape down one of the tag ends with a small piece of masking tape, making sure the edges of the tag end are even with the edges of the cylinder. Glue the untaped tag end to the outside of the cylinder with a drop or two of Krazy glue, making sure the edges of this tag end are even with the edges of the cylinder. Remove the tape and glue down the free tag end. Seal the interlocking slit and affix the two tag ends with three parallel thin beads of J-B Weld on the outside surface of the cylinder. Allow the J-B Weld 5 hr or more to partially cure before proceeding with stove assembly (STEP 6), or immediately proceed with stove assembly being careful not to touch the uncured epoxy.


STEP 6. ASSEMBLE THE STOVE (Fig. 15)
Figure 15

Summary. Fit the gapless edge of the inner wall into the circular groove of the top section. Slide the bottom section inside the top section. When the bottom section barely fits inside the top section, apply a thick bead of J-B Weld around the entire circumference of the bottom section just below the edge of the top section. Compress the sections together until the inner wall is tightly trapped between the top and bottom sections. Wipe off the excess epoxy. If the top section has slits, install rubber bands to compress the slit sides. Invert the stove and put a weight on top. Cure for at least 5 hr.

Details. Before assembling the stove, make a rectangular shim from aluminum can scraps to help ease the top section over the bottom section. From the side of an aluminum can cut out a rectangle about 25 x 65 mm (1 x 2 1/2 in). Round off the corners of the rectangle and lightly sand the edges. The shim should be smooth and undented particularly along its edges. Save the shim for ensuing stoves.
Figure 16A

If you haven't done so already, insert the cylindrical inner wall into the circular groove of the stove top so that the edge without the gaps is in the groove.

Place the top section (with the inner wall held in its groove with friction) over the bottom section and angle the top section so that one part of its edge overlaps the edge of the bottom section by about 3 mm (1/8 in). Fix the two sections together at that point with a short piece of tape, about 40 mm (1 1/2 in) long (Fig. 16A). On the side of the stove opposite the tape insert the shim between the edges of the top and bottom sections (Fig. 16B). Move the shim along the junction of the edges right to left (or left to right) as needed to ease the top section over the bottom section.
Figure 16B

When the edge of the top section barely overlaps the edge of the bottom section around the entire circumference, remove the shim and the tape and press the two sections together slightly so that they overlap by 6 mm (1/4 in) or less. Apply a thick, continuous bead of J-B Weld about 10 mm (3/8 in) wide around the entire circumference of the bottom section just below the edge of the top section. Press the top and bottom sections together slowly until the inner cylinder is held firmly between the top and bottom sections.

During this compression process, make sure the cylindrical inner wall is seated in the circular groove of the top section and keep the straight side walls of the two sections as parallel as possible. As long as you do, the stove should easily withstand 2-4 kg (5-10 lb) of vertical force. When the inner wall is flush against the bottom of the bottom section and the stove does not compress any further with moderate pressure, stop. Don't compress the stove with so much force that you bend the inner wall. The stove should be 40 mm (1 9/16 in) in height.

Note. The circular groove on the bottom of a Guinness or Caffrey's can has a larger diameter than the circular groove of a PepsiCo can, thus the cylindrical inner wall won't fit into the groove of a Caffrey's or Guinness bottom stove section. This is not a problem. Ignore it. On the other hand, the circular groove of the Murphy's can is approximately the same diameter as the PepsiCo can, thus the cylindrical inner wall fits into the circular groove of the Murphy's can.

Thoroughly wipe off the excess epoxy with paper towels, facial tissue, or toilet paper. Keep the epoxy off your fingers so that you don't transfer it to the burner holes.

Note: If the top section has slits be careful not to bend them when wiping off the epoxy. Once the excess epoxy is cleaned up, put several rubber bands around the stove to clamp the slit sides of the top section against the outside of the bottom section.

Invert the stove, put a weight on top (e.g., can of soup) and let the epoxy cure for at least 5 hr before proceeding to STEP 7 or at least 15 hr before proceeding to STEP 8.


STEP 7. SEAL THE TOP SECTION (Fig. 17)
Figure 17

Summary. Use J-B Weld to seal the three potential sites for flame leaks: 1) the junction of the top edge of the inner wall and the circular groove, 2) under the circular edge of the top section on the side wall of the stove, and 3) the 8 vertical slits in the top section. Skip STEP 7 if the inner wall fits snugly in the groove of the top section and you are not a perfectionist, if the top and bottom sections are undented and generously bonded with J-B Weld, and if the top section does not have slits.

Details. If the inner wall fit loosely in the circular groove of the top section or you are inescapably meticulous, seal the gap between the top of the inner wall and the circular groove. Use a wooden match stick or toothpick to scrape J-B Weld into the space between the top of the inner cylinder and the lip of the circular groove. Use Q-tips to force the J-B Weld into the gap, smooth out the epoxy, and remove most of the excess epoxy. Use paper towels, facial tissue, or toilet paper to thoroughly wipe off excess J-B Weld from the inner cylinder. If further sealing is planned, immediately proceed to the next paragraph. Otherwise, let the epoxy cure for at least 15 hr before using the stove.

If the top and bottom sections are dented and/or J-B Weld was used sparingly to bond these two sections together, then there may be an air gap for a flame leak. Put a bead of J-B Weld over the circular edge of the top section on the side wall of the stove, and try to force epoxy under the edge with a Q-tip. Wipe off the excess epoxy. Immediately proceed to the next paragraph if your stove has slits in the top section. Otherwise, let the epoxy cure for at least 15 hr before using the stove.

If you cut slits in the top section of the stove, seal each slit with a thin bead of J-B Weld about 2 mm (3/32 in) wide. Use a wooden match stick or toothpick to apply the epoxy. Let the epoxy cure for at least 15 hr before using the stove.


STEP 8. TEST THE STOVE (Fig. 18)
Figure 18

Summary. Test the stove for proper operation and flame leaks.

Cautionary Note: Perform this test is subdued light. An alcohol flame is nearly invisible in bright light. When the flame burns out, let the stove cool for a couple of minutes before touching it with bare fingers.

Details. Put 250 ml (1 cup) of water in a cooking pot and set it aside. Set the stove on a heat resistant surface such as a dinner plate or pie tin. Pour about 15 ml (1 T or 0.5 fl oz) of denatured alcohol or methanol down the large central hole of the stove and light it. It takes about a minute for this volume of room temperature alcohol to heat up, vaporize, and achieve an even burn out the burner holes. Hold the pot about 2.5 cm (1 in) above the flame. You should observe an even, circular pattern of (mostly) blue flame coming out of the small burner holes.

If the flame doesn't come out of the burner holes you likely have a problem with the inner wall. Either it is too loose or the gaps are blocked off. If the inner wall is too loose seal it at the top with J-B Weld (see STEP 7). If you can't rotate the inner wall with your fingers it is not too loose. If the gaps are blocked off, punch or cut holes at the base of the inner wall. If you can see the gaps they aren't blocked off. A predominantly orange flame indicates poor fuel quality or poor oxygenation of vaporized fuel.

Note: Without a pot over the stove, it appears to the novice that the flame burns excessively high. Further, it may appear that the flame comes largely out of the central hole, but that is an optical illusion unless it happens with the pot test.

Put the pot down and check for flame leaks at the junction between the top and bottom sections of the stove and at the slits in the top section (if there are any). Rotate the plate to check the entire circumference of the stove. If there is a flame leak seal it with J-B Weld. Let the epoxy cure for at least 15 hours before retesting the stove.


STEP 9 (Extremely Optional). FINISHING TOUCHES (Fig. 19)
Figure 19

Summary. Some artisans may want to befuddle their buddies and beautify their burner by disguising the graphics and junction of the top and bottom sections with heat resistant tape.

Details. Pull 30 cm (12 in) of 3M High Temperature Flue Tape off the roll and cut the 1 1/2 in wide tape in half lengthwise. This produces two pieces of tape about 20 x 300 mm (3/4 x 12 in), which is enough for two stoves. Trim a couple of centimeters (1 in) from each end to have a clean, wrinkle-free piece. Center the tape on the side wall of the stove and tape over the junction of the top and bottom sections. As you install the tape, burnish it by rubbing with your thumb, but don't push too hard and put a dent in the stove. The tape can be removed at any time with no damage to the stove and the tape residue cleaned off with denatured alcohol or acetone.

Alternatively, install heat resistant, self-adhering silicone tape. One brand is Tommy Tape. It comes in a variety of widths, but be aware that Tommy Tape should be stretched during installation so it becomes 25% narrower than it is on the roll. Consequently 3/4 in wide tape becomes 9/16 in wide installed and 1 in wide tape becomes 3/4 in wide installed. Tommy Tape comes in a variety of thicknesses and two cross-section shapes. I recommend the 20 mil thickness and rectangular cross-section. The regular colors are dull but vibrant colors will soon be offered. If you are lucky you can find the tape in a local retail store. If not, order it from tommytape.com.

If you are hesitant to take the plunge for a 10 or 36 ft roll, they offer a 3 ft evaluation roll for $1.95 (including shipping), but be warned, the tape is tricky to work with because it is self-adhering and you may waste 3 ft just learning how to handle it. One downside of this tape is that dirt and sand tend to stick to the tape like they do to a silnylon tarp. Cut 30 cm (12 in) off the roll, which should be enough for 2+ turns around the stove. Trim the corners off both ends. Center the starting end on the side wall of the stove and hold it there tightly as you stretch and wrap the tape around the stove. The tape sticks to itself but it doesn't stick to the stove, thus you can roll the tape off if you want to remove it.


STEP 10 (Optional). MAKE A SIMMER RING (Fig. 20)
Figure 20

Summary. The simmer ring is made from the top of a 24 oz Miller beer can. Enlarge the pop top hole with a file. Tear the side wall of the can away from the top. Press (or hammer) the top surface of the can top downward against a flat surface to form a cake pan shaped simmer ring.

Details. Wiggle the pop top back and forth until it falls off. Enlarge the hole with a half round and/or a round file, and smooth the edge of the hole with fine sandpape.

Note: You may find with experience that you want a larger opening than the pop top makes. The prospective simmer ring pictured in Fig. 20 has a slightly enlarged hole. It is easier to enlarge the opening before releasing the top from the can.

Release the flat can top from the rest of the can by cutting the side wall of the can all the way around the perimeter about 2-3 cm from the top. From the cut edge of the side wall, cut a slit down to within a few mm of the flat can top. Tear the side wall away from the top, which resembles a miniature pie plate. If the flap that covered the hole is still attached to the back, pull it off. Do not bend the top while removing the side wall material.

Place the can top right side up (rim up) on a flat, hard surface. Pound down, or better, press down the horizontal portion of the can top until it is flat against the flat, hard surface. Do not bend the circular rim portion of the can top or its short horizontal sides. That's all. You now have a simmer ring.

Tip. A solid cylinder (metal, plastic, or wood) with parallel faces helps in this procedure, especially if the diameter of this cylindrical tool is slightly smaller than the diameter of the can top rim so that the cylinder fits snugly inside the can top.

The simmer ring is typically used after the dinner has come to a boil. Place the simmer ring upside down on top of the large central hole of the stove. The outside edge (or rim) of the ring should cover the burner holes which forces the alcohol flame to come out the hole of the simmer ring. It takes a minute or so for the flame to come to a new low flame equilibrium. If you want to switch back to high heat, then simply remove the simmer ring. If you want to extinguish the flame, it is easier to blow out if the stove with the simmer ring in place. Let the stove cool and pour any remaining fuel back into the fuel bottle.

Be careful. The simmer ring gets too hot to touch with bare fingers. You can place or remove the simmer ring with multi-tool pliers, alligator clips, a spork, or a stick. Alternatively, you can install a mini handle made out of lightweight material attached with J-B Weld or a rivet.

Note: Set up the stove in an area protected from the wind and use a windscreen. This is especially important for this simmer ring design.


STEP 11. MAKE A POT STAND AND WINDSCREEN

Instructions for pot stands and windscreens are already well described on the internet: Roy Robinson's Cat Stove.