Dehydrator: A small machine used in the home to reduce healthy, well-adjusted fruits and vegetables into little bits of hard plastic so that they can be carried far into the wilderness where they are found to be completely inedible, indigestible, and are discarded.
The actual
Dehydrator: A person who either creates deserts or tortures vegetables with one of these machines.
If you sleep in a backpacking hammock you know how comfortable it is.
If you haven't there is nothing anyone can say to make you understand how comfortable it is. Simply beyond words.
If you can't sleep on the ground any more you have no choice anyway, other than giving up backpacking. This is pretty well my case, partly because of the back I was born with and partly because of creakiness as I get older. Can't help it.
But.
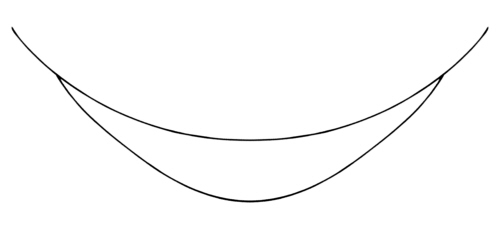
There is a problem with backpacking hammocks. Their undersides are hard to insulate. You notice this the first time you get into a hammock.
Yer basic hammock
Just about everyone first tries using a normal sleeping pad. One intended for sleeping on the ground.
This is great except that it doesn't work. It doesn't work because normal sleeping pads (sleeping mats, mattresses) are too narrow and rigid. Sure, they are flexible but not flexible enough. To work they would have to bend along two axes at once, head-to-toe and side-to-side, and they can't to this. They buckle and bunch up.
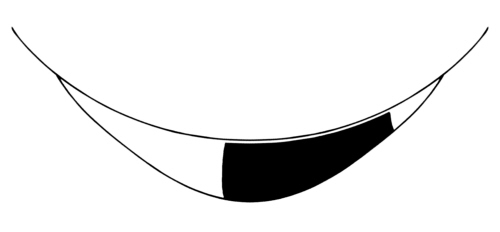
Hammock with minimal underquilt in place.
Any anyway, they're too narrow. Most are 20 inches by 48 inches (51 by 122 cm). The length is fine. The width is not. You need at least 36 inches of width, and even that is sketchy. Let's say 40 to 42 inches (102 to 107 cm) wide.
Why?
Because.
Because that's how much you need. You need insulation that's wide enough to wrap around you.
Part of it is under you and the rest goes around your sides. Another thing you quickly learn is that having your major body parts insulated is not enough. You need all of them insulated.
Lying in a hammock with even one knee in contact with the uninsulated side of the hammock is enough to keep you awake, even if that knee is inside your sleeping bag. And it's usually worse than that.
Raw fabric for shell (left). Cut (right ) toward head end to make a sort of boat's bow shape to match the hammock's curve
Try using a 20 inch wide pad and you'll have both shoulders and at least one hip cold. You won't really lose much heat but it will annoy you. The way having a fly trying to crawl up your nose will annoy you, even if the fly is too big to get past your nose hairs.
You will go crazy. In either situation.
So hammock insulation has to be wide enough.
Four feet to four and a half feet long (120 to 140 cm) is fine. For me. But I'm short by today's standards. If you're a big'un you will need more, but you don't need full body length.
And, as noted, hammock insulation needs to be flexible.
And it has to insulate.
And you don't need too much.
So that line of thinking brought me to an underquilt as narrow and short as I can stand, made entirely of fabric. An item that is adjustable and made of synthetic materials. No closed cell foam, no open cell foam, no down, no extra weight.
As above, with insulation on top.
What I have now is a small quilt shaped to fit the hammock with a shell of light fabric and one layer of fuzzy synthetic insulation. The whole thing is held to the bottom of the hammock with elastic cord (shock cord).
At night I stuff my pack inside a large plastic bag tied shut, and keep that inside, under my legs. This keeps my knees bent, relieves pressure on the heels of my feet (which can be annoying), and insulates my legs well enough.
After getting the right size, shape, and insulating qualities figured out, the right suspension was the next problem. For several seasons I did what others do - I tied shock cord to each end of the hammock and suspended the underquilt from this like it was on rails.
But this involves long runs of shock cord and is loose and sloppy. It's like hanging a picture by running a wire from each corner of the room.
I wanted something simpler and more direct.
So now, on each side of the hammock, I have a loop to anchor the shock cord. The shock cord has four free ends, each with its own cord lock. This is how I adjust the tension. The shock cord itself runs through loops along the top edges of the underquilt, supporting it.
I adjust how tightly the underquilt hugs the hammock via the cord locks. This is much easier. There are no long lines to dangle or tangle, and the underquilt can't move around on its own any more. Things are much simpler and tighter this way.
If I need a bit more warmth I can stuff something between the hammock and the underquilt, like one of those two-ounce (60 g) mylar emergency blankets, which I carry as an inside-sleeping-bag vapor barrier (just in case).
Breathability is important.
A foam pad made for the ground is bad not only because it's too narrow and too rigid but because it traps condensed moisture against the body. A breathable underquilt doesn't. With freely breathable insulation underneath you don't have to put up with a damp back all night as well as all day.
Finished underquilt attached to hammock.
How I make one.
First I hang my hammock and put some weight in it. Whatever: a couple sleeping bags, a pillow, clothes, whatever. This fills out the hammock to its normal shape.
Next I decide where the underquilt should go. My current one extends to about a foot (30 cm) from the head end of the hammock. My hammock is short, and I like to lie toward the head end. Someone else will use different positioning. Anyway, once I know where the underquilt's upper end goes the position of the foot end defines itself based on the underquilt's length.
Then I take some thin, light plastic sheeting and pin it to the hammock, trimming it and adjusting until I've captured the shape of the hammock.
Then I go back and measure the hammock from one edge across the bottom and up to the other edge for the full length of the proposed underquilt. I use these measurements to double-check the template I made out of plastic. One should match the other.
After this I lay out the fabric for the shell, trace out the shape, and cut it out, leaving a generous margin to act as a hem.
Repeat the previous step for the insulation. One inch (2.5 cm) thick works well, if it's good quality, but it's easier to use thicker or thinner insulation.
Lay this insulation onto the shell, roll the shell's edges over the insulation, pin in place and sew. Doing this locks the insulation to the shell. I apply some hand sewing as needed.
Just to be clear here, the shell goes under the insulation only. There is no top half going over the top side of the insulation. The bottom of the hammock does this.
I sew down the centerline, through both the insulation and the shell, and then lay an extra piece of insulation in over this stitching so I'm sure to have no cold spot along my spine. This takes only a bit of hand sewing and locks the two layers of insulation together securely.
Sew a fabric tube or some loops across the head and foot end of the underquilt and run shock cord through, then add a cord lock to each end of the shock cord (four total). This will let you cinch down the head and foot ends across the width of the hammock to seal out drafts and finish snugging up the underquilt.
Add loops along the two sides of the underquilt that run along the hammock's sides.
On each side of the hammock, add one loop near the head end and one toward the foot end. These must be past the ends of the underquilt to allow for tensioning.
Anchor shock cord to the hammock and run it through the loops on the underquilt, then adjust tension. Finally, tie knots in the shock cord's ends after adding the cord locks. This keeps them from falling off.
I've been looking for years (being slow on the uptake) for a reasonable trail food. This may be it.
Reasonable: (1) Body fuel that (2) I can get down, and (3) keep down, and (4) which provides enough energy and (5) doesn't violate rules 1 through 4 no matter how long the trip gets to be.
Trail Food: Body fuel that is (1) light, (2) not perishable, and has (3) a high energy density.
I am not an expert.
I used to be able to eat anything, and lots. If I skipped eating all day I could eat anyone else under the table. Drink is another matter. If I drink a little too much I puke like crazy, and that's fine with me. You want to show how big a man you are by how much you can drink, go kill yourself with it. I am not impressed.
My forte has always been food.
Once I went to supper with a friend. We were both hungry. My friend was nearly twice as big as I was. We each ordered a large pizza and had a couple beers. I finished mine (how big are those things - about 18" across?), ate all the crumbs and finished all my beer. He didn't. Didn't even come close.
I can't do that any more. Stomach won't hold that much these days. It starts screaming in severe pain like it's going to rip. Gettin' old. But once upon a time...
Correction: My forte has always been eating mass quantities of food. Not food in general.
I can cook well enough to get by and all that, but don't consider cooking to be either a sport or a religion. It's like cleaning out the toilet or doing laundry. One more thing that needs to be done, and done well enough, but beyond that one shouldn't think about it.
Which is kind of the problem in a way, when you get to backpacking.
Of course the other end of the spectrum is someone who fiddles with food endlessly and either won't go backpacking because there is no kitchen out there, or who makes too big a fuss on the trail and twiddles endlessly with tiny bits of things that need to be combined in just the right way at the right time.
Once I heard a woman gasp in horror when I mentioned that instant mashed potatoes make a great trail meal.
This is one reason I don't either own or carry a gun. I know I'd start shooting people. I would, I would.
"But that's all starch," she said. Ignorantly. In horror.
Add together one pouch (four servings) of instant, pre-seasoned mashed potatoes, four tablespoons of powered milk, four tablespoons of parmesan cheese, about four tablespoons of butter, with possibly some extra onion and garlic powder, put all into a freezer-weight ziplock bag.
When dinnertime comes add two cups of hot water, wait until it's cool enough to eat without removing the lining of your mouth, rip one corner off the bag, and squeeze the contents into your mouth. Swallow as often as needed. By the time the bag is empty you are totally ready for bed, where your stomach sighs quietly to itself and does not make any fuss at all, and you are satiated and quickly lose consciousness.
That is not "all starch". Them's good eats.
But it sort of has an odd chemical flavor if you pay too much attention. After the first or second day you don't notice, but you do wonder at times.
Other foods aren't so easy, and you need more than one thing to eat.
Corn meal is way too hard to cook on the trail. I don't cook. It's either something cold or something that goes into a bag and jumps for joy when hot water is poured on it. Few things do that. Corn meal mush takes half an hour of heat and stirring and adding more water just to get cooked and mushy. It's good but not for backpacking.
So I tried pinole. A sort of pinole anyway. Looks good so far.
Take ordinary yellow corn meal. Put it in a pan and heat on the stove, stirring constantly until it's about medium brown. That's it.
I've put about 1/2 to 2/3 cup into a bag and added dark brown sugar, powdered milk, and maybe four tablespoons of butter. On the trail I add water, a little less water every time I try it. For 2/3 cup of dry pinole I'm down to just under one cup of hot water, and it still seems too much.
This stuff does not cook or swell up, though it does soften a bit. The pan scorching does cook it in a way, and gives it a flavor I can't describe. I don't want to call it a "nutty" flavor but that's what a cook would call it. It isn't. It tastes like scorched corn meal. It's distinctive. A good flavor, but unique.
The texture bugs me. It's like eating wet sand. And since the water doesn't soak in, it's like eating wet sand with too much water in it. Too bad. Get over it, because there is a magnificently excellent part to this story.
The excellent part is that this stuff, once eaten, simply passes right out of your consciousness. You get it down, drink a cup of tea as a chaser, get up, and walk. After several hours you slowly get hungry again. No farting, no stomach gurgling, no projectile crapping, no nothing else including no nausea, no retching, no second thoughts or doubts about what you ate. No sudden energy crash. Pinole just works.
Which is about as good as food ever gets. Really. If you think of food as fuel. Maybe you don't, but that's your own shortcoming.
I understand that real pinole maybe should be made from masa harina. OK. Personally I've never seen it with its clothes off but maybe I'll try it some day.
I also understand that real pinole is normally stirred up in water and drunk cold. OK. Maybe I'll try that too, but butter adds huge amounts of calories and takes hot water to melt.
Right now I know that this works, and works well. I'm good to go as is, and it's likely only to get better as I figure out alternatives. But as I said it works already so even if I never tried to refine my method pinole would be a good option.
From the Food and Agriculture Organization of the United Nations:
Pinol or pinole
Recipe 4
Ingredients/Amount.
White dry maize: 1 kg
Water: 4 litres
Sal: to the pleasure
Method.
1. Toast the cleaned maize in a mud pot of wide mouth until it become golden to slightly brown in colour.
2. To grind the maize until it get fine grains
3. Cooling.
4. Put the grinded grain (pinol) into a container, add the water and shake until it become homogeneous.
5. Add small pieces of ice and it is ready for drinking. Also it may be served adding a little of salt or sugar.
It yields about 12 standard glasses.
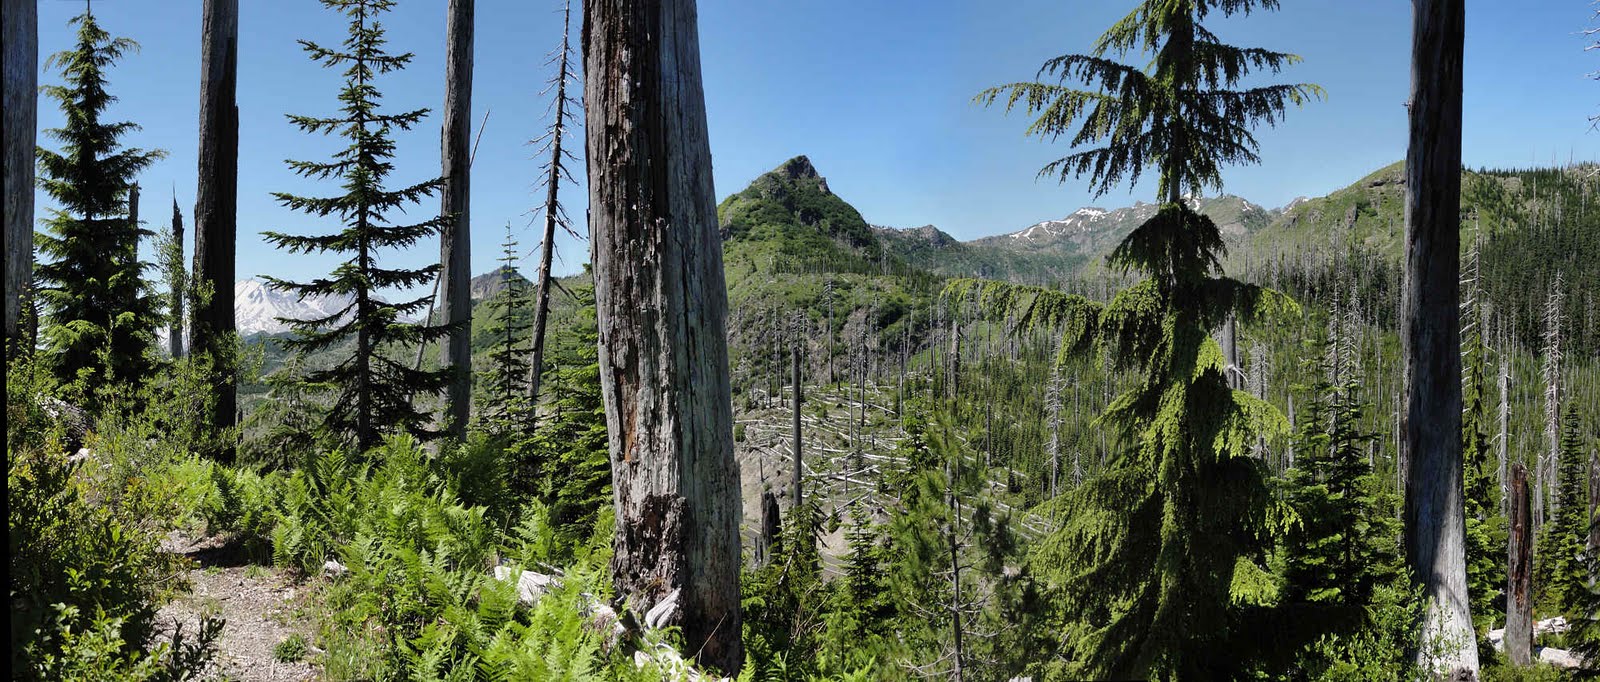
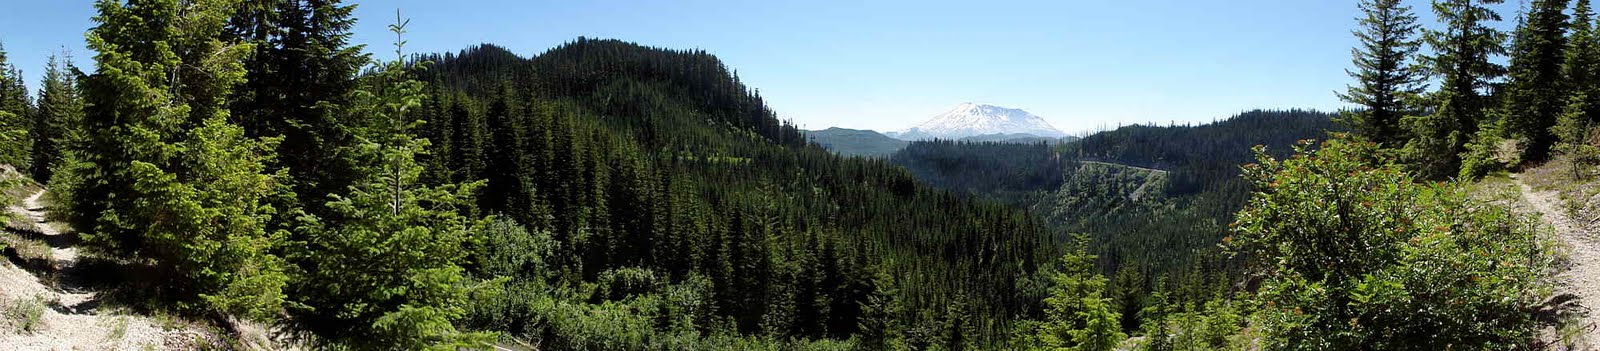
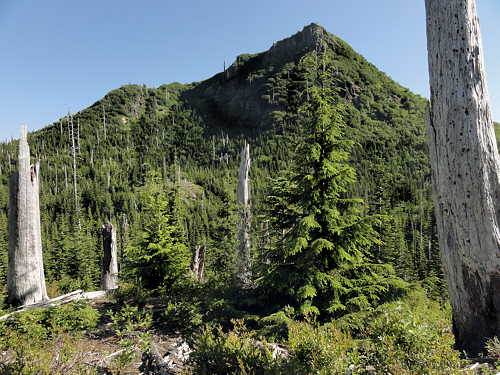
Bismark Mountain looking west toward Norway Pass. (Click to embiggen.)
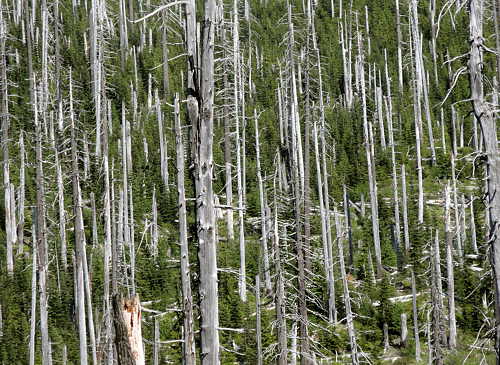
So there I was, set for a five day training hike across the Boundary Trail, which once demarcated the Columbia and Rainier National Forests, now all part of the Gifford Pinchot National Forest.
Everything went OK. It was hot, but I had water. I sweated a lot. After a late lunch I still had six or eight miles to go (10 - 13 km). It would be tight but I pushed on.
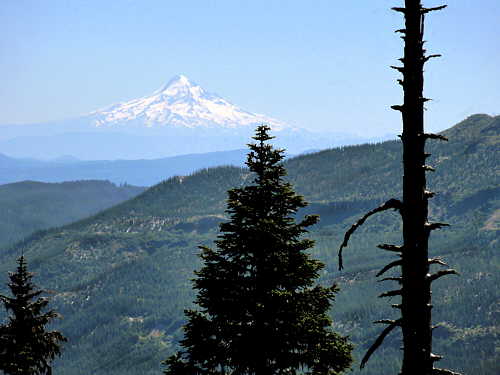
Mt Hood, far to the south in Oregon.
Toward dusk, at around 5000 feet (1524 m) I hit snow. Then more snow. The trail disappeared. Then bits of it reappeared, every now and then. The snow was three to six feet (1 - 2m) deep. I got sidetracked, missed the lake-blessed basin I was aiming for, and climbed an extra couple hundred feet before giving up, only to see where I'd gone wrong.
St Helens in the sun.
Anyway, that basin was all white, all snow and ice. No chance to stop, have a bath, and pitch a cozy camp, so I raced back downslope for half an hour, put up my hammock, ate, and went to bed with around half an inch of dried sweat between my skin and my stiff, sticky clothes. I had to, because it was dark by then, and there were clouds of mosquitoes everywhere, unlike at the lower elevations.
So the next morning I headed back.
St Helens from above Road 25 near Bear Meadow. (Click to embiggen.)
Road 25 from above, east of Bear Meadow.
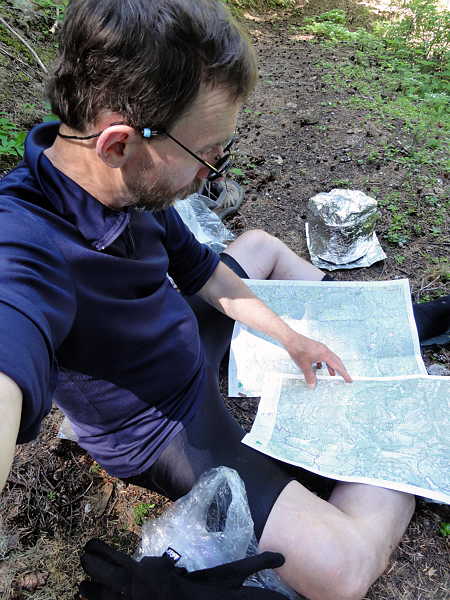
At lunch on day two, sitting in the middle of the trail, I finally evaluated my decision by checking out the maps. Sounds dumb but that's the way it is sometimes.
Anyway, it was the right decision.
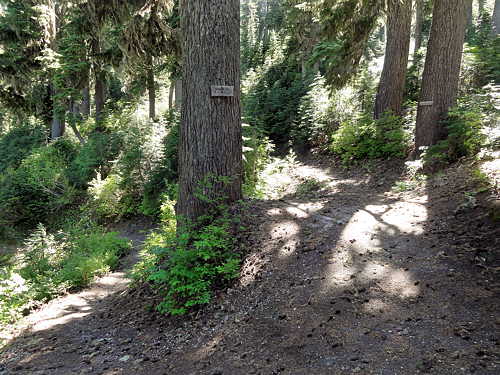
A sort-of typical stretch of trail, in one of the level spots.
Sorting it all out while lunch cooks.
I may never get back there, but I saw part of it last fall: Craggy Peak, Snagtooth Arch, Jumbo Peak, Sunrise Peak, Juniper Peak, and Shark Rock. And having done that knew enough about the area not to regret the decision. Regret being defeated, yes, but not the decision. It was the right one.
Ditto, stove in background.
My route would have taken me along steep shaded slopes where the snow would have been solid and impassible, so turning around was the right choice.
But I got a few photos. Not of the mosquitoes, or of the trail, badly torn up by motorcycles (I figured I had four more days to do all this), or of the snowy cirque at Badger Meadow where the pond was still frozen solid. But a few others.
For what it's worth.
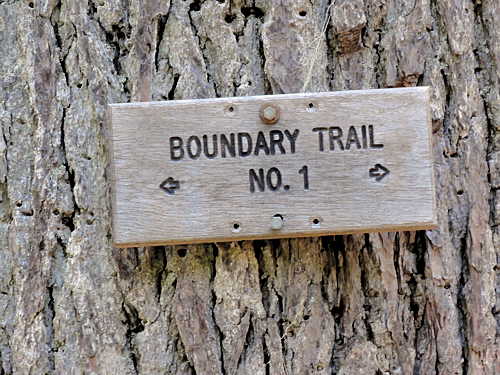
Junction of Boundary and Strawberry Mountain Trails.
Rest spot along the trail on the way back, above Ghost Lake. (Click to embiggen.)
 The ideal
 Typical small-scale food processor
 The actual
 After-dinner wobblies
 Plans for making your own