If you sleep in a backpacking hammock you know how comfortable it is.
If you haven't there is nothing anyone can say to make you understand how comfortable it is. Simply beyond words.
If you can't sleep on the ground any more you have no choice anyway, other than giving up backpacking. This is pretty well my case, partly because of the back I was born with and partly because of creakiness as I get older. Can't help it.
But.
There is a problem with backpacking hammocks. Their undersides are hard to insulate. You notice this the first time you get into a hammock.
Yer basic hammock
Just about everyone first tries using a normal sleeping pad. One intended for sleeping on the ground.
This is great except that it doesn't work. It doesn't work because normal sleeping pads (sleeping mats, mattresses) are too narrow and rigid. Sure, they are flexible but not flexible enough. To work they would have to bend along two axes at once, head-to-toe and side-to-side, and they can't to this. They buckle and bunch up.
Hammock with minimal underquilt in place.
Any anyway, they're too narrow. Most are 20 inches by 48 inches (51 by 122 cm). The length is fine. The width is not. You need at least 36 inches of width, and even that is sketchy. Let's say 40 to 42 inches (102 to 107 cm) wide.
Why?
Because.
Because that's how much you need. You need insulation that's wide enough to wrap around you.
Part of it is under you and the rest goes around your sides. Another thing you quickly learn is that having your major body parts insulated is not enough. You need all of them insulated.
Lying in a hammock with even one knee in contact with the uninsulated side of the hammock is enough to keep you awake, even if that knee is inside your sleeping bag. And it's usually worse than that.
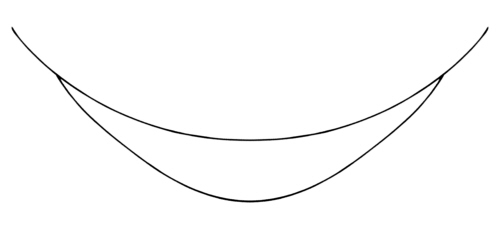
Raw fabric for shell (left). Cut (right ) toward head end to make a sort of boat's bow shape to match the hammock's curve
Try using a 20 inch wide pad and you'll have both shoulders and at least one hip cold. You won't really lose much heat but it will annoy you. The way having a fly trying to crawl up your nose will annoy you, even if the fly is too big to get past your nose hairs.
You will go crazy. In either situation.
So hammock insulation has to be wide enough.
Four feet to four and a half feet long (120 to 140 cm) is fine. For me. But I'm short by today's standards. If you're a big'un you will need more, but you don't need full body length.
And, as noted, hammock insulation needs to be flexible.
And it has to insulate.
And you don't need too much.
So that line of thinking brought me to an underquilt as narrow and short as I can stand, made entirely of fabric. An item that is adjustable and made of synthetic materials. No closed cell foam, no open cell foam, no down, no extra weight.
As above, with insulation on top.
What I have now is a small quilt shaped to fit the hammock with a shell of light fabric and one layer of fuzzy synthetic insulation. The whole thing is held to the bottom of the hammock with elastic cord (shock cord).
At night I stuff my pack inside a large plastic bag tied shut, and keep that inside, under my legs. This keeps my knees bent, relieves pressure on the heels of my feet (which can be annoying), and insulates my legs well enough.
After getting the right size, shape, and insulating qualities figured out, the right suspension was the next problem. For several seasons I did what others do - I tied shock cord to each end of the hammock and suspended the underquilt from this like it was on rails.
But this involves long runs of shock cord and is loose and sloppy. It's like hanging a picture by running a wire from each corner of the room.
I wanted something simpler and more direct.
So now, on each side of the hammock, I have a loop to anchor the shock cord. The shock cord has four free ends, each with its own cord lock. This is how I adjust the tension. The shock cord itself runs through loops along the top edges of the underquilt, supporting it.
I adjust how tightly the underquilt hugs the hammock via the cord locks. This is much easier. There are no long lines to dangle or tangle, and the underquilt can't move around on its own any more. Things are much simpler and tighter this way.
If I need a bit more warmth I can stuff something between the hammock and the underquilt, like one of those two-ounce (60 g) mylar emergency blankets, which I carry as an inside-sleeping-bag vapor barrier (just in case).
Breathability is important.
A foam pad made for the ground is bad not only because it's too narrow and too rigid but because it traps condensed moisture against the body. A breathable underquilt doesn't. With freely breathable insulation underneath you don't have to put up with a damp back all night as well as all day.
Finished underquilt attached to hammock.
- First I hang my hammock and put some weight in it. Whatever: a couple sleeping bags, a pillow, clothes, whatever. This fills out the hammock to its normal shape.
- Next I decide where the underquilt should go. My current one extends to about a foot (30 cm) from the head end of the hammock. My hammock is short, and I like to lie toward the head end. Someone else will use different positioning. Anyway, once I know where the underquilt's upper end goes the position of the foot end defines itself based on the underquilt's length.
- Then I take some thin, light plastic sheeting and pin it to the hammock, trimming it and adjusting until I've captured the shape of the hammock.
- Then I go back and measure the hammock from one edge across the bottom and up to the other edge for the full length of the proposed underquilt. I use these measurements to double-check the template I made out of plastic. One should match the other.
- After this I lay out the fabric for the shell, trace out the shape, and cut it out, leaving a generous margin to act as a hem.
- Repeat the previous step for the insulation. One inch (2.5 cm) thick works well, if it's good quality, but it's easier to use thicker or thinner insulation.
- Lay this insulation onto the shell, roll the shell's edges over the insulation, pin in place and sew. Doing this locks the insulation to the shell. I apply some hand sewing as needed. Just to be clear here, the shell goes under the insulation only. There is no top half going over the top side of the insulation. The bottom of the hammock does this. I sew down the centerline, through both the insulation and the shell, and then lay an extra piece of insulation in over this stitching so I'm sure to have no cold spot along my spine. This takes only a bit of hand sewing and locks the two layers of insulation together securely.
- Sew a fabric tube or some loops across the head and foot end of the underquilt and run shock cord through, then add a cord lock to each end of the shock cord (four total). This will let you cinch down the head and foot ends across the width of the hammock to seal out drafts and finish snugging up the underquilt.
- Add loops along the two sides of the underquilt that run along the hammock's sides.
- On each side of the hammock, add one loop near the head end and one toward the foot end. These must be past the ends of the underquilt to allow for tensioning.
- Anchor shock cord to the hammock and run it through the loops on the underquilt, then adjust tension. Finally, tie knots in the shock cord's ends after adding the cord locks. This keeps them from falling off.
- Fiddle a bit as needed during the first use.


