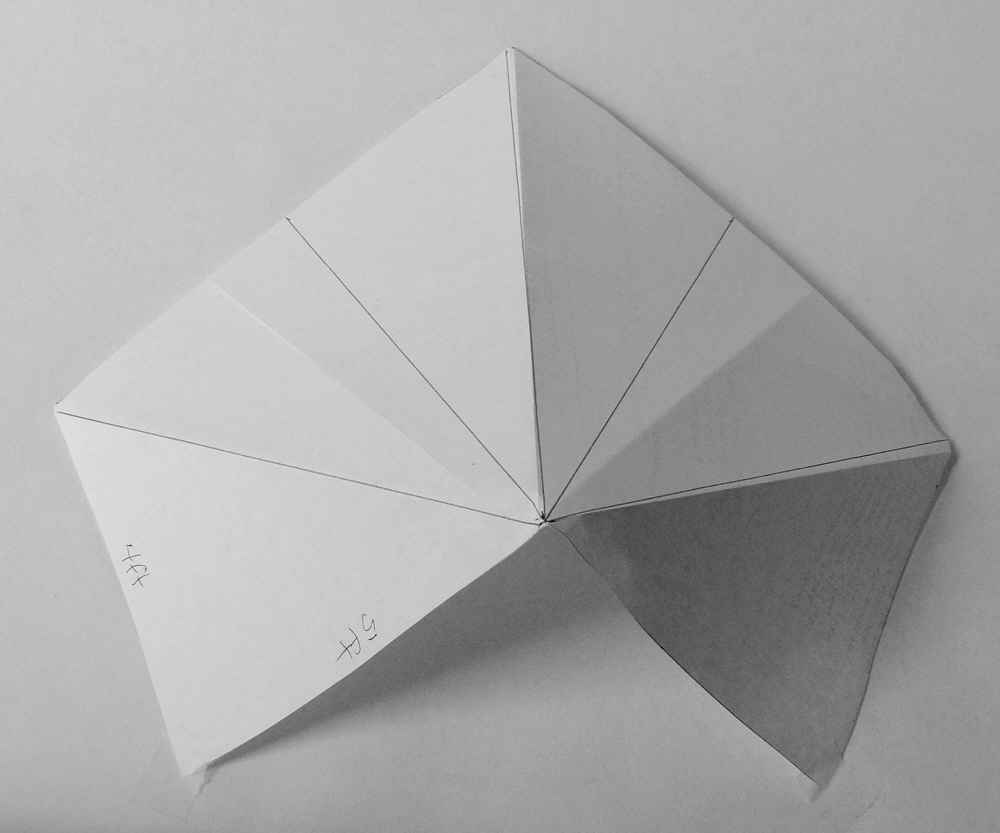
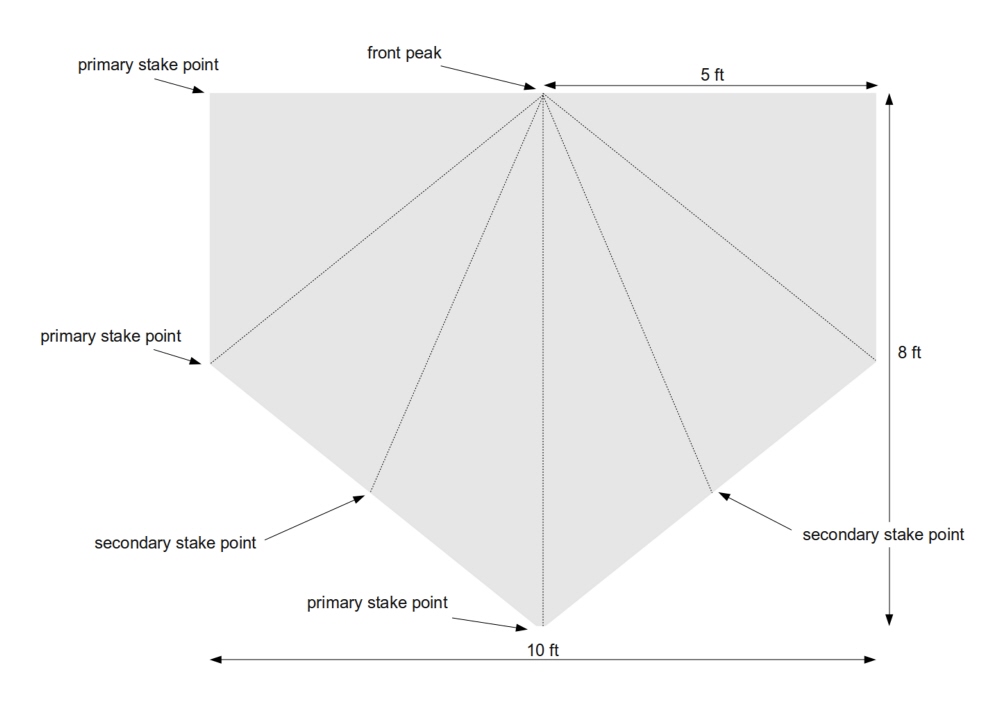
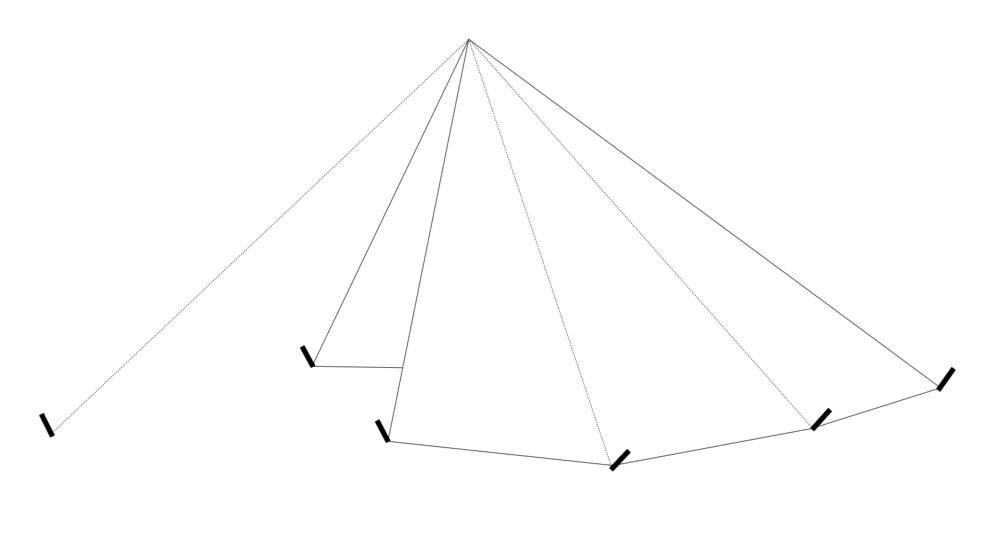
These first three photos are of a model I made from a sheet of paper.
For me, that's a good way to play with ideas.
So here's the deal, in two parts.
Part one is that I want to go do a part of Mt St Helens overlooking Castle Lake to the northwest of the mountain. I went there early last year but the weather was pretty crapola, and even after 30 years, the trees aren't big and strong enough to hold a hammock.
I did find a spot but it was breezy, and my new, roughly 8x10 (244x305 cm) custom-home-made hammock tarp caught a lot of wind. So I stayed only one night.
Time to try again, and though it hurts me all over all night long, I'm going to sleep on the ground, which brings us to part two.
Which is that, once upon a time I tried a suggestion in "Beyond Backpacking" and slept under a tarp made of 3mil polyethylene sheeting. This is also generically known as "poly film", and among construction-worker types as "Visqueen", which is actually a brand name for the stuff.
This worked well enough. I cut out an 8x10 piece, and used another swath as a ground cloth. The downside was that it was awkward to pitch and drafty. And I had to crawl in from one end.
But there was plenty of room inside.
So, a pretty huge, pretty cheap shelter that weighed 25 ounces (700 g) in all, and seemed tough enough, but was hard to pitch and impossible to rearrange whenever the wind changed.
I put an umbrella into the foot end to block the wind but it still wasn't great. For several years now I've been stumbling over the wadded up sheet of plastic and thought maybe it would be fun to try again, but modified.
After playing with a sheet of paper I found that I could cut off a bunch, pitch it carefully, and have a small, even lighter shelter with a high entry and lots of headroom inside. It's also roomy enough to sleep in, and could even serve for two.
And I really like the clear plastic. Not great on a sunny day, but really fun at night. All you have to do to check on the weather is to open your eyes. If you see stars it's clear. If not, it's cloudy. Sit up after daylight and just look around. You can see everything.
I also have another shelter similar to this that I'll take as a backup. This is smaller and lighter and even a bit harder to pitch, but it could also double as an extra layer of rain wear on the way out, if things get really nasty.
The design for that came from Carol "Brawny" Wellman when she was still making and selling gear. I looked at the pictures on her web site and finally figured out the design, and then just sewed one up.
The interesting part about her design is that it has no seams. It's only a piece of coated fabric 5x9 feet (152x274 cm). See the Mountain Laurel Designs' "Monk Tarp" for something similar but pitched another way.
For my version of the "Brawny Shelter", I added a beak, since in any real rain (with any kind of breeze at all), you'd get rain inside, and the single width of fabric (60 to 66 inches is what you get) isn't quite wide enough to make a deep enough shelter.
But pitched cleverly you angle in the two ends to form a sort of doorway (unlike the Monk Tarp at MLD). Around here though the big opening is just too big.
Which is what looks interesting with this tarp I got of of my poly film scrap.
It pitches high (or can pitch high), and if you do that then you can pull in the two sides to make a sort of doorway.
I haven't tried it outdoors yet, just rigging it over the carpet using big safety pins for stakes, but if the weather isn't too bad it could be fun.
Then again there's the unpredictability of St Helens and its weather. Today is supposed to be sunny. Here is how that actually worked out:
When I go I'll get some real photos of this in action.
More:
BackpackGearTest.org Conversion Utility
Mountain Laurel Designs
Later version of the Brawny Shelter:
See tabs at the top for definitions and books.
Have extra info to add?
If the commenting system is out again, then email sosayseff@gmail.com
Me? Do you really want to know?


