The Setup

Hoping to make it simple again.
I had to discard my self-designed, self-made pack when I moved out of the country in November, 2012.
Since then I've used a modified North Face summit pack (base volume: 32L), and a GoLite Jam (50L), but neither one came close to the light weight and usability of my own design.
The North Face is great for what it is. I added a deep pocket on each side, and another huge pocket on the front to roughly double the volume. Still, I had to strap on a large stuff sack when setting out on an 11-day trip, and it hurt. The pack is well-designed and well-made, but the shoulder and hip padding are light, and being a top-loader, the pack is as hard to load as any other of its kind.
Last summer, after my second winter out of the country, and running short on time, I bought a GoLite Jam. Some famous superlong-distance hikers use it, and at $109 it was super cheap. The pack was well-made and carried well, but was poorly designed. Another top-loader, it suffered from having that tiny hole to put things into, and its side pockets were laughably small — useless in fact, like most pack pockets.
I sloppily and quickly sewed up a couple of big side pockets, and made do.
But Ow!
The padding was even less capable than the summit pack, and the Jam weighed at least twice as much since it was made of some kind of over-sturdy miracle fabric that can withstand nuclear war. Empty, the pack weighed around 2.5 pounds. I don't remember exactly but its heft startled me every time I picked it up.
I'm talking past tense here because I cut up the pack to get the straps and hardware off it. I also cut off the front pocket and might use that until I have time to sew up one for my new pack. It might seem like a waste of money to chop away like this, but after only two trips I got to hate this pack. As noted, it did carry well, but it was a bitch to actually live out of.
Right now I'm learning to sew again. I've been away from it for several years and I'm having to re-make all my previous mistakes. At this point I'm on my third try, but doing better. Just yesterday I stopped work on the pack yet again because I found out that REI sells hip belts and shoulder straps. I ordered two of each, from different makers.
Shoulder straps and hip belts are hard to make. They're detailed, full of little bits, fussy to sew, and critical. I've successfully made several sets in the past, but that's no reason to go through all the trouble again, so I'll just attach what someone else has made and concentrate on the pack bag, which is what is unique about my design — the only part that is really important to me.
Waiting another week for the parts to get here is really a wash anyway — it would take me at least that long to sew up my own, considering all the mid-course design tweaks I'd need, and all the sewing mistakes I would make and have to undo. I've been spending at least half my time ripping stitches that I've just sewn. Yes, I need help. This might make the difference.
Until the stuff gets here on April 1, I'll work on my hammock.
OK then, what follows is the beginning of my documentation. I'm developing non-paper-based plans this time, so I don't have to lose them next time I move. I'll update this as I go along, and will probably include the plans in my upcoming book on backpacks.
Squeezo Pack
Finished Dimensions And Volumes
Pack body dimensions:
- Width : 11 inches
- Depth : 10 inches
- Height: 22 inches

Note on the design illustrations:
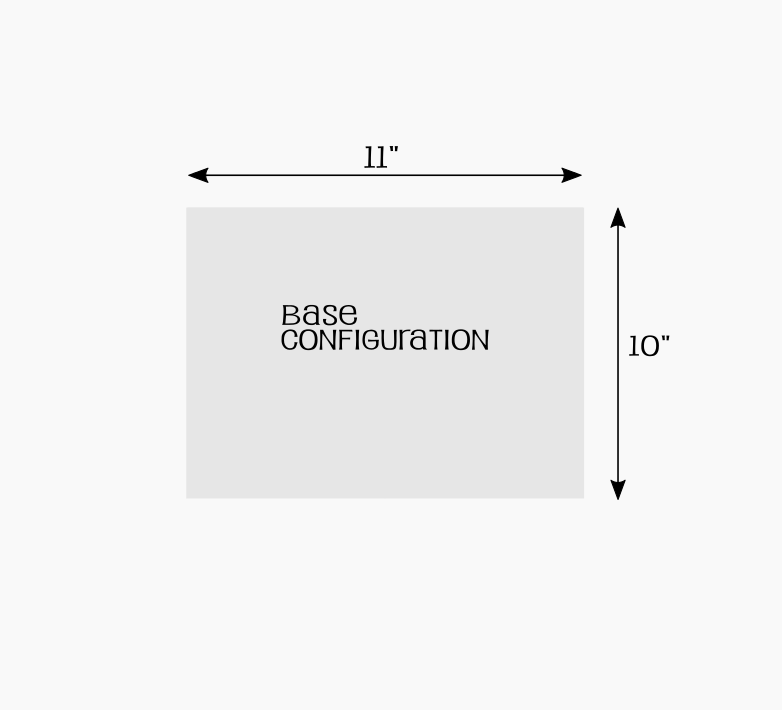
- Base volume has a rectangular, nearly square pack area. This is a sort of standard or "normal" configuration.
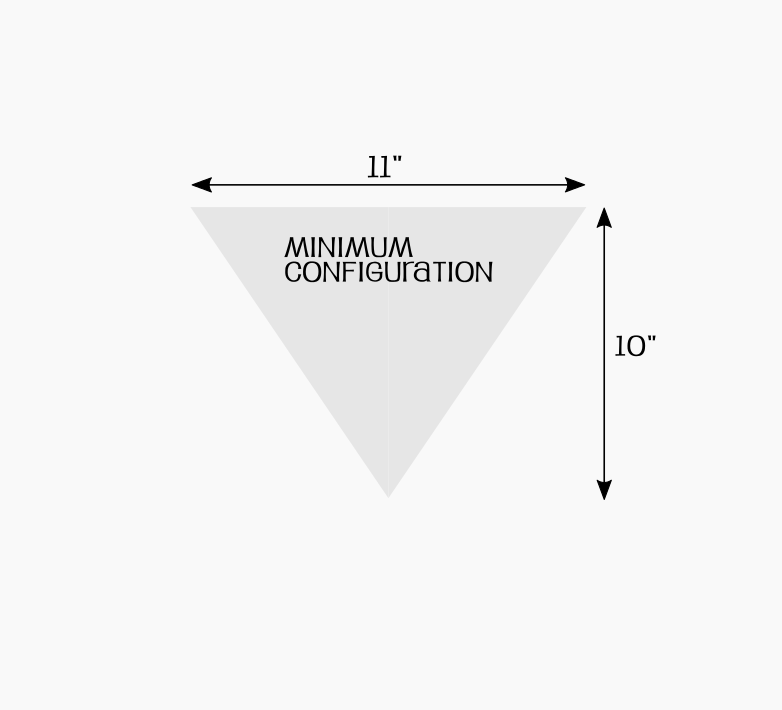
- Minimum volume has a triangular pack area in the design.
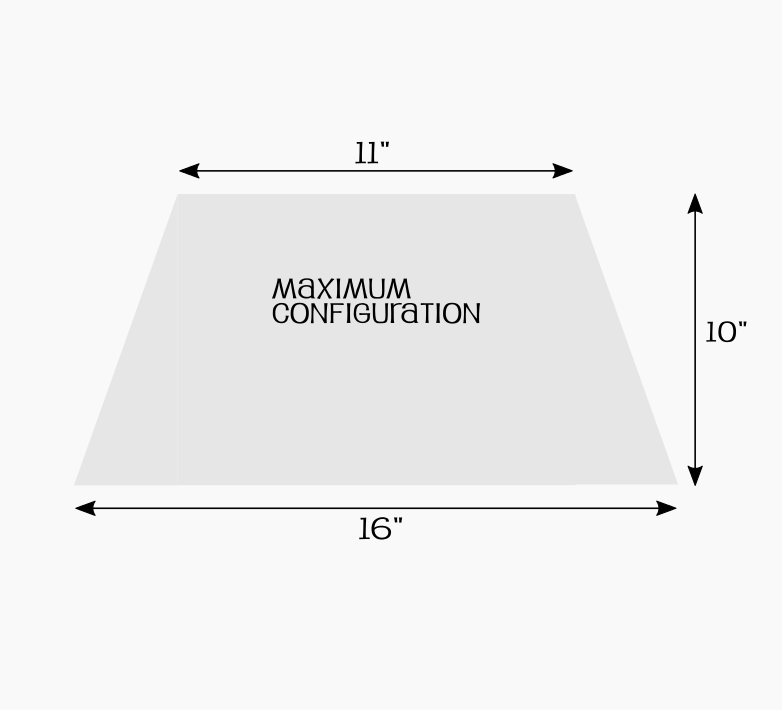
- Maximum volume has a trapezoidal pack area in the design.
In practice, these areas collapse to a more circular configuration, with the pack assuming a cylindrical shape.
Pack body volume range (ignoring the side pockets).
| Pack Configuration | Dimensions | Effective Diameter | Volume | Volume |
|---|---|---|---|---|
| (inches) | (inches) | (cubic inches) | (liters) | |
| Base ("normal") | 10*11*22 | 13.4 | 3088 | 51 |
| Minimum (fully scrunched) | 3*5.5*22 | 9.87 | 1210 | 28 |
| Maximum (fully expanded) | 11*10*16*22 | 15.0 | 3867 | 63 |
Side pocket dimensions.
- Width : 8 inches
- Depth : 8 inches
- Height: 20 inches
These are nominal dimensions. The pocket fabric folds over and is sewn to itself at the bottom end, making the pockets sort of funnel-shaped — almost flat with no volume at the very bottom end but square-ish and full-sized for roughly the top two thirds.
Side pocket volumes.
Nominal pocket volumes according to their raw measurements.
- Each pocket : 1280 cubic inches / 21L
- Both pockets: 2560 cubic inches / 42L
Estimated pocket volumes according to their actual shapes.
- Each pocket : 1090 cubic inches / 18L
- Both pockets: 2180 cubic inches / 36L
Total volume: pack body plus side pockets.
| Pack Configuration | Volume | Volume |
|---|---|---|
| (cubic inches) | (liters) | |
| Base ("normal") | 5268 | 86 |
| Minimum (fully scrunched) | 3390 | 56 |
| Maximum (fully expanded) | 6047 | 99 |
Pocket Construction
Raw fabric dimensions: Two pieces 28 inches wide by 22 inches high. There are two pockets, so this requires two identical pieces of fabric.
Finished dimensions: Two pockets of 10 inches wide by 20 inches high.
Notes:
- Each pocket sews to the side of the pack within a space that is 10 inches deep front-to-back and 22 inches high.
- Pockets have elastic sewn into their top hems. (Optional, depending on personal taste.)
- Each pocket has a grommet in the top hem for additional support when carrying heavy loads, like water. Run a cord through the grommet of each pocket and across the pack's top, then pull it tight and tie it off. (Optional, depending on personal taste.)
Construction sequence:
- Hem the raw fabric to 1 inch all around.
- Run a cord through the tube-shaped hem at the top of each pocket before closing off its ends.
- Use that cord to pull an appropriate length of elastic into this tube, then solidly bar tack each end of the elastic. (To have any effect the elastic must be significantly shorter than the pocket's width.)
- Fold and pin the fabric at bottom of the pocket so it will fit into a 10-inch-wide space.
- Sew the pockets onto the pack, flush with the pack's bottom side. Use plenty of bar tacking along the bottom and sides.
- The finished pockets will be 2 inches shorter than the pack is tall but will take up the full width of each side.
More:
Previous generation Squeezo (Looks goofy — I've since changed the blog formatting. And I don't remember if there was ever a "Part 2".)